Page
Sxrc
Sxrc
Sxrc Remote Control
Sxrc Remote Control
Kicker
Rubber Mounting Washers Includes four
VFD Display
Keypad
ESC Used to exit the current menu
ENT Used to enter the selected menu
Home Used to return to the Main Menu and other
Other surface panel to mount the Sxrc
Standard DIN sized opening
Be sure you will have a minimum
Sxrc Control Head Mounting Clips
Screws Here
Surface Mounting With Screws
Kicker
Kicker
87654321
Run the supplied
Orange-White Brown-White
Blue-White Green-White
Blue Green
Reconnect cables
Between each step
Please read
Instructions and follow
Default Menu
Press the ENT key to enter the Main
Menu of the amplifier
Press the UP or Down key until
Avve ye s
Avve no
Verriiffy ok
Sttoorreed
Did you check the pins #1 and #8 in the SX Series
Place
Amplifier to control then continue with Step
If you have made your own cables double check them for
Press the ENT key to select Installation
If you select Save YES then you choose which Global
UP or Down key to scroll through the options
You want to use is selected press the ENT key to
Are Straight-Through Ethernet Network cables
Go back and double check your Communications Network
Inserted properly and ‘snapped’ into place
ENT key to select Installation
By using the UP or Down key to scroll through
Go back and double check your Communication Network
Amplifiers to make sure they are not bent or damaged?
Amplifiers to make sure they are not bent or damaged?
Connected ...we can see Oklahoma
Operation Navigation
This name to whatever you like. See the Sxrc Setup section
Sxrc Setup section of the manual
You! Plus...it is quicker than a Google search
Manual
Down key to change the Drvc level
Display will instantly show the current
Drvc level .5 dB and each press
Down key decreases the Drvc level .5 dB
AMP ADJ
Amp addj
Main
Otth chhnns
1005 10
Requenc y
Through frequency, boost/cut
Menu and choose another function to adjust Operation
Lope
Press the ENT key to select
HI-PASS menu and lower the high pass crossover point
Menu and choose another function to adjust
LO-PASS menu and raise the low pass crossover point
Oth chhnns
Degree or180 degree. Press the ESC
Both chns, left chn and right chn
Use the UP or Down keys to select from
Through both chns, left chn and right
Mute on or mute off. Press the ESC
Menu the Komp indicator on the Isis
Adjustments in the Kompressor
Red-liinne
While you are in the Kompressor
Function to adjust
Bypasss offf
Bypass OFF or Bypass on
8V Range or 16v range
Remotte on
Through noise off and noise on
Through Remote on and Remote OFF
Pink noise generator
Can be created in the Sxrc Setup menu
Will either be the default name from
Group ADJ
Any name you may have assigned to
When you try to increase or decrease
Gain setting of this group, nothing will
Example
Amp
Display, the highest gain setting of the group
Adjustments in the Gain menu
Kicker uses a default Q
Boost/cut , bandwidth options menu. You
While in the frequency and slope options
Indicates you are making adjustments in the HI-PASS menu
Key to save your setting and return to the both
Menu and choose another function to adjust
Chns,left chn and right chn options
Both chns,left chn and right chn
Both chns ,left chn and right chn
Chns, left chn and right chn options
If you select the Kompressor
Turn it OFF for this group
Another group function to adjust
Ed-li n e
1v raanngge
Through from 24.0 db to-24.0 dB
Shooting and diagnostic tools
Sick BAY
You view each amplifier’s built in trouble
Available tools in the Sick Bay menu are
Viewing when you have multiple amps
Selected amplifier’s current +12 volt Lock
Real time
Same make or name
Sx-50000//2
Voolltts
Selected amplifier’s minimum +12
Volt terminal reading will be displayed
Sx -50000//2
No hiissttoor y
=llo-voollt
Selected amplifier’s total run time
Reading will be displayed
Through Select AMP or ALL Amps
45 hr
Ll ammpps
Select Noise on or Noise OFF for
You can then use the UP or Down keys to
All
»display
»autosearch
»group amps
»brightness »set time »temp. c/f
»hold time
»scrnsaver »led
»set date »led Time
Off and auto
Protected by the backup battery
Level set in this menu. The default setting
Default setting from Kicker is
Intensity modes, On and Dim. When
Keys are not being used they will dim to
Return to the Sxrc Setup menu
Autosearch function
»groups
»group name »assign »release »link »remote vol
Roouup
Amplifiers you are wanting to use
More amplifiers available to assign
Select it
No amplifiers currently assigned to that
Group
Amplifier will be displayed
»EQ
Link Off AMP ADJ
Link Off Group ADJ
Link On AMP ADJ
Example
Set to Remote OFF
When done selecting the current group’s
Big baasss
Sxxrrc
Which character you want to change
Sx-50000//2 Emmoorry
Bass, center, front, rear, etc
Oaaddiinng
Avve alll
Aiit
Eaarrcch
By using the UP or Down key to scroll
When the memory you want to use is selected
Through the four memory locations
Press the ENT key to store
Aiilleed
Erriiffy =0
Security
Loocckkeed
Kiicckkeer
Press the ENT key to enter your lock code
Again
» EQ
Recalling a Preset
Storing a Preset
Sxrc Remote Control
Internal Fusing in Sxrc Interface Box
Power, Ground, Remote
Operating Voltage
Remote Turn-On Voltage
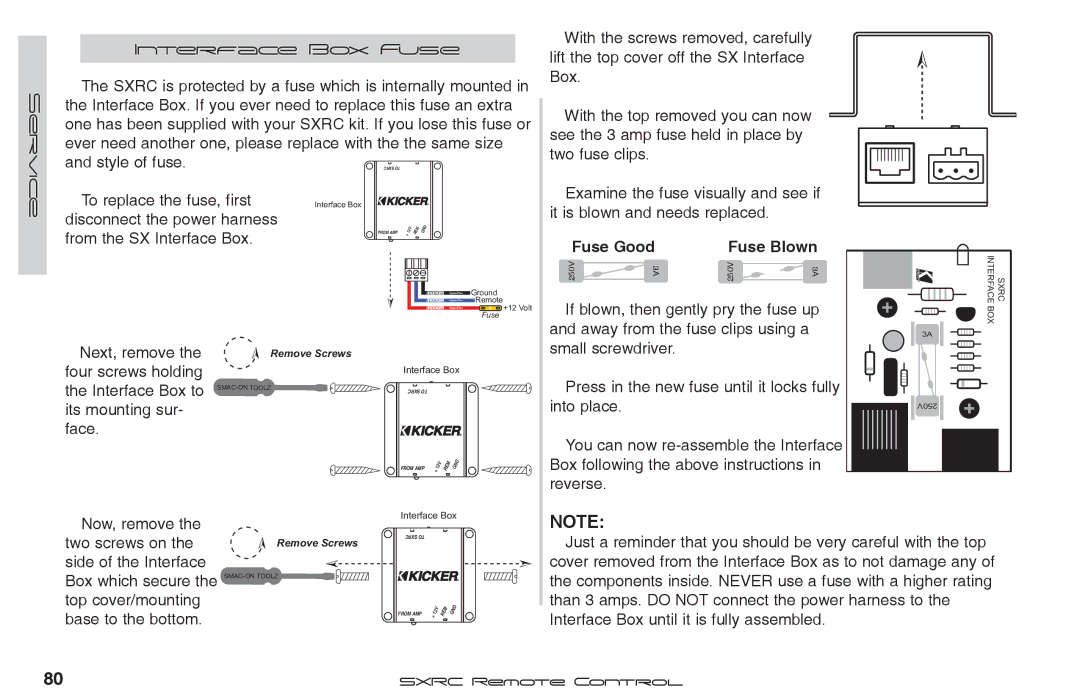
Disconnect the power harness
To replace the fuse, first
From the SX Interface Box
Fuse Good Fuse Blown
€ Blue LED on, garbage characters in display
€ Blue LED off
€ Blue LED on, no display on Sxrc Control Head
€ Everything powers up and looks great, just no sound
€ Other problem, I am lost, I don’t know, Help
†Select Remote Vol
†Select Off
Amplifier Remote Address Name
Amplifier Help
What is not COVERED?
Today’s System Diagram Tomorrow’s System Diagram
My Future ‘Drool’ System Cash Money Plan
Pizza Delivery Earl’s Thoughts