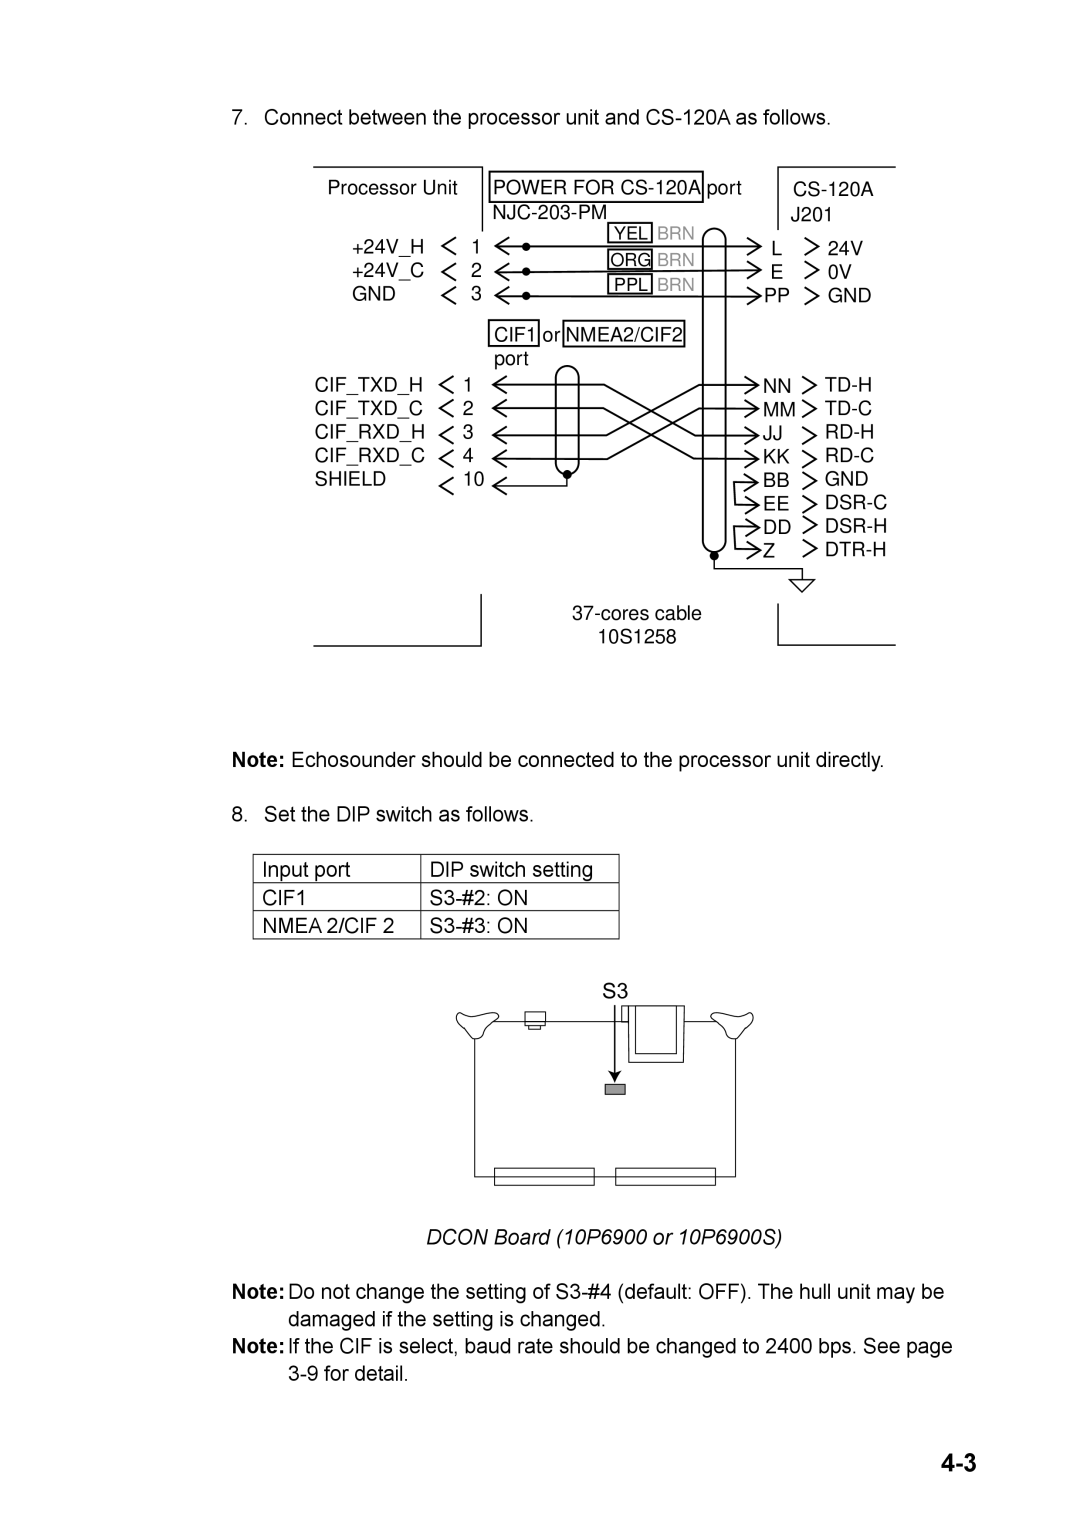
7. Connect between the processor unit and
Processor Unit
+24V_H 1
+24V_C 2
GND 3
POWER FOR
YEL BRN
ORG BRN
PPL BRN
CIF1 or NMEA2/CIF2 port
L24V
E 0V
PP GND
CIF_TXD_H 1
CIF_TXD_C 2
CIF_RXD_H 3
CIF_RXD_C 4
SHIELD 10
10S1258
NN
JJ
Z
Note: Echosounder should be connected to the processor unit directly.
8. Set the DIP switch as follows.
Input port | DIP switch setting |
CIF1 | |
NMEA 2/CIF 2 |
S3 |
DCON Board (10P6900 or 10P6900S)
Note: Do not change the setting of
Note: If the CIF is select, baud rate should be changed to 2400 bps. See page