Connecting additional equipment
Remove the white plug from the port labeled
If you are connecting additional equipment, such as a
back. Do not use a
Note: If you subscribe to a DSL/ADSL service, connect to the DSL/ADSL filter to
the parallel splitter, and then use the
the computer.
1 |
|
3 |
|
4 | 6 |
2 |
|
5 |
|
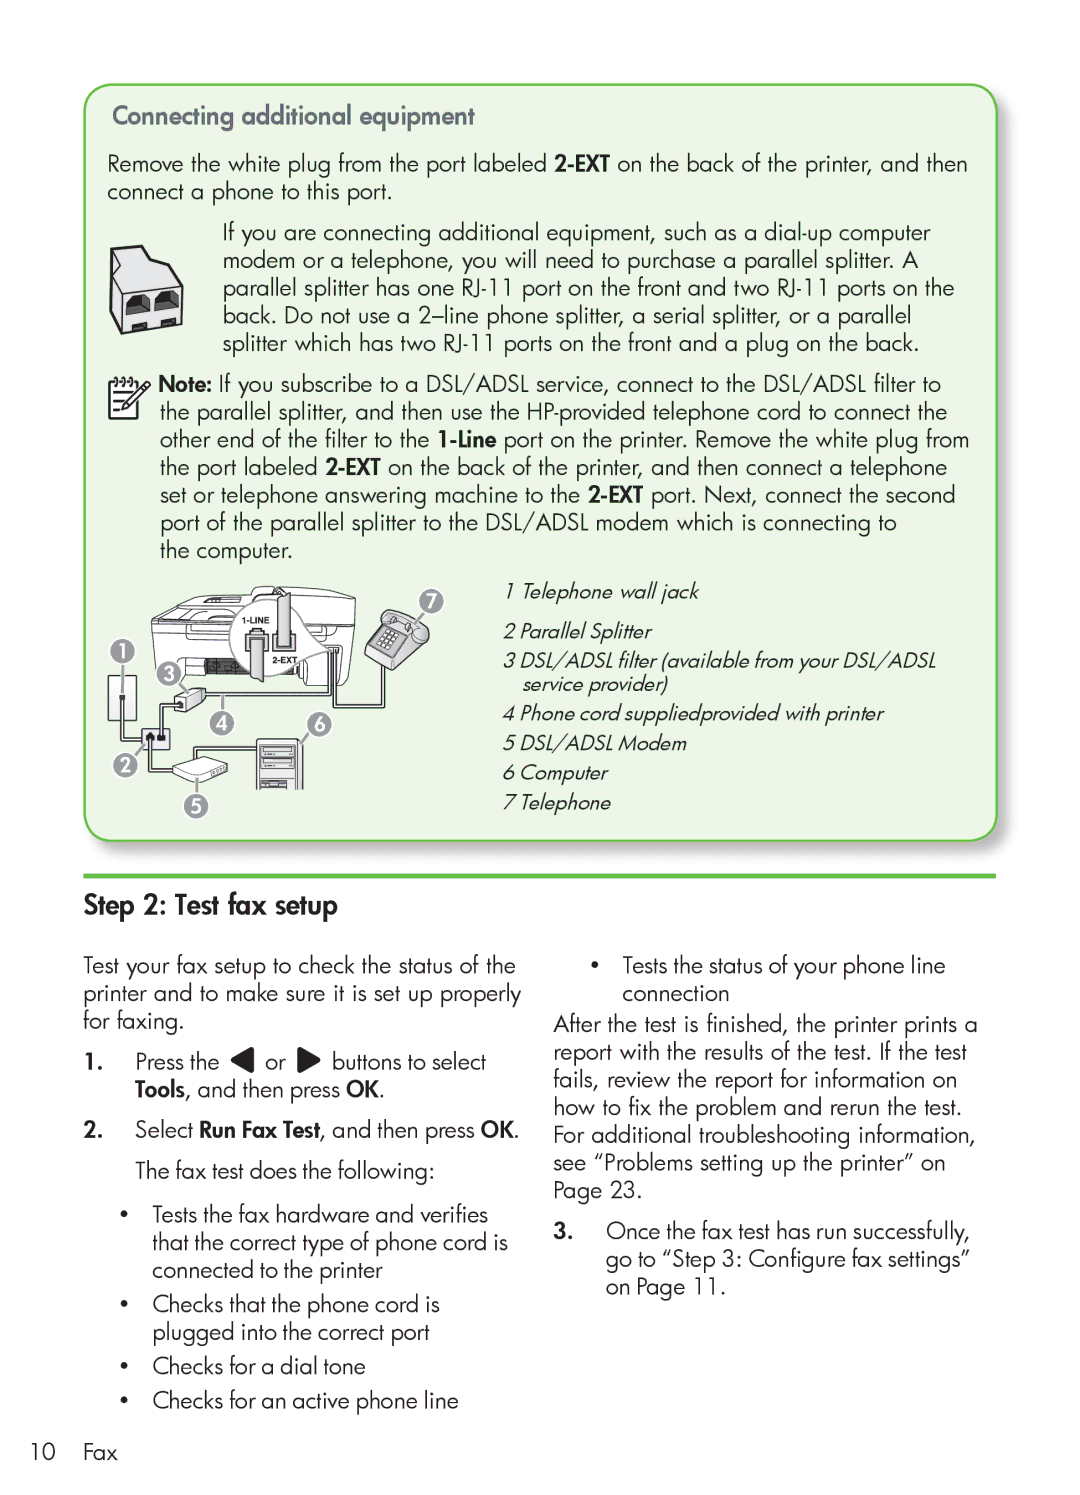
71 Telephone wall jack
2 Parallel Splitter
3 DSL/ADSL filter (available from your DSL/ADSL service provider)
4 Phone cord suppliedprovided with printer
5 DSL/ADSL Modem
6Computer
7Telephone
Step 2: Test fax setup
Test your fax setup to check the status of the printer and to make sure it is set up properly for faxing.
1.Press the ![]() or
or ![]() buttons to select Tools, and then press OK.
buttons to select Tools, and then press OK.
2.Select Run Fax Test, and then press OK. The fax test does the following:
•Tests the fax hardware and verifies that the correct type of phone cord is connected to the printer
•Checks that the phone cord is plugged into the correct port
•Checks for a dial tone
•Checks for an active phone line
10 Fax
•Tests the status of your phone line connection
After the test is finished, the printer prints a report with the results of the test. If the test fails, review the report for information on how to fix the problem and rerun the test. For additional troubleshooting information, see “Problems setting up the printer” on Page 23.
3.Once the fax test has run successfully, go to “Step 3: Configure fax settings” on Page 11.