•Click a zone, zone set, or port icon.
•
•Hold down the Shift key while clicking several consecutive icons.
•Hold down the Control key while clicking several
Using tool bar buttons, popup menus, or a
Use the Edit Zoning dialog to define zoning changes, and click Apply to open the Error Check dialog. Click Error Check to check for zoning conflicts, such as empty zones or zone sets. Click Save Zoning to
implement the changes. Click Close to close the Error Check dialog. Click Close in the Edit Zoning dialog to close the Edit Zoning dialog.
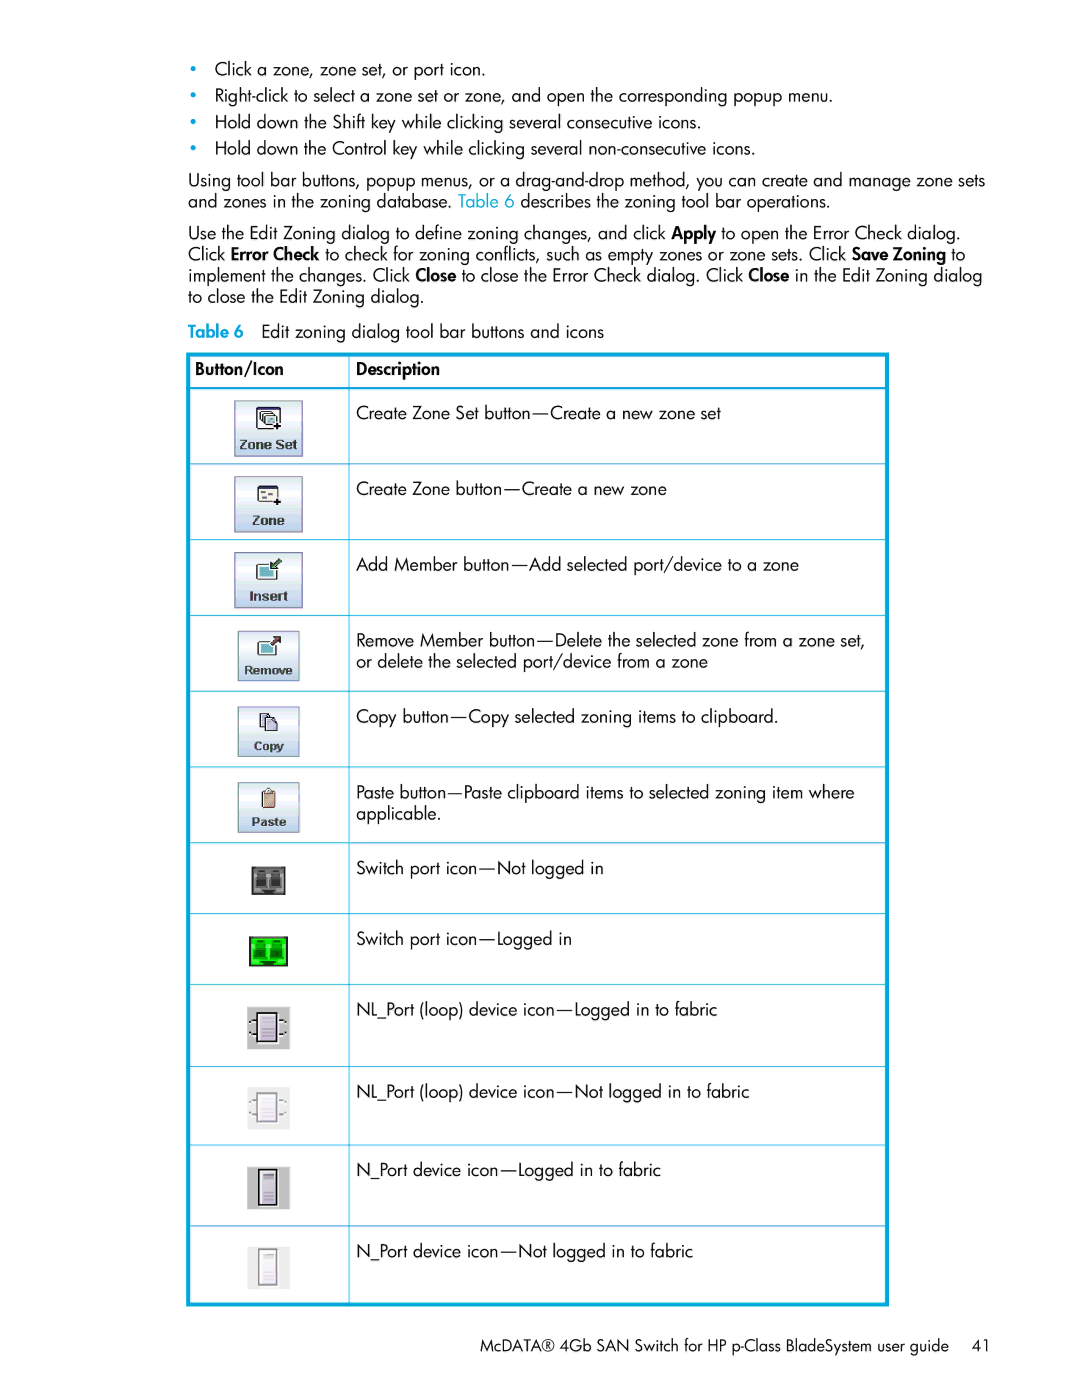
Table 6 Edit zoning dialog tool bar buttons and icons
Button/Icon | Description |
|
|
| Create Zone Set |
|
|
| Create Zone |
|
|
| Add Member |
|
|
| Remove Member |
| or delete the selected port/device from a zone |
|
|
| Copy |
|
|
| Paste |
| applicable. |
|
|
| Switch port |
|
|
| Switch port |
|
|
| NL_Port (loop) device |
|
|
| NL_Port (loop) device |
|
|
| N_Port device |
|
|
| N_Port device |
|
|
