6.Set the other settings to your requirements, then click on Permissions.
7.Add any groups or users required, and set the permissions as required by the customer.
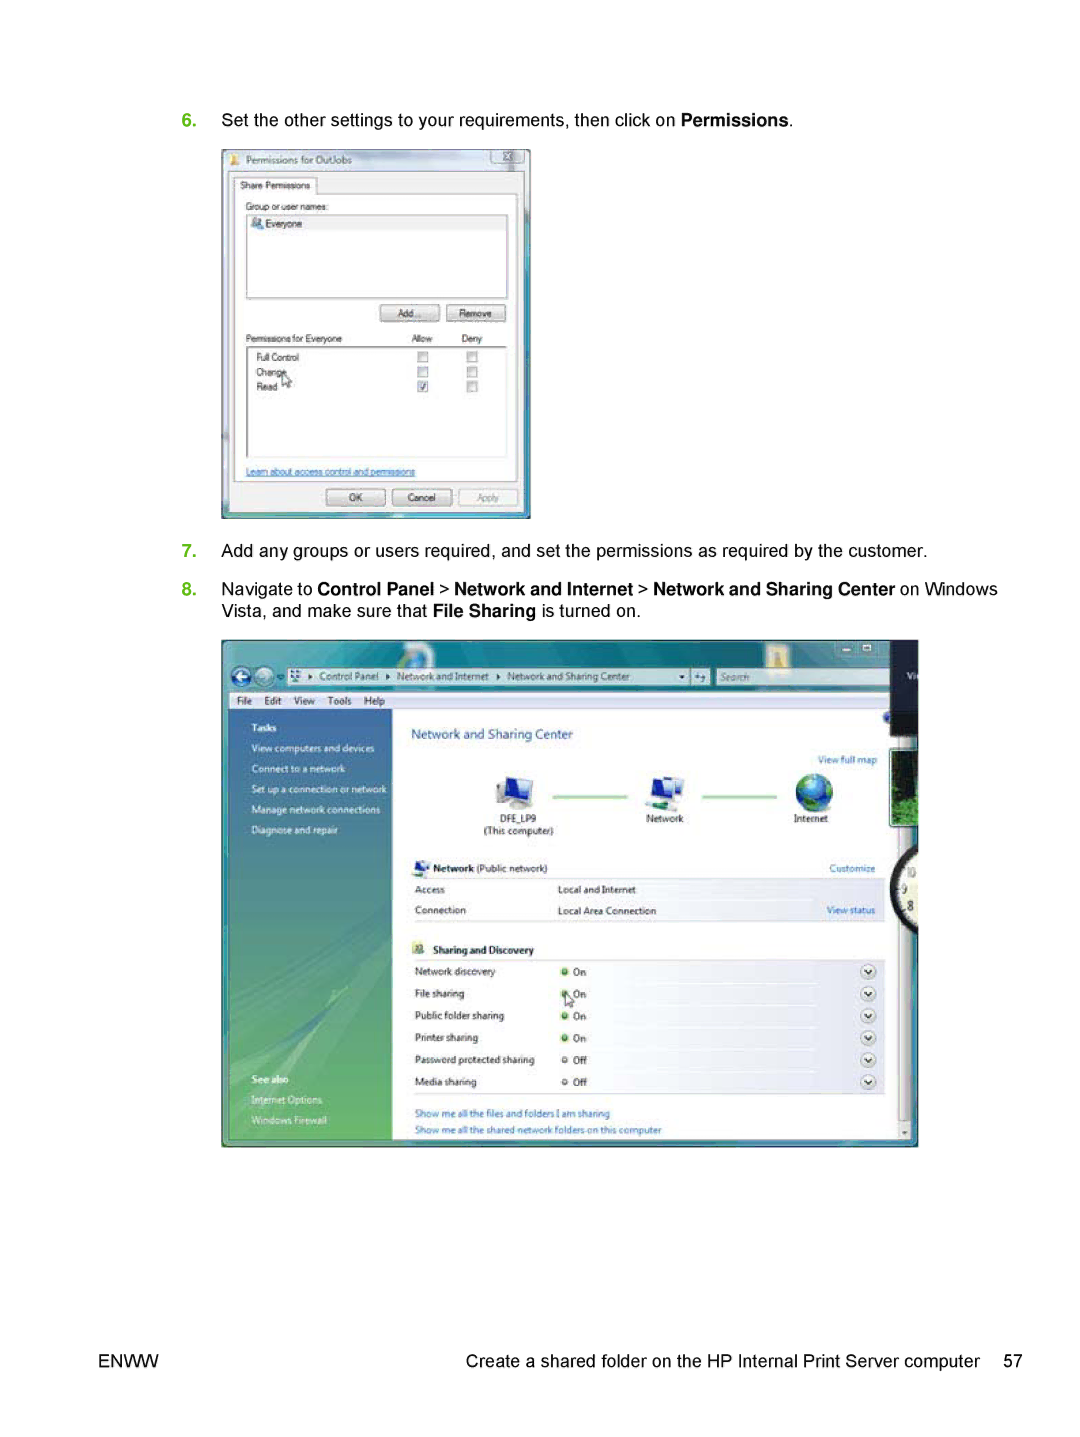
8.Navigate to Control Panel > Network and Internet > Network and Sharing Center on Windows Vista, and make sure that File Sharing is turned on.
ENWW | Create a shared folder on the HP Internal Print Server computer 57 |