DeviceNet to Motor Drives
EXCEPTION TABLE (Mitsubishi Drives Only)
There are some parameters within Mitsubishi Drives that must be written to the drive as
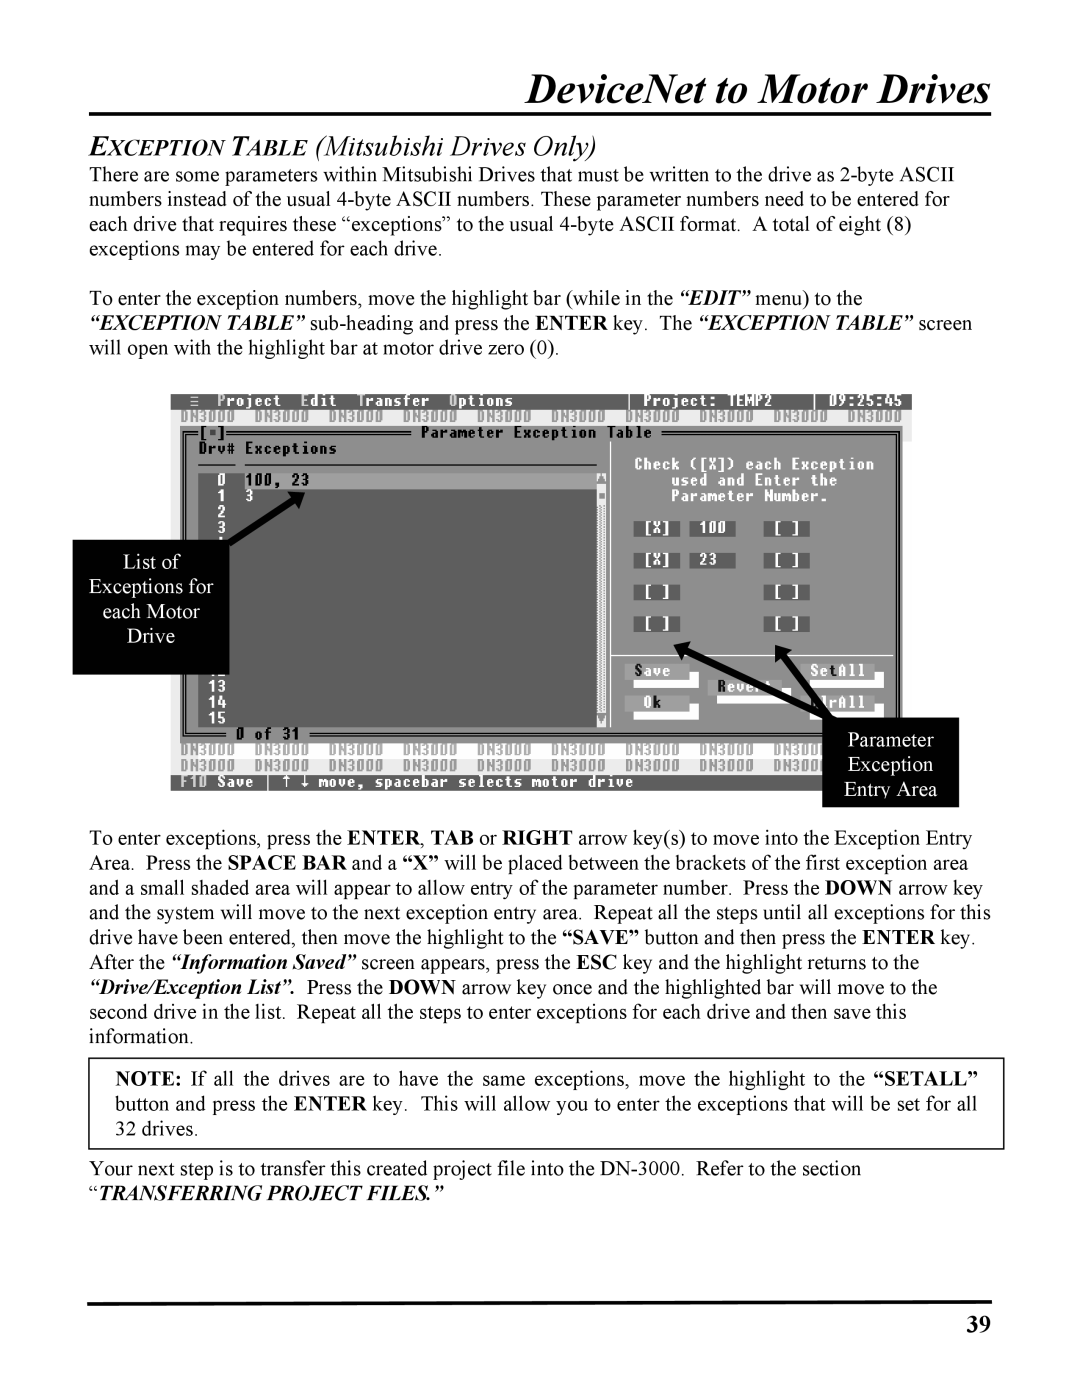
To enter the exception numbers, move the highlight bar (while in the “EDIT” menu) to the “EXCEPTION TABLE”
List of
Exceptions for
each Motor
Drive
Parameter
Exception
Entry Area
To enter exceptions, press the ENTER, TAB or RIGHT arrow key(s) to move into the Exception Entry Area. Press the SPACE BAR and a “X” will be placed between the brackets of the first exception area and a small shaded area will appear to allow entry of the parameter number. Press the DOWN arrow key and the system will move to the next exception entry area. Repeat all the steps until all exceptions for this drive have been entered, then move the highlight to the “SAVE” button and then press the ENTER key. After the “Information Saved” screen appears, press the ESC key and the highlight returns to the “Drive/Exception List”. Press the DOWN arrow key once and the highlighted bar will move to the second drive in the list. Repeat all the steps to enter exceptions for each drive and then save this information.
NOTE: If all the drives are to have the same exceptions, move the highlight to the “SETALL” button and press the ENTER key. This will allow you to enter the exceptions that will be set for all 32 drives.
Your next step is to transfer this created project file into the
“TRANSFERRING PROJECT FILES.”
39
