Filename |
|
29
0 – 9
CABLE/SAT
TV ![]() DVD
DVD
![]()
![]() STANDBY/ON
STANDBY/ON
TV TV AV TV/CBL/SAT DVD
| VIDEO |
|
|
| ABC | DEF | TV% |
GHI | JKL | MNO |
|
PQRS | TUV | WXYZ | PR |
CANCEL AUX MEMO/MARK
CABLE/SAT
TV ![]() DVD
DVD
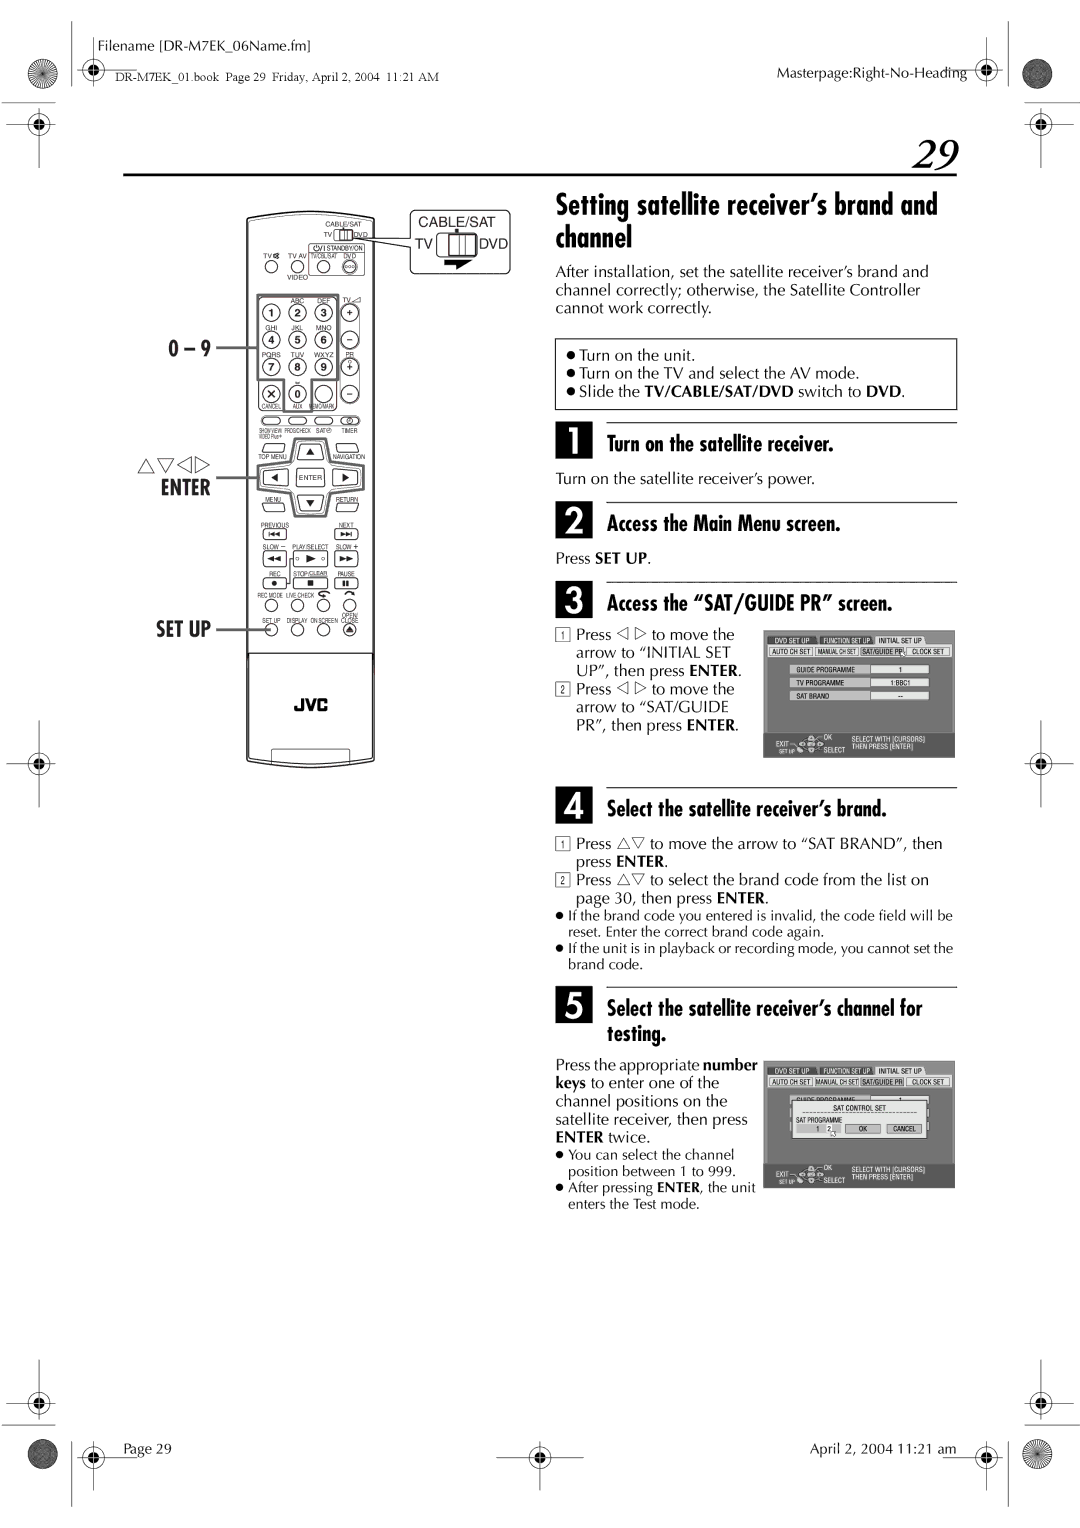
Setting satellite receiver’s brand and channel
After installation, set the satellite receiver’s brand and channel correctly; otherwise, the Satellite Controller cannot work correctly.
●Turn on the unit.
●Turn on the TV and select the AV mode.
●Slide the TV/CABLE/SAT/DVD switch to DVD.
rtwe
ENTER
SET UP
SHOW VIEW/ PROG/CHECK SAT# | TIMER | |
VIDEO Plus+ |
|
|
TOP MENU |
| NAVIGATION |
| ENTER |
|
MENU |
| RETURN |
PREVIOUS | NEXT | |
SLOW | PLAY/SELECT | SLOW |
REC | STOP/CLEAR | PAUSE |
REC MODE LIVE CHECK |
| |
SET UP |
| OPEN/ |
DISPLAY ON SCREEN CLOSE | ||
A Turn on the satellite receiver.
Turn on the satellite receiver’s power.
B Access the Main Menu screen.
Press SET UP.
C Access the “SAT/GUIDE PR” screen.
APress w e to move the
arrow to “INITIAL SET UP”, then press ENTER.
B Press w e to move the arrow to “SAT/GUIDE PR”, then press ENTER.
D Select the satellite receiver’s brand.
APress rt to move the arrow to “SAT BRAND”, then
press ENTER.
BPress rt to select the brand code from the list on
page 30, then press ENTER.
●If the brand code you entered is invalid, the code field will be reset. Enter the correct brand code again.
●If the unit is in playback or recording mode, you cannot set the brand code.
E Select the satellite receiver’s channel for testing.
Press the appropriate number keys to enter one of the channel positions on the satellite receiver, then press ENTER twice.
●You can select the channel
position between 1 to 999.
● After pressing ENTER, the unit enters the Test mode.
Page 29
April 2, 2004 11:21 am
