![]()
![]()
![]()
![]() 43
43
Displaying The Date And Time During Recording
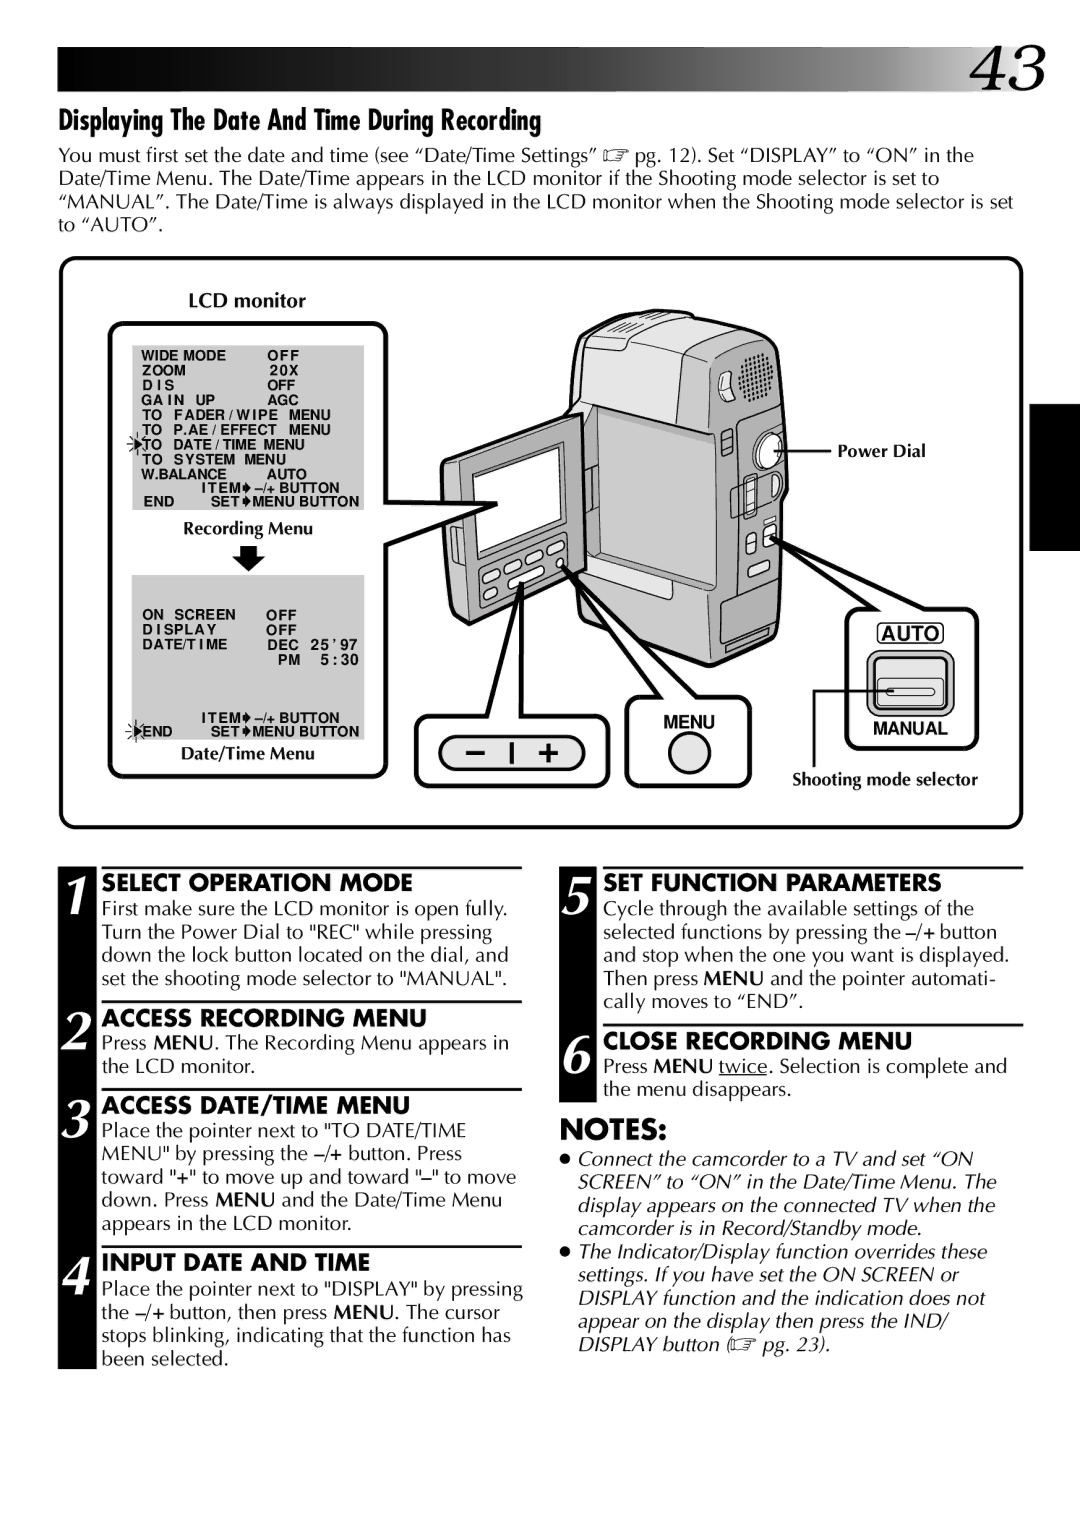
You must first set the date and time (see “Date/Time Settings” ☞ pg. 12). Set “DISPLAY” to “ON” in the Date/Time Menu. The Date/Time appears in the LCD monitor if the Shooting mode selector is set to “MANUAL”. The Date/Time is always displayed in the LCD monitor when the Shooting mode selector is set to “AUTO”.
LCD monitor
WIDE MODE | O FF |
ZOOM | 2 0X |
D I S | OFF |
GA I N UP | AGC |
TO | FADER / W IPE | MENU |
TO | P. AE / EFFECT | MENU |
TO | DATE / TIME MENU | |
TO SYSTEM MENU |
| ||
W.BALANCE | AUTO |
| |
END | I TEM | ||
SET | MENU BUTTON | ||
| Recording Menu | ||
|
|
| |
ON SCREEN | OFF |
| |
D I SPLAY | OFF |
| |
DATE/T I ME | DEC | 25 ’ 97 | |
|
| PM | 5 : 30 |
END | I TEM | ||
SET | MENU BUTTON | ||
Date/Time Menu
![]()
![]() Power Dial
Power Dial
AUTO
MENU | MANUAL |
|
Shooting mode selector
1 SELECT OPERATION MODE
First make sure the LCD monitor is open fully. Turn the Power Dial to "REC" while pressing down the lock button located on the dial, and set the shooting mode selector to "MANUAL".
2 ACCESS RECORDING MENU
Press MENU. The Recording Menu appears in the LCD monitor.
3 ACCESS DATE/TIME MENU Place the pointer next to "TO DATE/TIME MENU" by pressing the
4 INPUT DATE AND TIME
Place the pointer next to "DISPLAY" by pressing the
5 SET FUNCTION PARAMETERS Cycle through the available settings of the selected functions by pressing the
6 CLOSE RECORDING MENU
Press MENU twice. Selection is complete and the menu disappears.
NOTES:
●Connect the camcorder to a TV and set “ON SCREEN” to “ON” in the Date/Time Menu. The display appears on the connected TV when the camcorder is in Record/Standby mode.
●The Indicator/Display function overrides these settings. If you have set the ON SCREEN or DISPLAY function and the indication does not
appear on the display then press the IND/ DISPLAY button (☞ pg. 23).
