64![]()
![]()
![]()
![]()
![]()
![]()
![]()
![]()
![]()
![]()
![]()
![]()
![]()
![]()
![]()
![]()
![]()
![]()
![]()
![]()
![]()
![]()
![]()
![]()
![]()
![]()
![]()
![]()
![]()
![]()
![]()
![]()
![]()
![]()
![]()
![]()
![]()
![]()
![]()


 EDITIN
 G (Cont.)
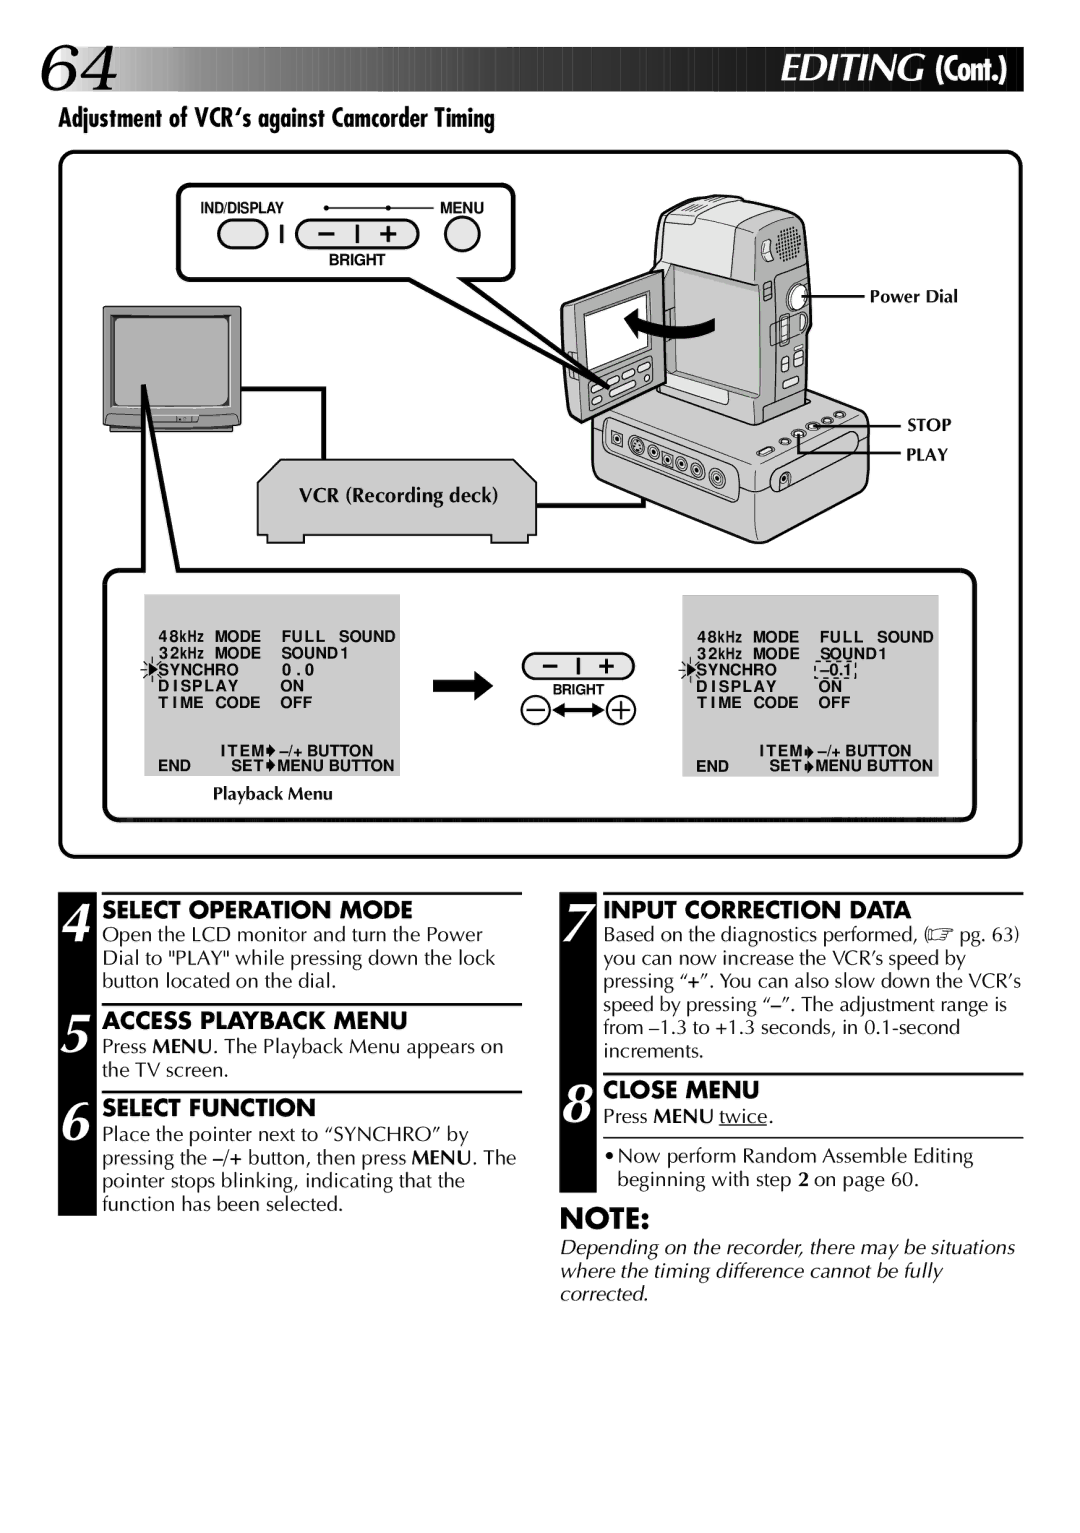
Adjustment of VCR‘s against Camcorder Timing
IND/DISPLAY |
|
|
|
|
|
|
|
|
| MENU | ||
|
|
|
|
|
|
|
|
| ||||
|
|
|
|
|
|
|
|
|
|
|
|
|
BRIGHT
VCR (Recording deck)
4 8kHz MODE | FULL | SOUND |
|
|
|
|
|
|
|
|
|
|
|
| |||
3 2kHz MODE | SOUND 1 |
|
|
|
|
|
|
|
|
|
|
|
| ||||
SYNCHRO | 0 . 0 |
|
|
|
|
|
|
|
|
|
|
|
|
|
|
| |
D I SPLAY | ON |
|
|
|
| BRIGHT |
|
|
| ||||||||
T I ME | CODE | OFF |
|
|
|
|
|
|
|
|
|
|
|
|
|
|
|
END | I TEM |
|
|
|
|
|
|
|
|
|
|
|
|
|
| ||
SET | MENU BUTTON |
|
|
|
|
|
|
|
|
|
|
|
| ||||
Playback Menu
![]()
![]() Power Dial
Power Dial
STOP
PLAY
4 8kHz MODE | FULL SOUND | |
3 2kHz MODE | SOUND 1 | |
SYNCHRO | ||
D I SPLAY | ON | |
T I ME | CODE | OFF |
| I TEM | |
END | SET | MENU BUTTON |
4 SELECT OPERATION MODE Open the LCD monitor and turn the Power Dial to "PLAY" while pressing down the lock button located on the dial.
5 ACCESS PLAYBACK MENU
Press MENU. The Playback Menu appears on the TV screen.
6 SELECT FUNCTION
Place the pointer next to “SYNCHRO” by pressing the
7 INPUT CORRECTION DATA
Based on the diagnostics performed, (☞ pg. 63) you can now increase the VCR’s speed by pressing “+”. You can also slow down the VCR’s speed by pressing
8 CLOSE MENU Press MENU twice.
•Now perform Random Assemble Editing beginning with step 2 on page 60.
NOTE:
Depending on the recorder, there may be situations where the timing difference cannot be fully corrected.