![]()
![]()
![]()
![]()
![]()
![]()
![]()
![]() 47
47
Exposure Control
Usually this is adjusted automatically. However, when the background is too bright or too dark in compari- son with the subject, the exposure could be corrected manually.
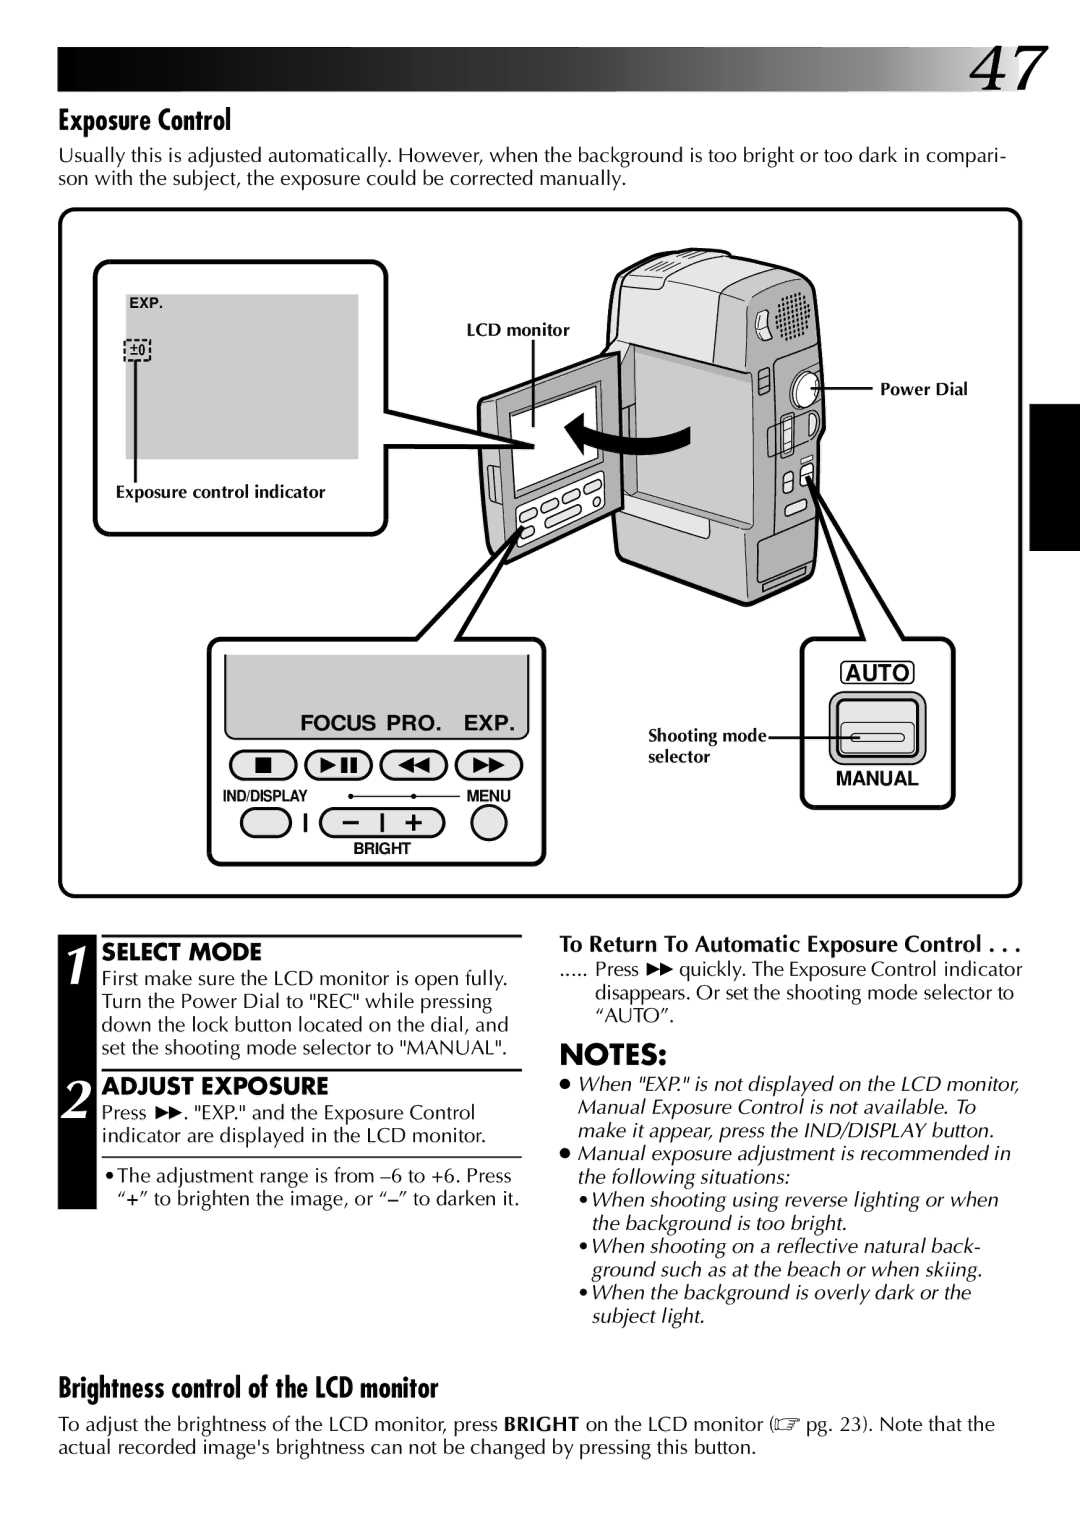
EXP.
LCD monitor
![]() 0
0
Exposure control indicator
FOCUS PRO. EXP.
|
|
|
|
|
|
|
|
|
|
|
|
IND/DISPLAY |
|
|
|
|
|
|
| MENU | |||
|
|
|
|
|
|
| |||||
|
|
|
|
|
|
|
|
|
|
|
|
|
|
|
|
|
|
|
|
|
|
|
|
BRIGHT
![]()
![]() Power Dial
Power Dial
AUTO
Shooting mode selector
MANUAL
1 SELECT MODE
First make sure the LCD monitor is open fully. Turn the Power Dial to "REC" while pressing down the lock button located on the dial, and set the shooting mode selector to "MANUAL".
2 ADJUST EXPOSURE
Press 3. "EXP." and the Exposure Control indicator are displayed in the LCD monitor.
•The adjustment range is from
To Return To Automatic Exposure Control . . .
..... Press 3quickly. The Exposure Control indicator
disappears. Or set the shooting mode selector to “AUTO”.
NOTES:
●When "EXP." is not displayed on the LCD monitor, Manual Exposure Control is not available. To make it appear, press the IND/DISPLAY button.
●Manual exposure adjustment is recommended in the following situations:
•When shooting using reverse lighting or when the background is too bright.
•When shooting on a reflective natural back- ground such as at the beach or when skiing.
•When the background is overly dark or the subject light.
Brightness control of the LCD monitor
To adjust the brightness of the LCD monitor, press BRIGHT on the LCD monitor (☞ pg. 23). Note that the actual recorded image's brightness can not be changed by pressing this button.