12


 GETTING
 STARTED (Cont.)
Date/Time Settings
Date and time will automatically be recorded on tape at all times. It is your choice to display it or not during playback (☞ pg. 54)
To set date and time follow the instructions from 1 to 5.
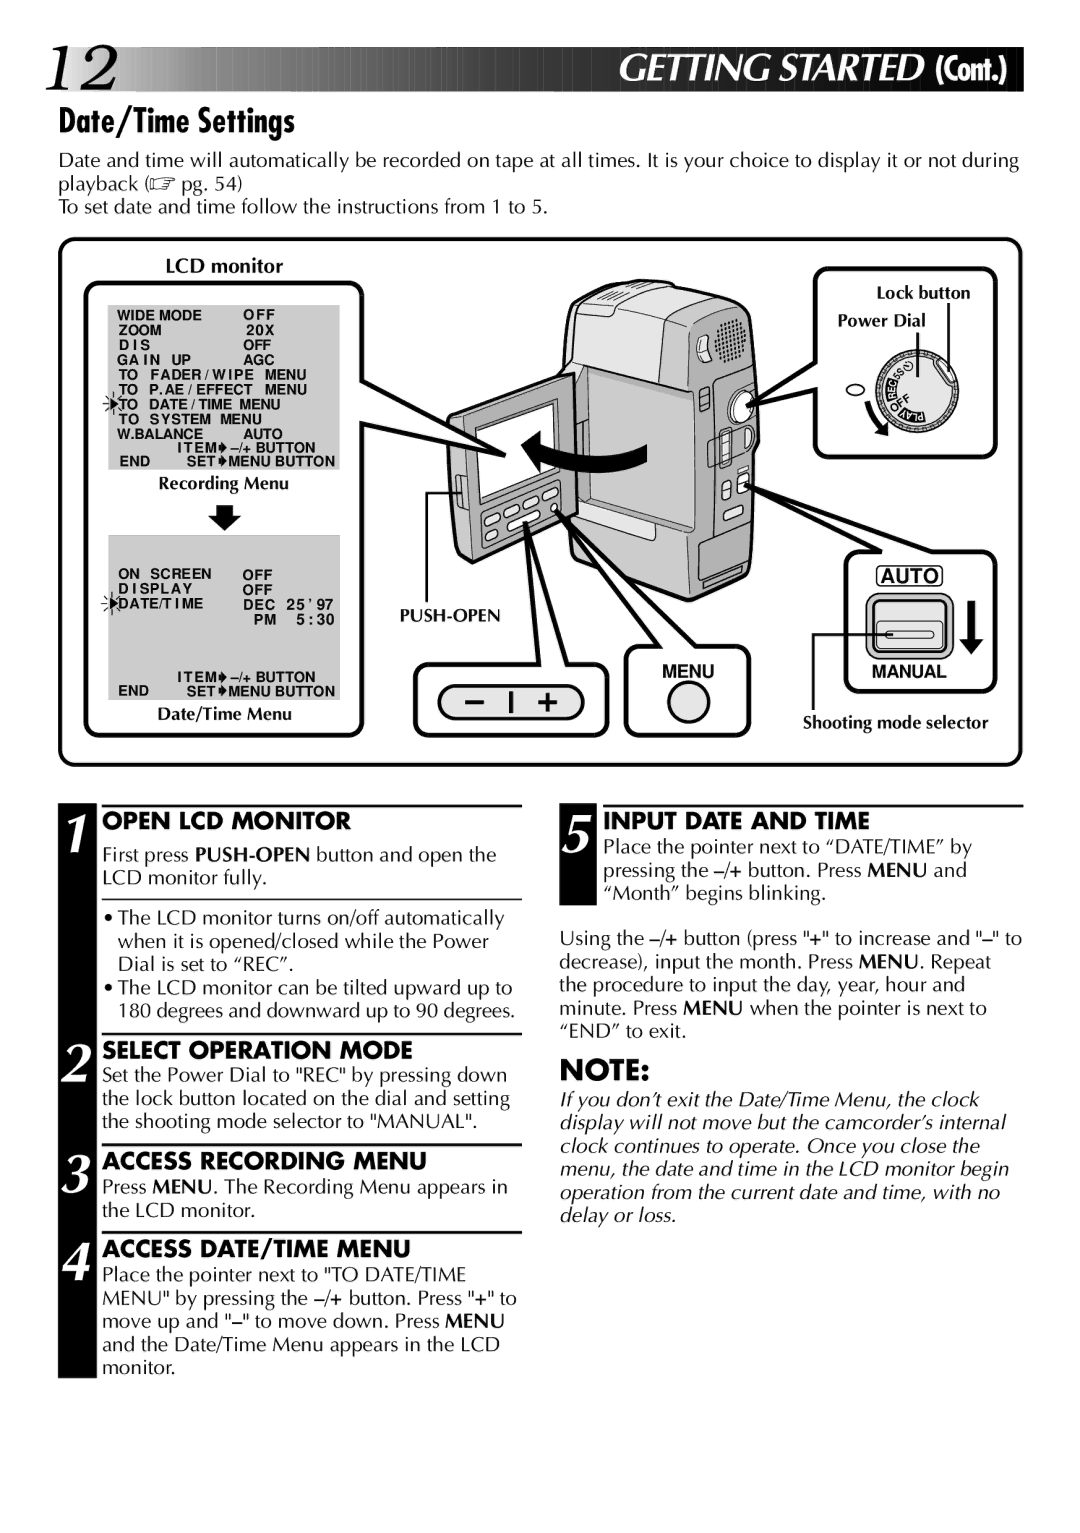
LCD monitor
WIDE MODE | O FF |
ZOOM | 2 0X |
D I S | OFF |
GA I N UP | AGC |
TO FADER / W IPE MENU TO P. AE / EFFECT MENU
![]()
![]() TO DATE / TIME MENU
TO DATE / TIME MENU
TO SYSTEM MENU
W.BALANCE | AUTO | |
END | I TEM | |
SET | MENU BUTTON | |
Recording Menu
Lock button
Power Dial
| S |
C | 5 |
| |
E |
|
R
OFF
YALP
ON SCREEN | OFF |
|
|
| AUTO | |
D I SPLAY | OFF |
|
|
|
| |
DATE/T I ME | DEC | 25 | ’ 97 |
| ||
|
| PM | 5 | : 30 |
| |
END | I TEM | MENU | MANUAL | |||
SET | MENU BUTTON |
|
| |||
| Date/Time Menu |
|
| Shooting mode selector | ||
|
|
|
|
|
| |
1 OPEN LCD MONITOR
First press
•The LCD monitor turns on/off automatically when it is opened/closed while the Power Dial is set to “REC”.
•The LCD monitor can be tilted upward up to 180 degrees and downward up to 90 degrees.
2 SELECT OPERATION MODE
Set the Power Dial to "REC" by pressing down the lock button located on the dial and setting the shooting mode selector to "MANUAL".
3 ACCESS RECORDING MENU
Press MENU. The Recording Menu appears in the LCD monitor.
4
5 INPUT DATE AND TIME
Place the pointer next to “DATE/TIME” by pressing the
Using the
NOTE:
If you don’t exit the Date/Time Menu, the clock display will not move but the camcorder’s internal clock continues to operate. Once you close the menu, the date and time in the LCD monitor begin operation from the current date and time, with no delay or loss.