50![]()
![]()
![]()
![]()
![]()
![]()
![]()
![]()
![]()
![]()
![]()
![]()
![]()
![]()
![]()
![]()
![]()
![]()
![]()
![]()
![]()
![]()
![]()
![]()
![]()
![]()
![]()
![]()
![]()
![]()
![]()
![]()


 PLAYBACK Basic Connections
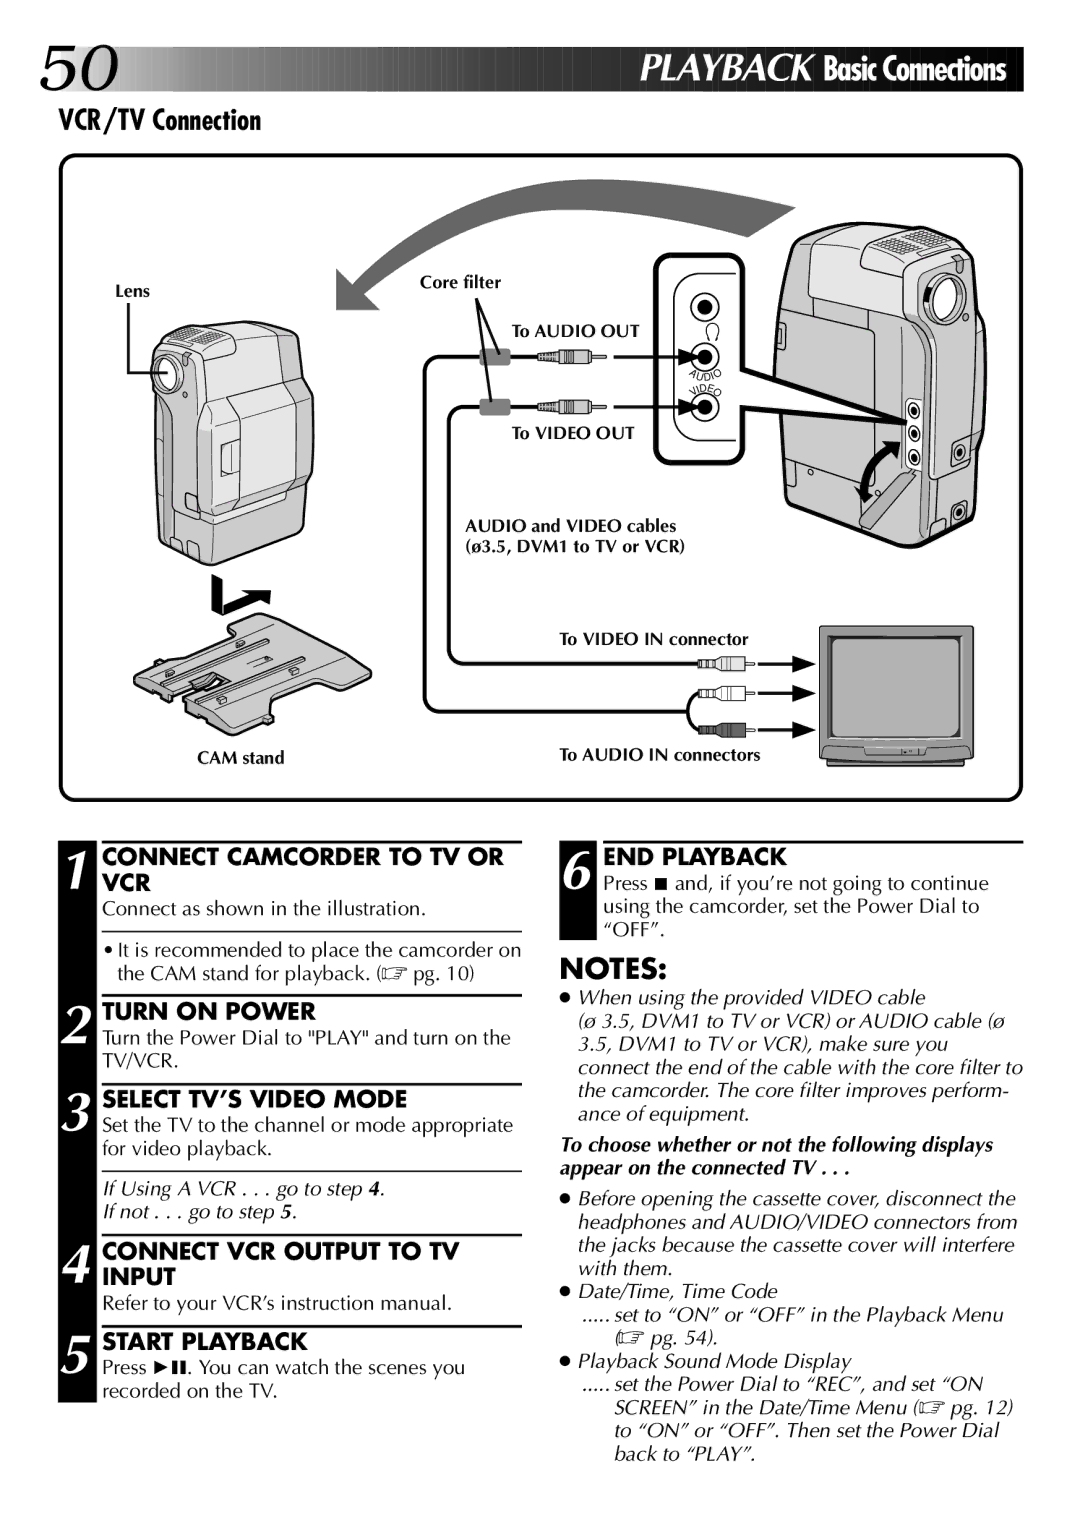
VCR/TV Connection
Lens | Core filter |
|
To AUDIO OUT
A
U
DIO
| IDE |
| V O |
| To VIDEO OUT |
| AUDIO and VIDEO cables |
| (ø3.5, DVM1 to TV or VCR) |
| To VIDEO IN connector |
CAM stand | To AUDIO IN connectors |
1 CONNECTVCR CAMCORDER TO TV OR
Connect as shown in the illustration.
•It is recommended to place the camcorder on the CAM stand for playback. (☞ pg. 10)
2 TURN ON POWER
Turn the Power Dial to "PLAY" and turn on the TV/VCR.
3 SELECT TV’S VIDEO MODE
Set the TV to the channel or mode appropriate for video playback.
If Using A VCR . . . go to step 4.
If not . . . go to step 5.
4 CONNECTINPUT VCR OUTPUT TO TV Refer to your VCR’s instruction manual.
5 START PLAYBACK
Press 46. You can watch the scenes you recorded on the TV.
6 END PLAYBACK
Press 5 and, if you’re not going to continue using the camcorder, set the Power Dial to “OFF”.
NOTES:
●When using the provided VIDEO cable
(ø 3.5, DVM1 to TV or VCR) or AUDIO cable (ø 3.5, DVM1 to TV or VCR), make sure you connect the end of the cable with the core filter to the camcorder. The core filter improves perform- ance of equipment.
To choose whether or not the following displays appear on the connected TV . . .
●Before opening the cassette cover, disconnect the headphones and AUDIO/VIDEO connectors from the jacks because the cassette cover will interfere with them.
●Date/Time, Time Code
..... set to “ON” or “OFF” in the Playback Menu
(☞ pg. 54).
●Playback Sound Mode Display
..... set the Power Dial to “REC”, and set “ON
SCREEN” in the Date/Time Menu (☞ pg. 12) to “ON” or “OFF”. Then set the Power Dial back to “PLAY”.