![]()
![]()
![]()
![]()
![]()
![]()
![]()
![]() 19
19
Basic Recording
You should already have performed the necessary preparations (☞ pgs. 8 – 16). Set the shooting mode selector to "AUTO" and try recording that way before attempting to use more advanced features.
NOTE:
Before starting recording, make sure you set the date and time (☞ pg. 12). Even if they don’t appear during recording, you can display them during playback (☞ pg. 55).
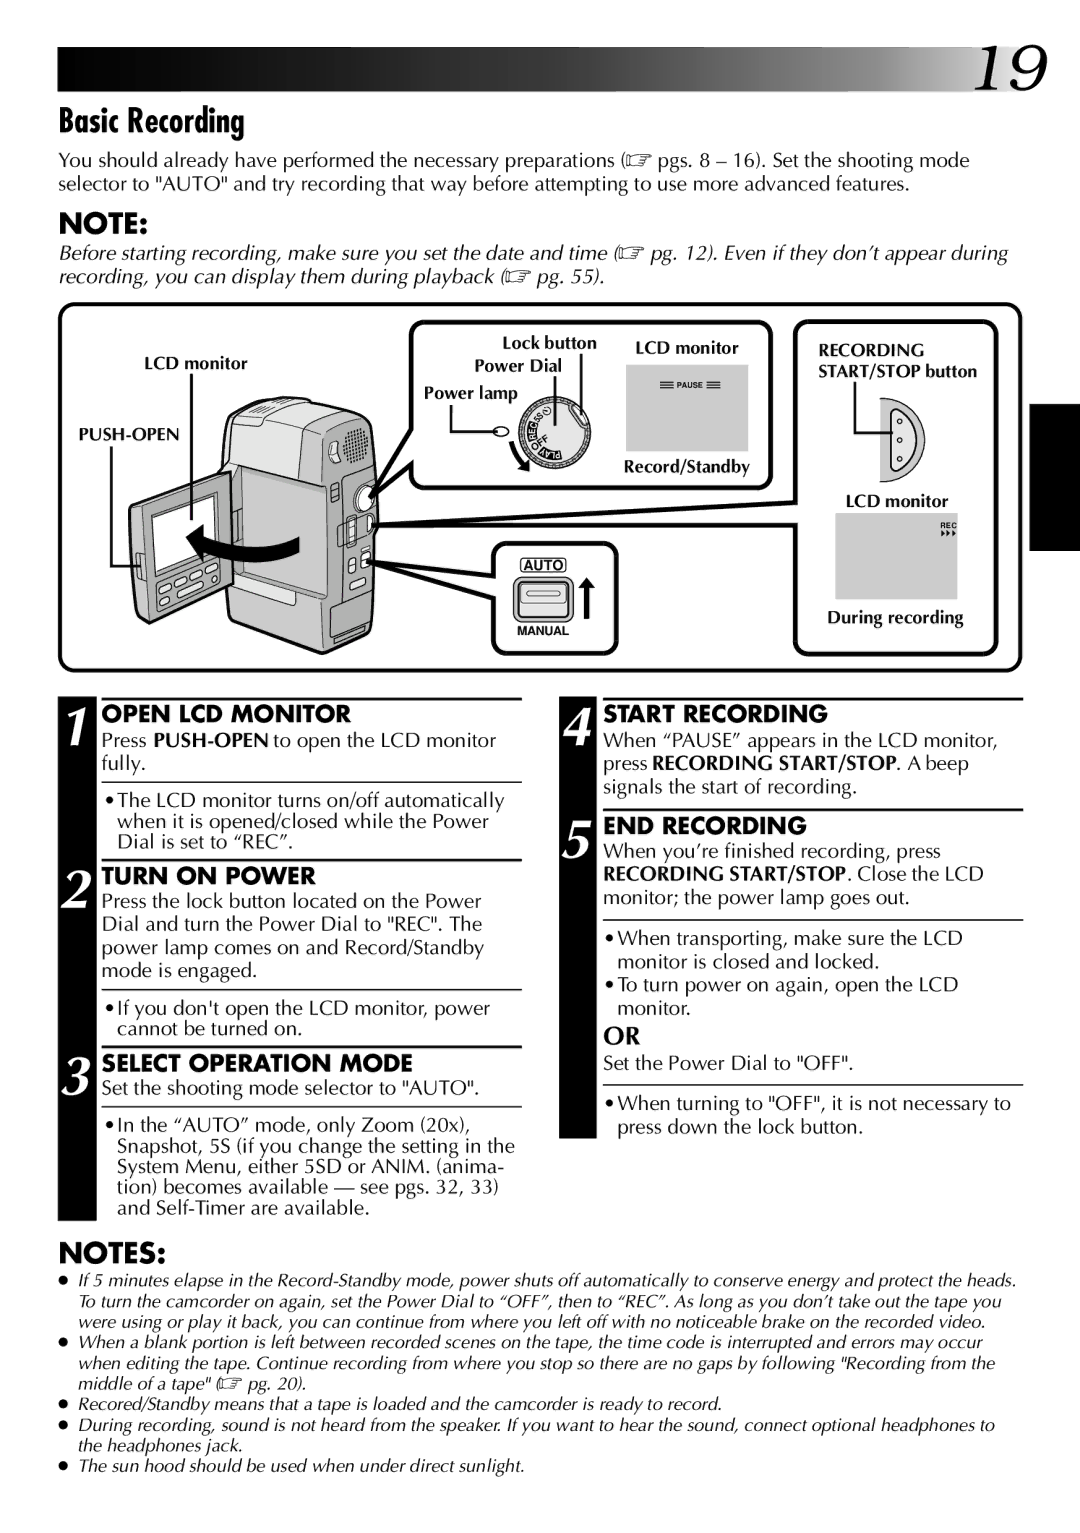
LCD monitor
Lock button Power Dial
Power lamp
| S |
C | 5 |
| |
E |
|
R | |
OFF | |
| Y |
| ALP |
AUTO
LCD monitor | RECORDING | ||||||
|
|
|
|
| START/STOP button | ||
|
| PAUSE |
|
| |||
|
|
|
|
|
|
| |
|
|
|
|
|
|
|
|
|
|
|
|
|
|
|
|
Record/Standby
LCD monitor
REC
During recording
MANUAL
1 OPEN LCD MONITOR
Press
•The LCD monitor turns on/off automatically when it is opened/closed while the Power Dial is set to “REC”.
2 TURN ON POWER
Press the lock button located on the Power Dial and turn the Power Dial to "REC". The power lamp comes on and Record/Standby mode is engaged.
•If you don't open the LCD monitor, power cannot be turned on.
3 SELECT OPERATION MODE
Set the shooting mode selector to "AUTO".
•In the “AUTO” mode, only Zoom (20x), Snapshot, 5S (if you change the setting in the System Menu, either 5SD or ANIM. (anima- tion) becomes available — see pgs. 32, 33) and
4 START RECORDING
When “PAUSE” appears in the LCD monitor, press RECORDING START/STOP. A beep signals the start of recording.
5 END RECORDING
When you’re finished recording, press RECORDING START/STOP. Close the LCD monitor; the power lamp goes out.
•When transporting, make sure the LCD monitor is closed and locked.
•To turn power on again, open the LCD monitor.
OR
Set the Power Dial to "OFF".
•When turning to "OFF", it is not necessary to press down the lock button.
NOTES:
●If 5 minutes elapse in the
●When a blank portion is left between recorded scenes on the tape, the time code is interrupted and errors may occur
when editing the tape. Continue recording from where you stop so there are no gaps by following "Recording from the middle of a tape" (☞ pg. 20).
●Recored/Standby means that a tape is loaded and the camcorder is ready to record.
●During recording, sound is not heard from the speaker. If you want to hear the sound, connect optional headphones to the headphones jack.
●The sun hood should be used when under direct sunlight.