On the front panel ONLY:
When you have connected two pairs of the front speakers and set them to the main room, you can select which to use in the main room.
To use the speakers connected to the FRONT 1 SPEAKERS
terminals, press SPEAKERS ON/OFF 1 so |
|
that SPEAKERS 1 indicator lights up on the | 1 |
display. (Make sure that the SPEAKERS 2 is
On the front panel:
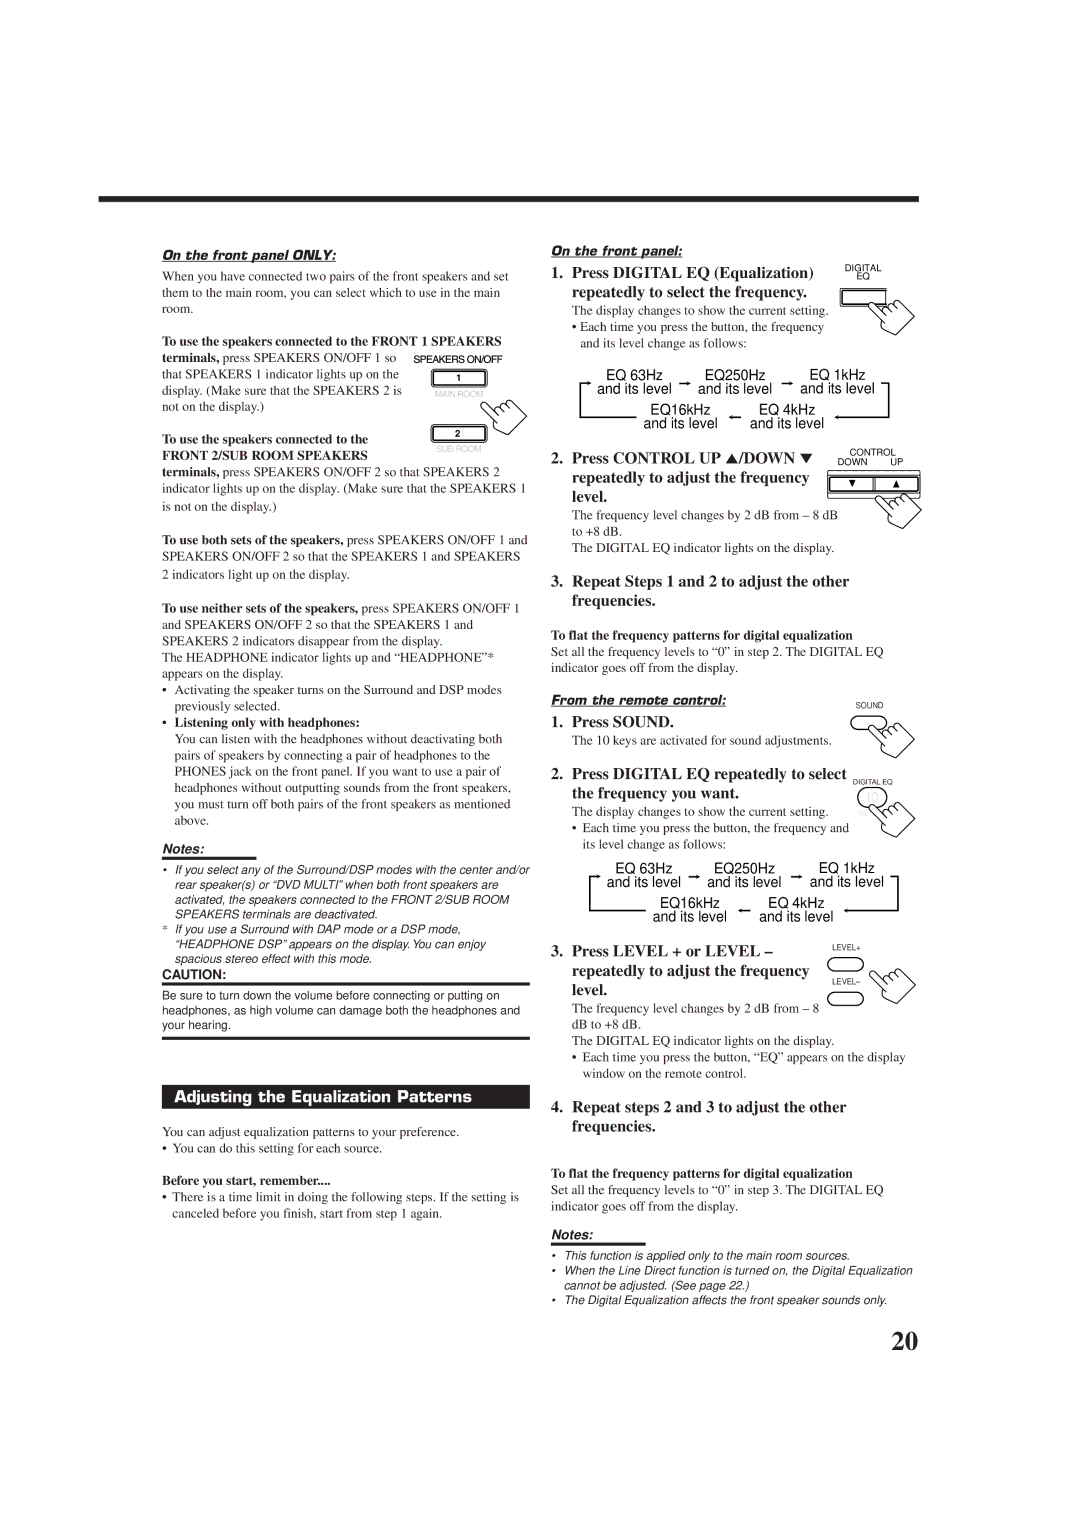
1. Press DIGITAL EQ (Equalization) | DIGITAL |
EQ | |
repeatedly to select the frequency. |
|
The display changes to show the current setting.
•Each time you press the button, the frequency and its level change as follows:
EQ 63Hz |
| EQ250Hz |
| EQ 1kHz |
and its level |
| and its level |
| and its level |
not on the display.)
To use the speakers connected to the
FRONT 2/SUB ROOM SPEAKERS
2
EQ16kHz | EQ 4kHz |
and its level | and its level |
CONTROL
2. Press CONTROL UP 5/DOWN ° DOWN UP
terminals, press SPEAKERS ON/OFF 2 so that SPEAKERS 2 indicator lights up on the display. (Make sure that the SPEAKERS 1 is not on the display.)
To use both sets of the speakers, press SPEAKERS ON/OFF 1 and SPEAKERS ON/OFF 2 so that the SPEAKERS 1 and SPEAKERS 2 indicators light up on the display.
To use neither sets of the speakers, press SPEAKERS ON/OFF 1 and SPEAKERS ON/OFF 2 so that the SPEAKERS 1 and SPEAKERS 2 indicators disappear from the display.
The HEADPHONE indicator lights up and “HEADPHONE”* appears on the display.
•Activating the speaker turns on the Surround and DSP modes previously selected.
•Listening only with headphones:
You can listen with the headphones without deactivating both pairs of speakers by connecting a pair of headphones to the PHONES jack on the front panel. If you want to use a pair of headphones without outputting sounds from the front speakers, you must turn off both pairs of the front speakers as mentioned above.
Notes:
• If you select any of the Surround/DSP modes with the center and/or rear speaker(s) or “DVD MULTI” when both front speakers are activated, the speakers connected to the FRONT 2/SUB ROOM SPEAKERS terminals are deactivated.
*If you use a Surround with DAP mode or a DSP mode, “HEADPHONE DSP” appears on the display. You can enjoy spacious stereo effect with this mode.
CAUTION:
Be sure to turn down the volume before connecting or putting on headphones, as high volume can damage both the headphones and your hearing.
Adjusting the Equalization Patterns
You can adjust equalization patterns to your preference.
• You can do this setting for each source.
Before you start, remember....
•There is a time limit in doing the following steps. If the setting is canceled before you finish, start from step 1 again.
repeatedly to adjust the frequency level.
The frequency level changes by 2 dB from – 8 dB to +8 dB.
The DIGITAL EQ indicator lights on the display.
3.Repeat Steps 1 and 2 to adjust the other frequencies.
To flat the frequency patterns for digital equalization
Set all the frequency levels to “0” in step 2. The DIGITAL EQ indicator goes off from the display.
From the remote control: | SOUND |
1. Press SOUND.
The 10 keys are activated for sound adjustments.
2. Press DIGITAL EQ repeatedly to select
the frequency you want. | DIGITAL EQ |
10 | |
The display changes to show the current setting. | RETURN |
•Each time you press the button, the frequency and its level change as follows:
EQ 63Hz |
| EQ250Hz |
| EQ 1kHz | |||
and its level |
| and its level |
| and its level |
| ||
EQ16kHz | EQ 4kHz | ||||||
and its level | and its level |
|
| ||||
3. Press LEVEL + or LEVEL – | LEVEL+ | |
| ||
repeatedly to adjust the frequency | LEVEL– | |
level. | ||
|
The frequency level changes by 2 dB from – 8 dB to +8 dB.
The DIGITAL EQ indicator lights on the display.
•Each time you press the button, “EQ” appears on the display window on the remote control.
4.Repeat steps 2 and 3 to adjust the other frequencies.
To flat the frequency patterns for digital equalization
Set all the frequency levels to “0” in step 3. The DIGITAL EQ indicator goes off from the display.
Notes:
•This function is applied only to the main room sources.
•When the Line Direct function is turned on, the Digital Equalization cannot be adjusted. (See page 22.)
•The Digital Equalization affects the front speaker sounds only.
20
