Diagnostics and Troubleshooting

Observation

Possible Cause


Possible Solution


The boarders on the prints

The host software’s image

Refer to the instructions for image positioning

are not the right size.

positioning is not correct.

in the manual for the host software.


The page start parameter may be

See “Using Page Starts” on page 3-29.


incorrect.


The edge(s) of the prints

• The paper is not loaded correctly

1.

Reload the paper in the paper supply

are damaged and the

in the paper cassette.


cassette.

image is skewed.

• The paper supply cassette

2.

Position the paper supply cassette on the


clamp is not secured correctly.


pin of the shelf.


• The paper supply cassette was

3.

Close the clamp to lock the paper supply


not aligned with the pin when


cassette into position.


installed on the shelf.

NOTE: Always carry the paper cassette with


• The paper supply cassette was


two hands to prevent the paper from


not picked up or carried correctly


sliding to one end or “telescoping”.


and the paper has “telescoped”.

4.

When loading paper into the printer:


• Paper was not straight when it


• cut the corners of the lead edges of the


was fed into the printer.


paper at a 45o angle


• The Punch assembly is not


• wait for a message to feed


adjusted correctly.


• push the paper slowly into the printer’s


• Paper was not fed correctly into


rollers, keeping the paper taut between


the punch slots.


the cassette and the rollers.


NOTE: Push the paper evenly so that the


paper remains flat and does not


buckle and do not push the paper too


hard against the paper alignment


guide.


The edge of the paper is

• The paper was not straight when

Make sure that the takeup cassette is seated

damaged in the takeup

cinched.

correctly on the arms and can move up and

area.

• The paper was not centered

down a few degrees when you push on the top


when cinched.

of it.


• The bearings on the takeup


cassette were not seated


correctly when the takeup


cassette was placed on the


arms.


The text on the paper has

• The text density is too high.

Calibrate the printer.

flare.

• The processor is not in control.

• Download the latest calibration software


• The printer is not calibrated


from Kodak’s Web site and then calibrate


correctly.


the printer.


The host does not

An error was made during the

1.

Turn off the host computer.

recognize the printer

power up sequence.

2.

Turn off the printer.


3.

Power up the printer and wait for it to


initialize.


4.

Power up the host computer.


The SCSI IDs are different.

1.

Change the SCSI ID through the OCP.


2.

Turn off the host computer.


3.

Turn off the printer.


4.

Power up the printer and wait for it to


initialize.


5.

Power up the host computer.


5-12

September 2000

Page 82
Image 82
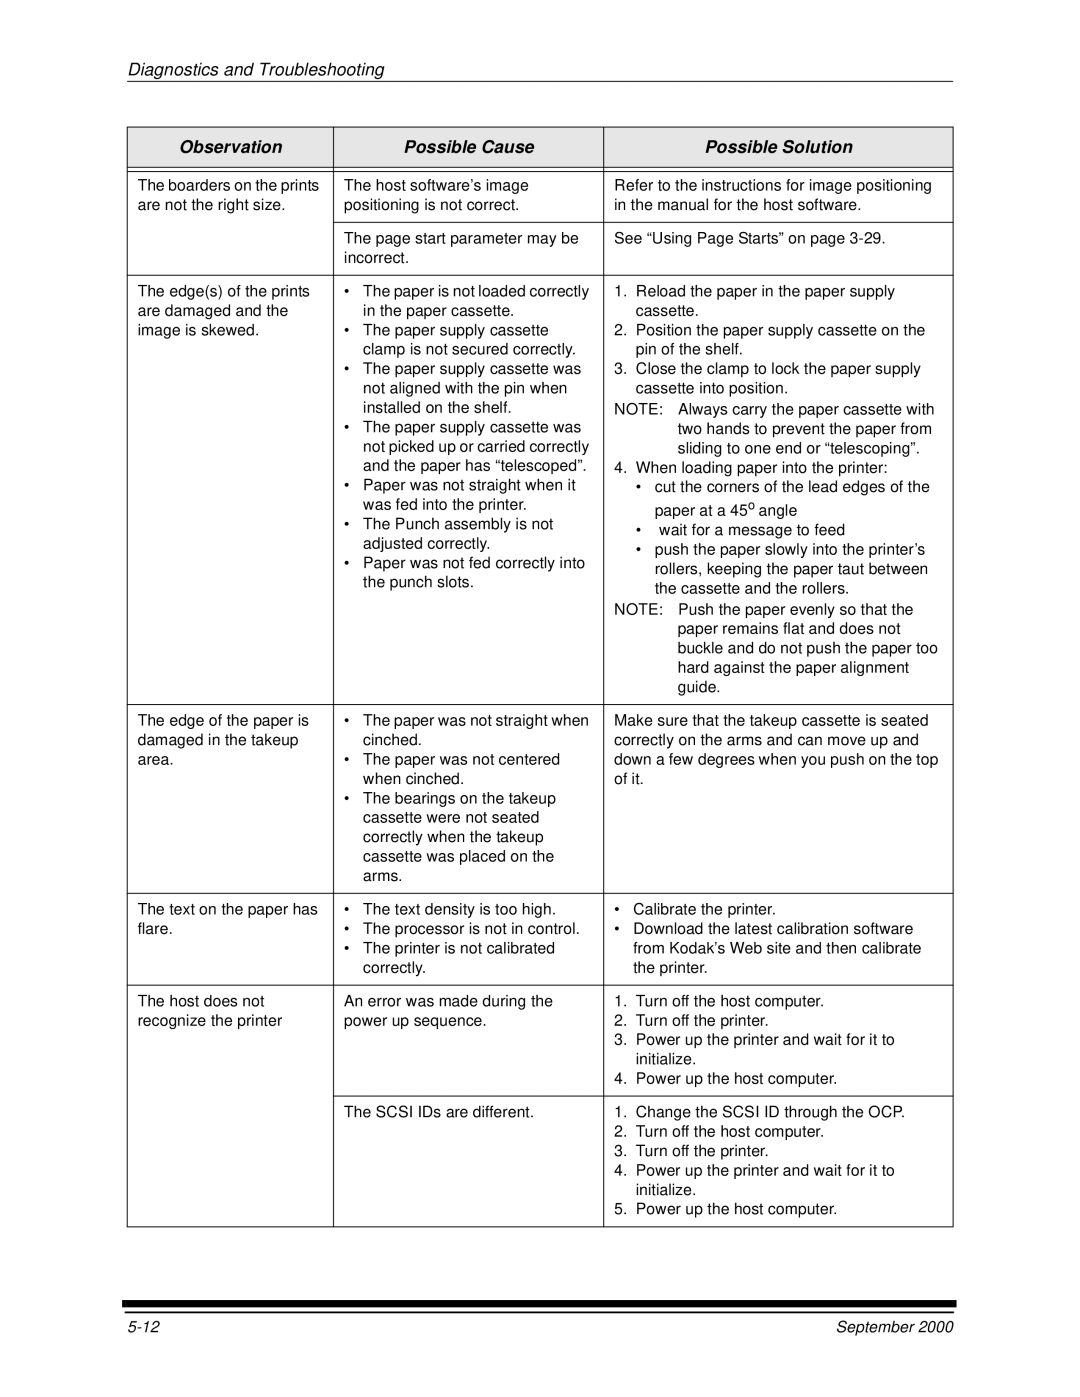
Kodak 20R manual Observation Possible Cause Possible Solution

20R specifications

The Kodak 20R is a notable addition to the realm of portable photographic technology, making it a favorite among amateur and professional photographers alike. Introduced during a period of resurgence in film photography, the Kodak 20R exemplifies the perfect blend of classic design and innovative features aimed at enhancing user experience and image quality.

At its core, the Kodak 20R employs a reliable 35mm film format, a staple in the industry that ensures compatibility with a wide range of lenses and accessories. This format not only provides excellent resolution but also allows for a significant dynamic range, making it suitable for various lighting conditions. The camera’s compact design makes it easy to carry, making it the perfect companion for travel, street photography, and candid shots.

One of the standout features of the Kodak 20R is its integrated light meter, which aids in achieving optimal exposure. The meter is designed to read various lighting conditions accurately, ensuring that images captured have the right balance of highlights and shadows. This eliminates the guesswork commonly associated with manual settings, catering to both novices and seasoned photographers.

The camera also boasts a fixed lens with a versatile focal length, which is well-suited for a variety of photography styles. Its fast maximum aperture allows for improved low-light performance and the ability to achieve a pleasing bokeh effect, helping subjects stand out against beautifully blurred backgrounds.

Another remarkable aspect of the Kodak 20R is its straightforward operational interface, which encourages users to focus on composition rather than overwhelming technical settings. The intuitive controls allow for quick adjustments, promoting a more fluid photography experience. Additionally, the camera is constructed with durable materials, ensuring longevity and reliability in diverse shooting environments.

The Kodak 20R's shutter mechanism is engineered for precision, providing a robust performance that minimizes vibrations. This feature is critical for achieving sharp images, particularly at slower shutter speeds or with longer focal lengths.

Overall, the Kodak 20R encapsulates a return to form in film photography, offering essential features that appeal to a broad audience. With its combination of vintage charm and modern functionality, it remains a cherished tool for anyone looking to immerse themselves in the art of photography. For those eager to explore the world of film or revisit its timeless qualities, the Kodak 20R presents an inviting opportunity.