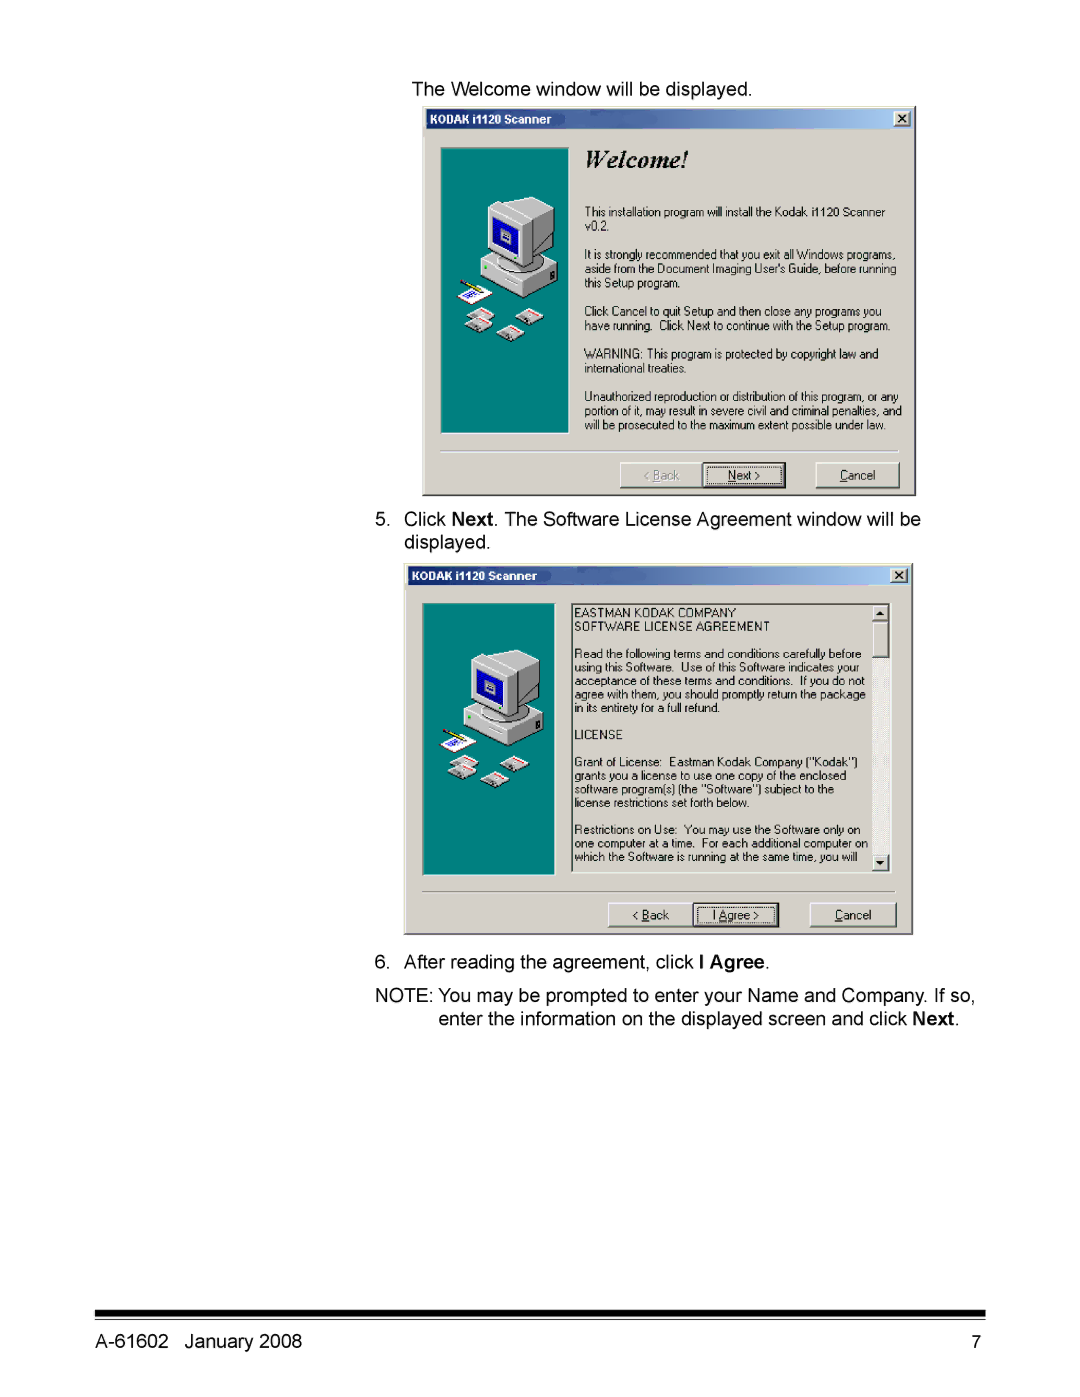
i1120 Scanner
ScanMate
User’s Guide
A-61602 Part No. 9E8497
1 Introduction
Contents
3 Using the Scanner
2 Getting Started
Appendix A Specifications
5 Maintenance
6 Troubleshooting
4 Image Processing
Product features
1 Introduction
MSDS
Safety information
EMC statements
Environmental information
connection
Power system
Acoustic emission
Japan
What’s in the box System requirements
2 Getting Started
Kodak ScanMate i1120 Scanner
Install the Kodak Driver Software on the host PC before you connect the scanner
Installing the Kodak Driver Software
2. Select Install Scanner Software
6. After reading the agreement, click I Agree
The Welcome window will be displayed
A-61602 January
9. Click Finish
7. Click Continue Anyway, The installation will begin
The following screen may be displayed
A-61602 January
2. Open the scanner cover
Attaching the input tray
Assembling the scanner The input tray snaps into place
A-61602 January
1. Locate the output tray slots on the scanner
Attaching the output tray
A-61602 January
Select USB Test
United States and Canada China power cord
cable
Connecting the USB
IMPORTANT If you have not installed the Kodak Driver Software
do that now before proceeding
3. Click Continue Anyway
Your operating software will now auto detect the scanner
The Hardware Update Wizard screen will be displayed 4. Click Finish
A-61602 January
Installing application software
Scanner components
Front view
Power switch
Inside view
Back view
Power port
Adjusting the input and output trays
3 Using the Scanner
Turning the scanner on and off
Start and stop scanning
Document preparation
Verifying your scanner installation
The main Kodak Scanner window will be displayed
5. Select the Default Setting Shortcut
A-61602 January
Application software
Viewing test images
image0000001A.jpg is a front image image0000001B.jpg is a back
Smart touch functionality
with each of the 9 function numbers
Remove Icon - displays the Remove Icon dialog box
A-61602 January
an attachment. If your email requires logon authentication password
Scan To settings
and launches the application program for the saved file. For example
Select the language for the searchable PDF or RTF file and click OK
Settings button - if you select PDF - Searchable or RTF as the File
Type, the OCR Setup dialog box will be displayed
A-61602 January
Display settings prior to scanning if selected, the Kodak Scanner
Scan As settings
Menu buttons
Configuring function
numbers
12. Modify other function numbers by repeating Steps 2 through
13. When finished, click OK
11. Click Apply
A-61602 January
2. Select the Color Document OCR Quality shortcut
3. Change the Input Document is setting to One Sided - Front
A-61602 January
5. Select Save and OK to return to the Configuration dialog box
A-61602 January
A-61602 January
Tools
Using function numbers Scanning your documents
Starting the Scan Validation Tool
4 Image Processing
Overview
1. Select StartProgramsKodakDocument ImagingScan Validation Tool
Scan Validation Tool dialog box
Toolbar buttons
Using the TWAIN datasource
How do I begin?
One Sided-Front - captures the front side only
Selecting Image settings From the main Kodak Scanner window
Two Sided - captures both sides of the document
One Sided-Back - captures the back side only
A-61602 January
7. When finished
2. Select Settings to access the Image Settings window
3. Select Device. The Device Settings window will be displayed
A-61602 January
Black and White Document Black and White Document OCR Quality
The main Kodak Scanner window
Color Document Color Document OCR Quality Color Photograph
One Sided - Front scans only the front side of the document
Save - saves any changes made to the current Setting Shortcut
Two Sided scans the front and back of the document
One Sided - Back scans only the back side of the document
Information Icons
About displays the scanners’ version and copyright information
The Image Settings window
Advanced Image Setup displays the Advanced tab
Toolbar buttons
Preview area
NOTE If you choose Document Manually Select or Image Part of a
General tab
none no compression, which may produce a large image size
Compression - allows you to reduce your electronic image size
Type the scanner will produce a color version of your document
JPEG uses JPEG techniques to compress a color/grayscale image
Size tab
if you select Document Automatically Detect and Straighten
Origin x, y
none
none
Landscape Feed
NOTE This is not available for Conversion quality Draft
A-61602 January
Filters Noise none
Image none
Page
Enhancements tab
The options on the Enhancements tab depend on the Scan as selection
none Red Green Blue
Advanced Image Setup
The Advanced tab
Multiple indicates you want the scanner to create more than one image
One indicates you want the scanner to create one image
A-61602 January
Add adds an image type to the bottom of the configuration list
Creating different settings for each side of a document, Example
Creating multiple images for each side of a document, Example
Toolbar buttons
5. Select Images per side Multiple
Creating multiple images for each side of a document, Example
4. Select Input document is Two Sided
select Grayscale
9. Select Sides Both Color 24-bit
make sure Black and White1-bit is selected
10. Select Sides Both Black and White 1-bit
2. Select Input document is Two Sided
Creating different settings for each side of a document, Example
3. Turn on the Different settings per side option
4. Select Images per side One
8. Select Sides Back
Creating a new Setting Shortcut
6. Select Preview to review the resulting image
4. Select the appropriate options on the General tab
5. Place one representative document in the input tray of the scanner
9. Select Home to return to the main Kodak Scanner window
Changing Image settings
The Device Settings window
Information Icons
Paper Source
Device - General tab
Document Feeder
Continue Scanning the scanner will continue to scan
A-61602 January
Changing Device settings
Tests
The Diagnostics window
Diagnostics - General tab
Scanner Time
A-61602 January
Toolbar buttons
Images - Sent To Application
Refresh refreshes the currently displayed log
5 Maintenance
Do not use cleaners in confined areas, use with adequate ventilation
Cleaning the rollers
Cleaning the pre- separation pad
Cleaning the calibration area
Replacement procedures
Replacing the pre- separation pad
4. Lift the feed roller assembly up and out of the scanner
Replacing the feed roller assembly
3. Rotate the orange tab upward to release the feed roller assembly
1. Open the scanner cover
A-61602 January
Description
Supplies and consumables
CAT No
6 Troubleshooting
Indicator lights and error codes Clearing a document jam
Problem
Problem solving
Possible Solution
A-61602 January
1. Click on My Computer and select Properties
Scanner not working
verify this
2. Click on the Hardware tab and select Device Manager
6. Click Next
A-61602 January
7. Click Next
9. Click Open and proceed with the prompts to install the driver
A-61602 January
connection
Testing for a USB
C\program files\Kodak\Document Imaging\usbtst.exe
Solutions
Your operating system is correctly configured to support USB
Your operating system only supports USB
You do not need to install any additional USB cards
USB will not work
Specifications
Appendix A
Eastman Kodak Company 343 State Street Rochester, NY 14650 U.S.A
Kodak, 2007. All rights reserved. TM Kodak, ScanMate