The Diagnostics window
Diagnostics - General tab
From this window you can access the diagnostic functions of the scanner. The Diagnostics window includes the following tabs: General, Debug and Logs. The Diagnostics window can be accessed via the Diagnostics button which is located on the General tab of the Device Settings window.
Done — returns you to the Device Settings window.
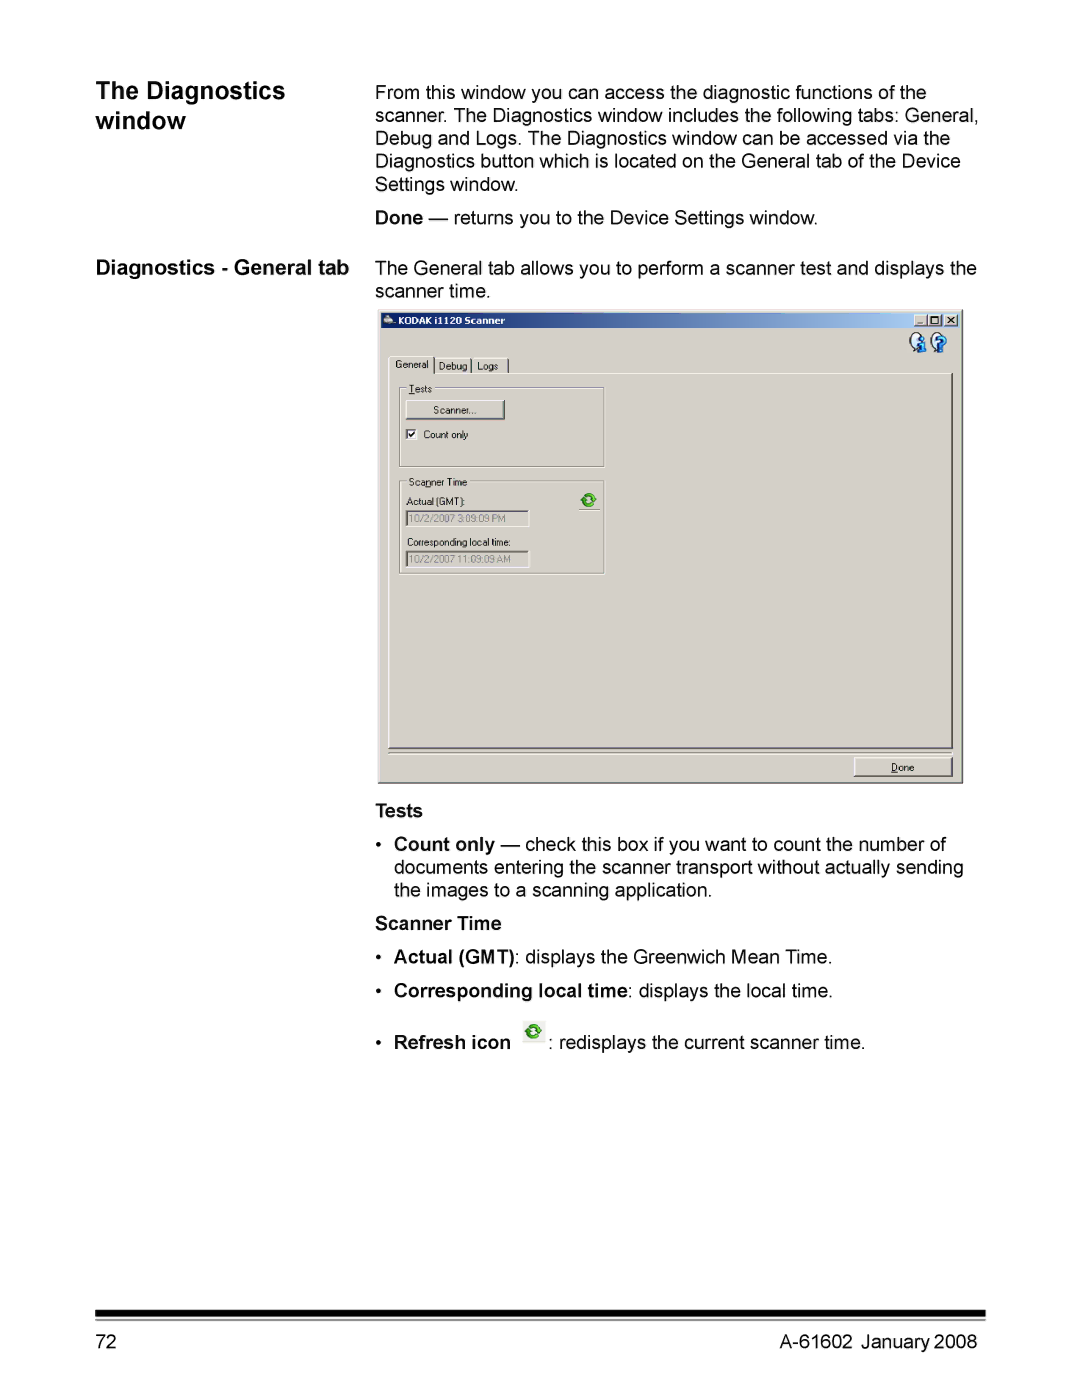
The General tab allows you to perform a scanner test and displays the scanner time.
Tests
•Count only — check this box if you want to count the number of documents entering the scanner transport without actually sending the images to a scanning application.
Scanner Time
•Actual (GMT): displays the Greenwich Mean Time.
•Corresponding local time: displays the local time.
•Refresh icon ![]() : redisplays the current scanner time.
: redisplays the current scanner time.
72 |
|