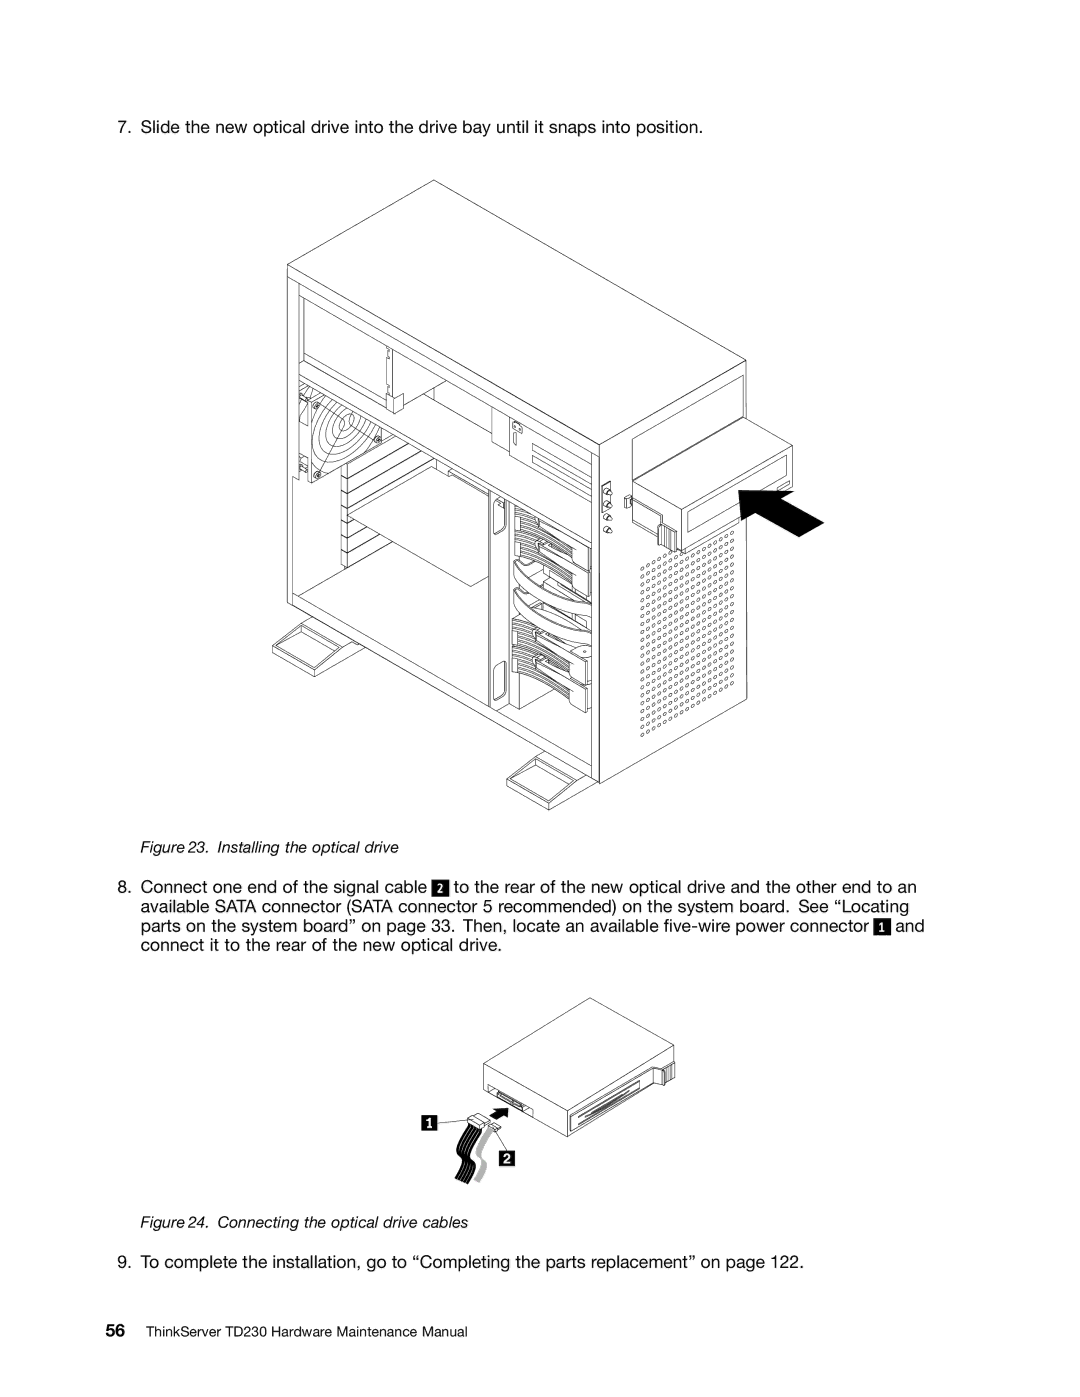
7. Slide the new optical drive into the drive bay until it snaps into position.
Figure 23. Installing the optical drive
8.Connect one end of the signal cable 2 to the rear of the new optical drive and the other end to an available SATA connector (SATA connector 5 recommended) on the system board. See “Locating parts on the system board” on page 33. Then, locate an available
Figure 24. Connecting the optical drive cables
9. To complete the installation, go to “Completing the parts replacement” on page 122.
