1.Remove all media from the drives and turn off all attached devices and the server. Then, disconnect all power cords from electrical outlets and disconnect all cables that are connected to the server.
2.Remove the server cover. See “Removing the server cover” on page 43.
3.Lay the server on its side for easier operation.
4.The RAID card should be installed into the appropriate PCI Express x8 slot on the system board (callout 31 in Figure 7 “Locating major parts on the system board” on page 34).
5.Touch the
6.Depending on your RAID card, you might need to install the ThinkServer 8708EM2 RAID Battery. See “Installing the ThinkServer 8708EM2 RAID Battery” on page 92 and follow those instructions to install the battery card assembly.
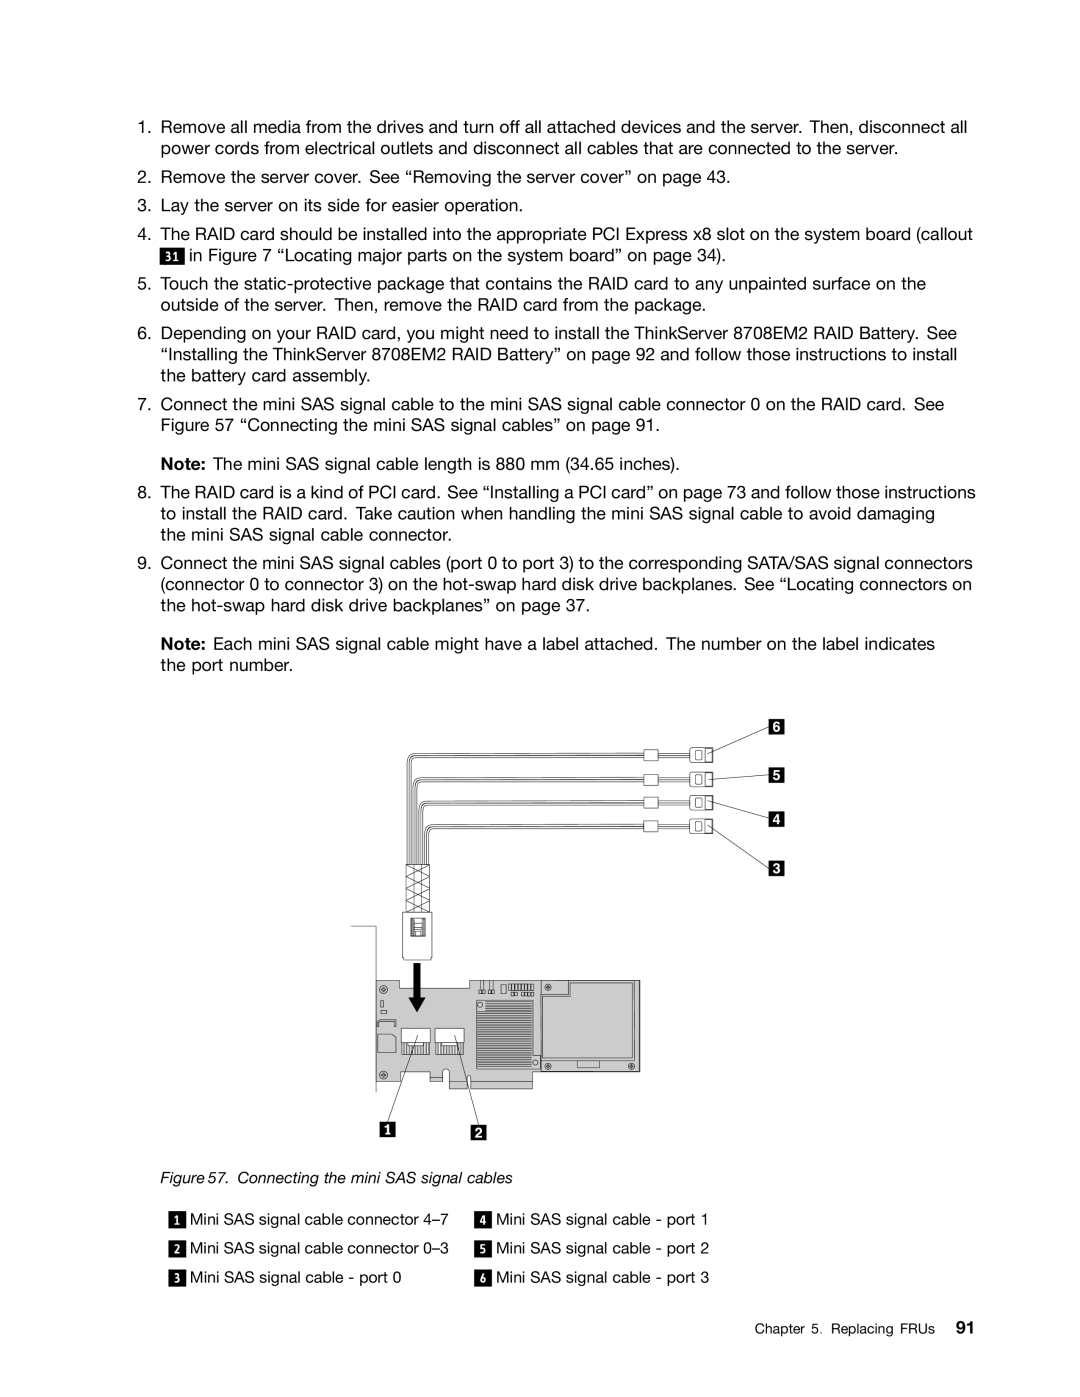
7.Connect the mini SAS signal cable to the mini SAS signal cable connector 0 on the RAID card. See Figure 57 “Connecting the mini SAS signal cables” on page 91.
Note: The mini SAS signal cable length is 880 mm (34.65 inches).
8.The RAID card is a kind of PCI card. See “Installing a PCI card” on page 73 and follow those instructions to install the RAID card. Take caution when handling the mini SAS signal cable to avoid damaging the mini SAS signal cable connector.
9.Connect the mini SAS signal cables (port 0 to port 3) to the corresponding SATA/SAS signal connectors (connector 0 to connector 3) on the
Note: Each mini SAS signal cable might have a label attached. The number on the label indicates the port number.
Figure 57. Connecting the mini SAS signal cables
1
2
3
Mini SAS signal cable connector
4
5
6
Mini SAS signal cable - port 1 Mini SAS signal cable - port 2 Mini SAS signal cable - port 3