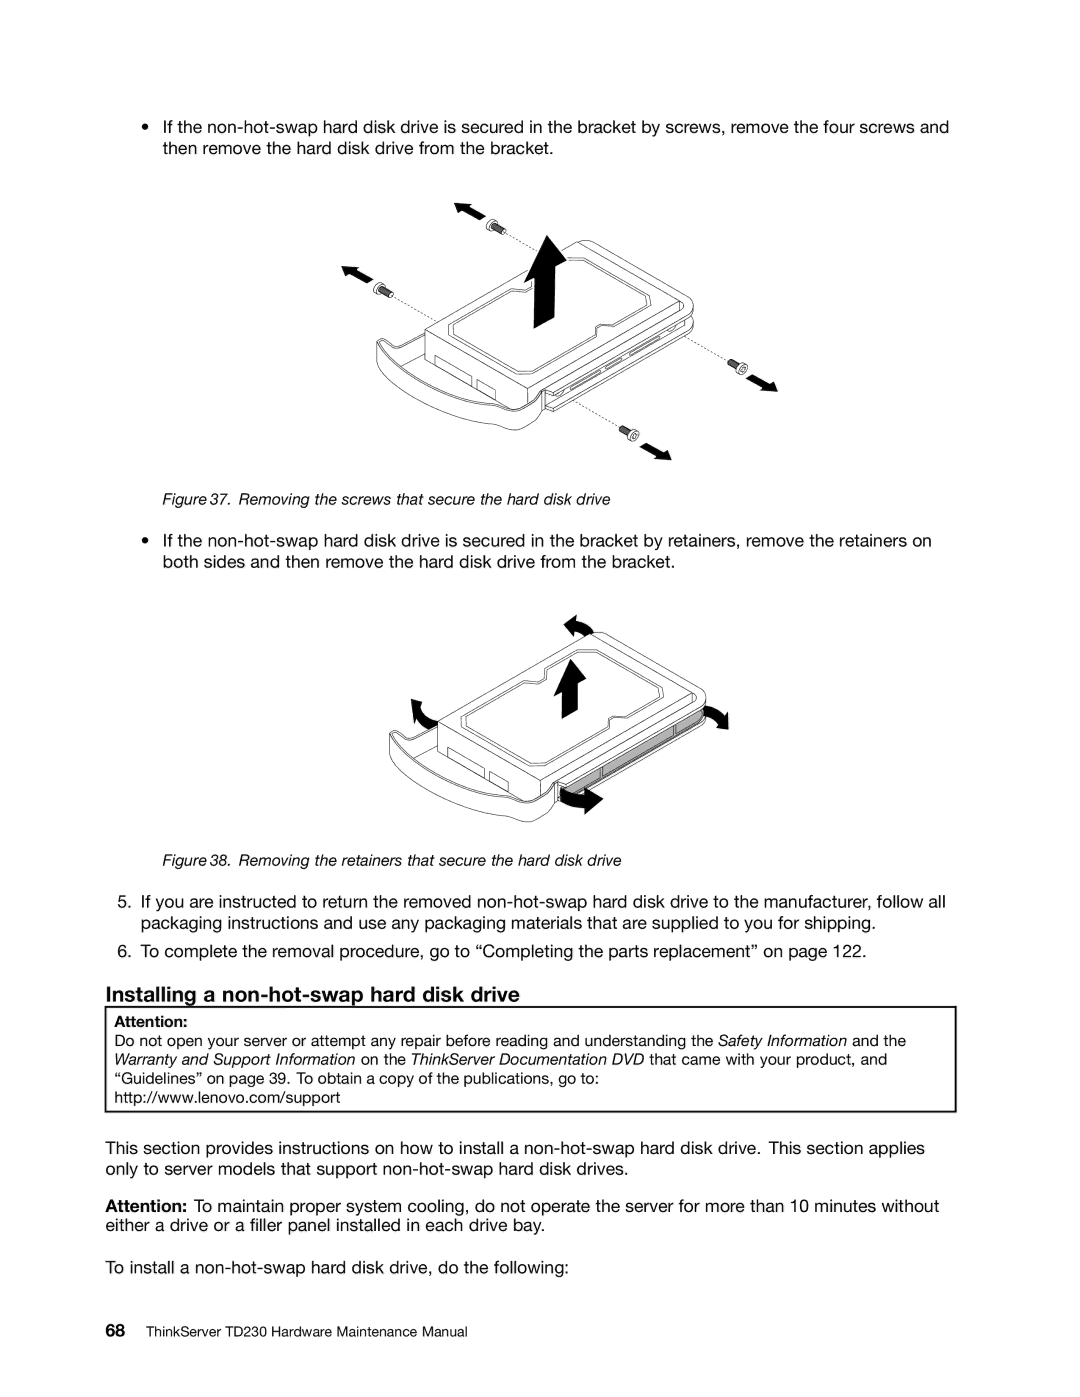
Lenovo TD230 manual Installing a non-hot-swap hard disk drive

Models: TD230

1 186
Download 186 pages 12.12 Kb
Page 74
Image 74

If the non-hot-swap hard disk drive is secured in the bracket by screws, remove the four screws and then remove the hard disk drive from the bracket.

Figure 37. Removing the screws that secure the hard disk drive

If the non-hot-swap hard disk drive is secured in the bracket by retainers, remove the retainers on both sides and then remove the hard disk drive from the bracket.

Figure 38. Removing the retainers that secure the hard disk drive

5.If you are instructed to return the removed non-hot-swap hard disk drive to the manufacturer, follow all packaging instructions and use any packaging materials that are supplied to you for shipping.

6.To complete the removal procedure, go to “Completing the parts replacement” on page 122.

Installing a non-hot-swap hard disk drive

Attention:

Do not open your server or attempt any repair before reading and understanding the Safety Information and the Warranty and Support Information on the ThinkServer Documentation DVD that came with your product, and “Guidelines” on page 39. To obtain a copy of the publications, go to:

http://www.lenovo.com/support

This section provides instructions on how to install a non-hot-swap hard disk drive. This section applies only to server models that support non-hot-swap hard disk drives.

Attention: To maintain proper system cooling, do not operate the server for more than 10 minutes without either a drive or a filler panel installed in each drive bay.

To install a non-hot-swap hard disk drive, do the following:

68ThinkServer TD230 Hardware Maintenance Manual

Page 74
Image 74
Lenovo TD230 manual Installing a non-hot-swap hard disk drive, Removing the screws that secure the hard disk drive