4Press ![]() .
.
The
5If you want to scan only a portion of the document, click and drag the dotted line box to select a specific area of the preview image to scan.
6From the “Send scanned image to” menu, select a program.
7Click See More Scan Settings.
8Select what is being scanned.
9Select a scan quality.
10If you want to make additional selections:
aClick Display Advanced Scan Settings.
bCustomize the scan settings.
cClick OK.
11Click Scan Now.
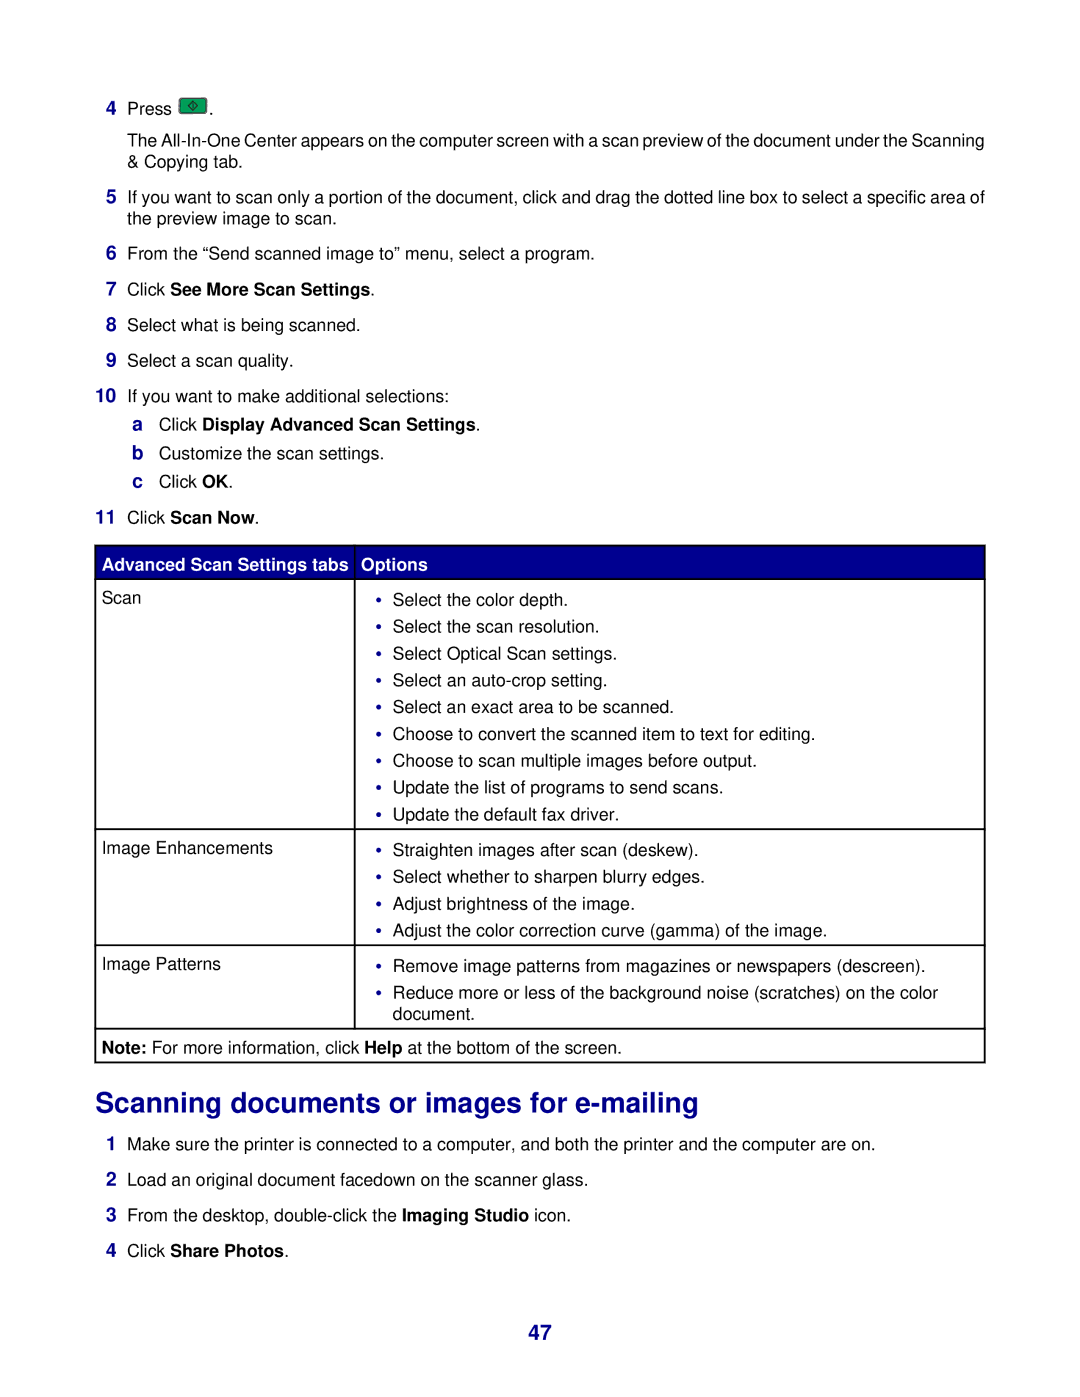
Advanced Scan Settings tabs Options
• Select the color depth.
•Select the scan resolution.
•Select Optical Scan settings.
•Select an
•Select an exact area to be scanned.
•Choose to convert the scanned item to text for editing.
•Choose to scan multiple images before output.
•Update the list of programs to send scans.
•Update the default fax driver.
• Straighten images after scan (deskew).
•Select whether to sharpen blurry edges.
•Adjust brightness of the image.
•Adjust the color correction curve (gamma) of the image.
• Remove image patterns from magazines or newspapers (descreen).
•Reduce more or less of the background noise (scratches) on the color document.
Note: For more information, click Help at the bottom of the screen.
Scanning documents or images for e-mailing
1Make sure the printer is connected to a computer, and both the printer and the computer are on.
2Load an original document facedown on the scanner glass.
3From the desktop,
4Click Share Photos.
47