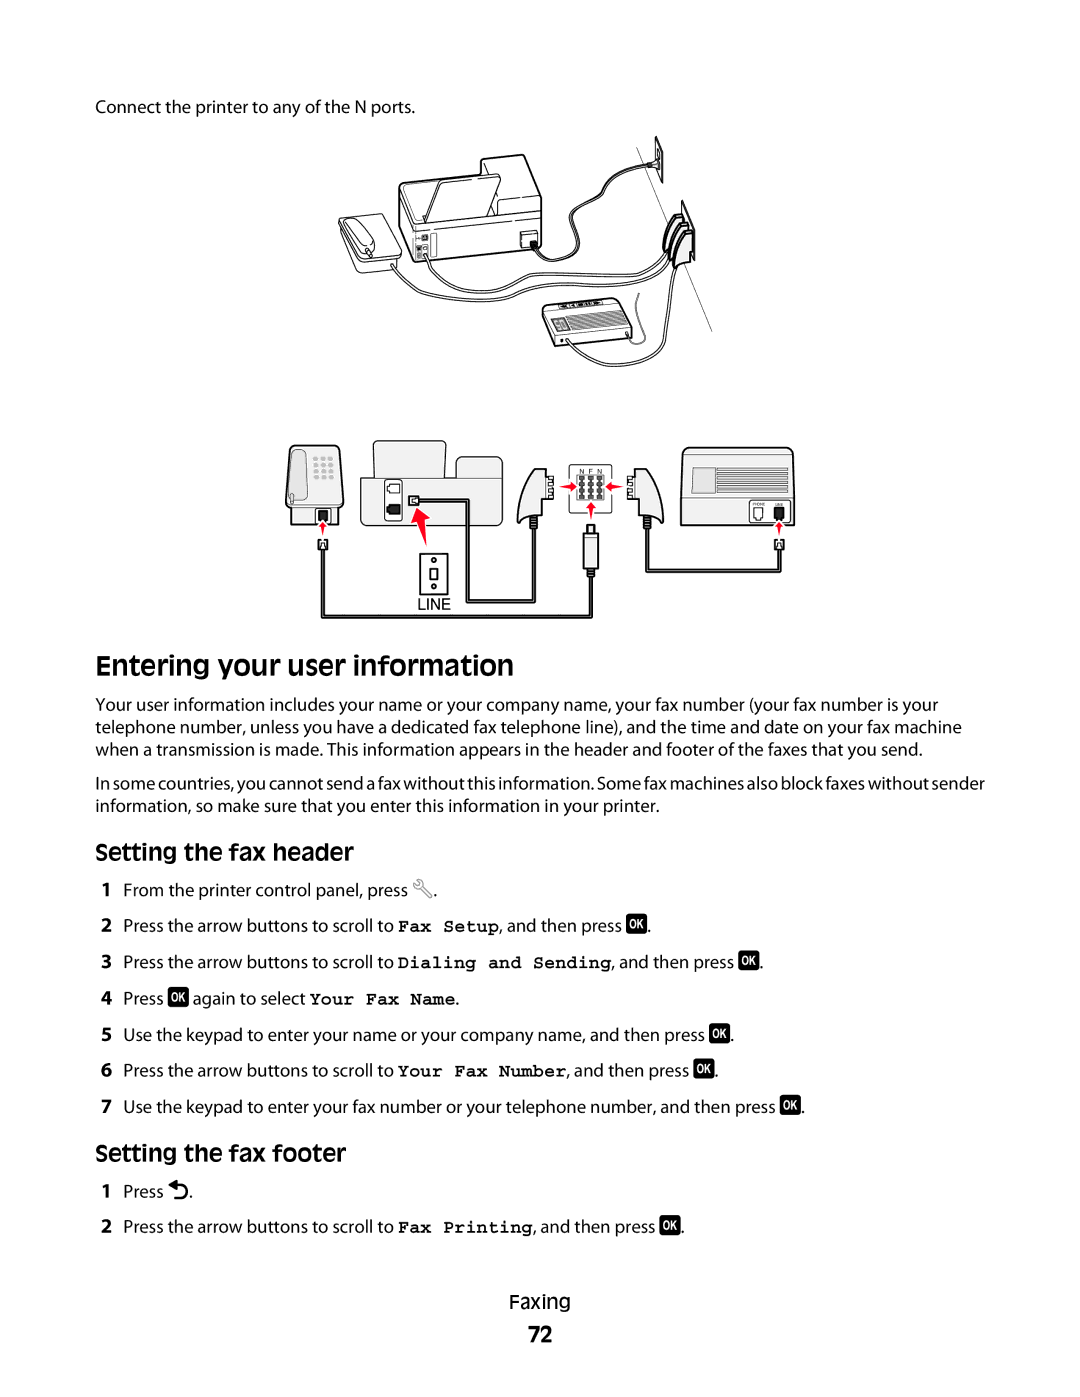
Connect the printer to any of the N ports.
EXT
LINE
N F N
PHONE | LINE |
|
|
Entering your user information
Your user information includes your name or your company name, your fax number (your fax number is your telephone number, unless you have a dedicated fax telephone line), and the time and date on your fax machine when a transmission is made. This information appears in the header and footer of the faxes that you send.
In some countries, you cannot send a fax without this information. Some fax machines also block faxes without sender information, so make sure that you enter this information in your printer.
Setting the fax header
1 From the printer control panel, press ![]() .
.
2 | Press the arrow buttons to scroll to Fax Setup, and then press . |
3 | Press the arrow buttons to scroll to Dialing and Sending, and then press . |
4 Press  again to select Your Fax Name.
5 Use the keypad to enter your name or your company name, and then press ![]() . 6 Press the arrow buttons to scroll to Your Fax Number, and then press
. 6 Press the arrow buttons to scroll to Your Fax Number, and then press ![]() .
.
7 Use the keypad to enter your fax number or your telephone number, and then press ![]() .
.
Setting the fax footer
1 Press ![]() .
.
2 Press the arrow buttons to scroll to Fax Printing, and then press ![]() .
.
Faxing
72