TROUBLE DIAGNOSIS
3-4. Practical Work For Heavy Repair
Items |
| Precautions |
|
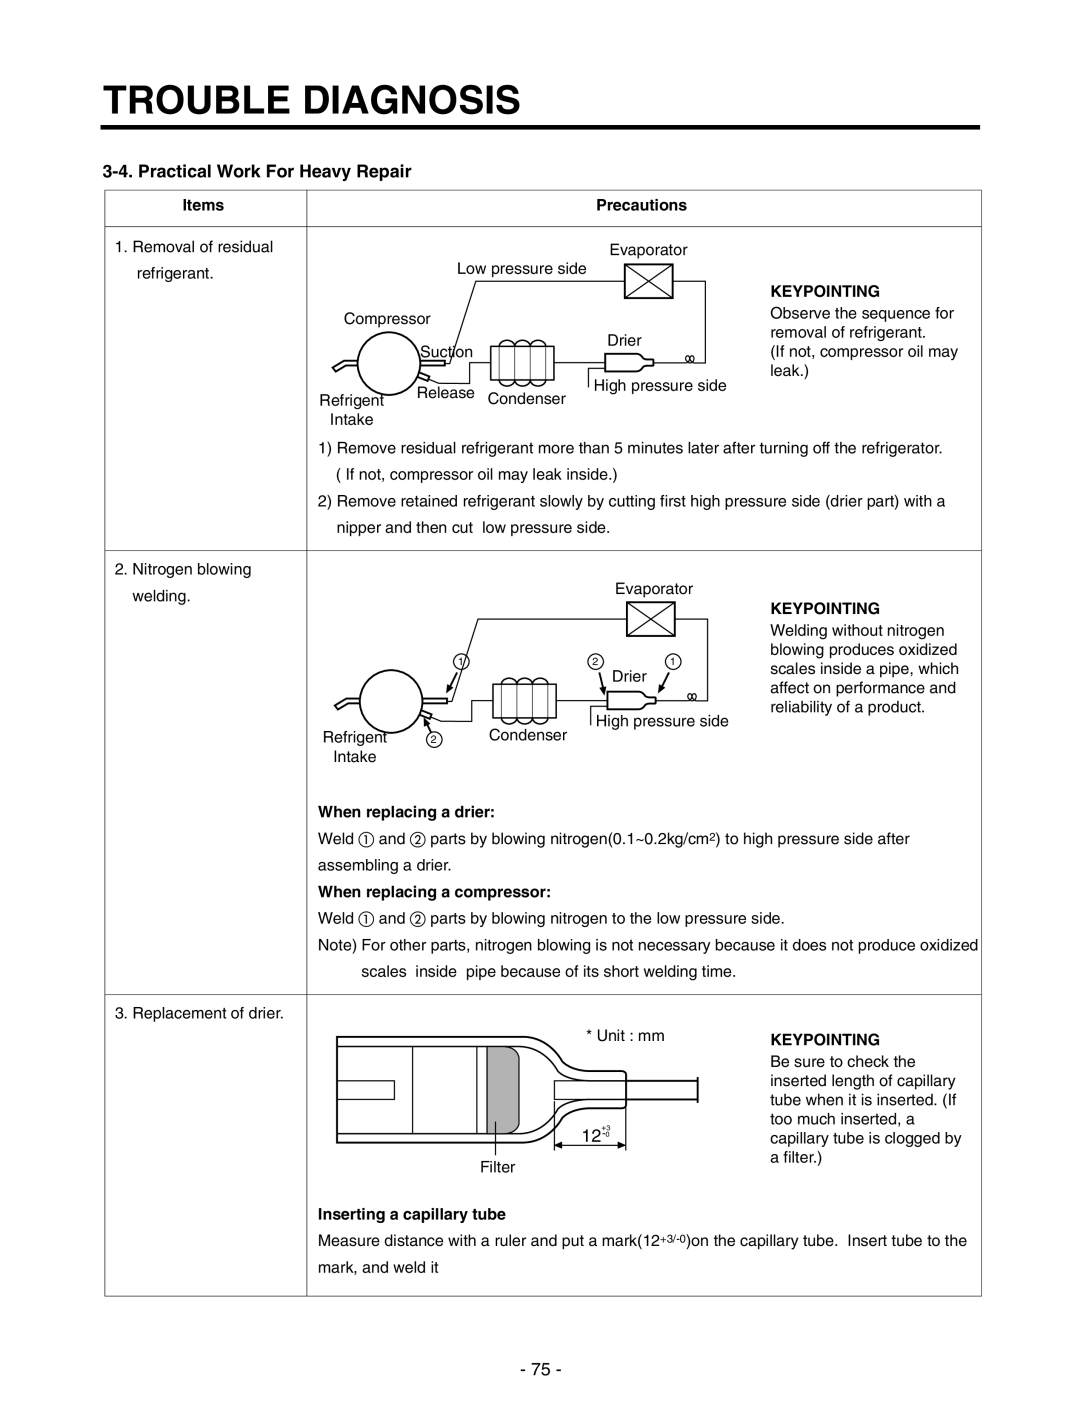
1. Removal of residual |
| Evaporator |
|
refrigerant. | Low pressure side |
| |
|
| KEYPOINTING | |
|
|
| |
Compressor |
| Observe the sequence for | |
| removal of refrigerant. | ||
|
| Drier | |
| Suction | (If not, compressor oil may | |
|
| ||
|
| High pressure side | leak.) |
Refrigent | Release |
| |
Condenser |
| ||
Intake |
|
|
|
1)Remove residual refrigerant more than 5 minutes later after turning off the refrigerator. ( If not, compressor oil may leak inside.)
2)Remove retained refrigerant slowly by cutting first high pressure side (drier part) with a nipper and then cut low pressure side.
2. Nitrogen blowing |
|
|
|
|
|
welding. |
|
|
| Evaporator |
|
|
|
|
| KEYPOINTING | |
|
|
|
|
| |
|
|
|
|
| Welding without nitrogen |
|
| 1 | 2 | 1 | blowing produces oxidized |
|
| scales inside a pipe, which | |||
|
|
|
| Drier | |
|
|
|
| affect on performance and | |
|
|
|
|
| |
|
|
| High pressure side | reliability of a product. | |
|
|
|
| ||
Refrigent | 2 | Condenser |
|
| |
Intake |
|
|
|
|
|
When replacing a drier: |
|
| |||
Weld | and | parts by blowing nitrogen(0.1~0.2kg/cm2) to high pressure side after | |||
assembling a drier. |
|
|
| ||
When replacing a compressor: |
|
| |||
Weld | and | parts by blowing nitrogen to the low pressure side. | |||
Note) For other parts, nitrogen blowing is not necessary because it does not produce oxidized
scales inside pipe because of its short welding time.
3. Replacement of drier.
|
|
|
| * Unit : mm |
| |||||
KEYPOINTING | ||||||||||
|
|
|
|
|
|
|
|
| Be sure to check the | |
|
|
|
|
|
|
|
|
| inserted length of capillary | |
|
|
|
|
|
|
|
|
| ||
|
|
|
|
|
|
|
|
| tube when it is inserted. (If | |
|
|
|
|
|
|
|
|
| ||
|
|
| +3 |
|
|
| too much inserted, a | |||
|
|
|
|
|
| |||||
|
|
|
|
|
| capillary tube is clogged by | ||||
|
|
|
|
|
|
|
|
| a filter.) | |
Filter | ||||||||||
| ||||||||||
Inserting a capillary tube
Measure distance with a ruler and put a
mark, and weld it
- 75 -