TOC
TOC
TROUBLESHOOTING & REPAIR |
FAN REMOVAL AND REPLACEMENT (continued)
PROCEDURE
1.Remove input power to
2.Remove carrying handle using a 4mm allen wrench.
3.Using a crescent wrench, carefully remove the plastic nut from around the pressure regulator located on the top of the machine.
4.Using a 7mm nut driver, remove the case wraparound.
5.Perform Capacitor Discharge
Procedure.
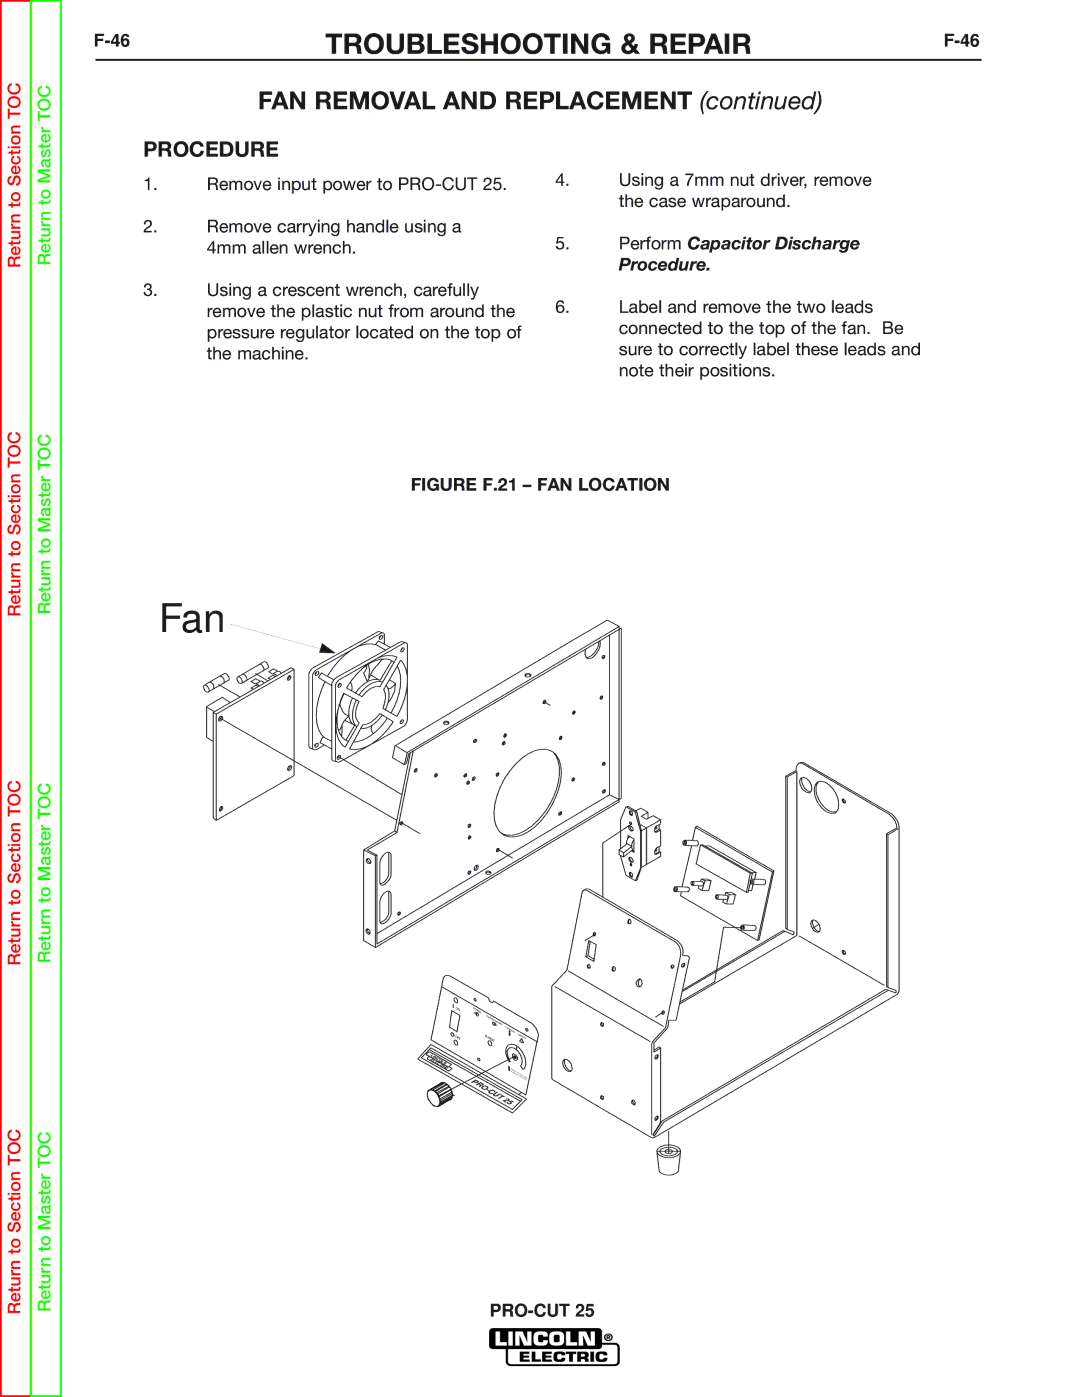
6.Label and remove the two leads connected to the top of the fan. Be sure to correctly label these leads and note their positions.
Return to Section TOC
Return to Section TOC
Return to Section TOC
Return to Master TOC
Return to Master TOC
Return to Master TOC
FIGURE F.21 – FAN LOCATION
Fan
|
|
| ON | PO |
|
|
|
|
|
| WER |
|
|
|
|
|
| GAS | PRESSURE |
|
|
|
|
|
| T | |
|
|
|
|
|
| HER |
|
|
|
|
|
| MAL |
|
|
| OFF | PUR | GE | SAFETY |
|
|
|
|
| ! | |
L |
|
|
|
|
|
|
IN | C |
|
|
|
|
|
E | OL |
|
|
|
| |
L |
|
|
|
|
| |
EC | N |
|
|
| ||
|
| TR | IC |
|
|
|
|
|
|
| PRO- |
|
|
|
|
|
| CUT | 25 | |
|
|
|
|
|
| |