Colour Balance Button
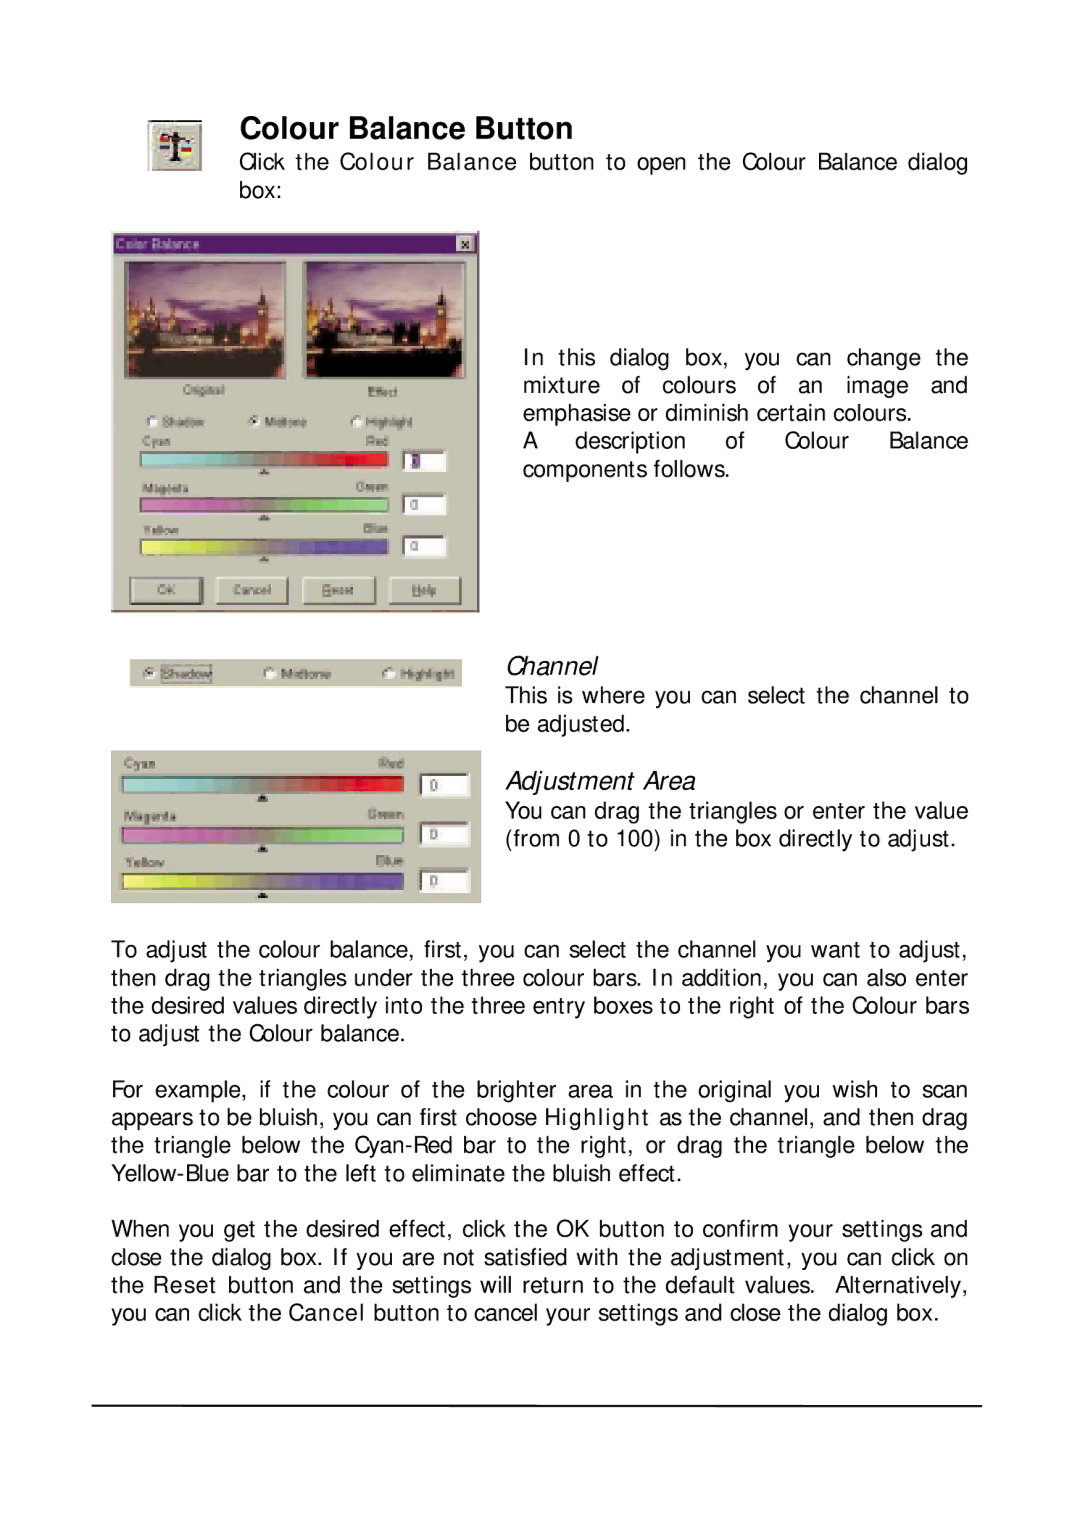
Click the Colour Balance button to open the Colour Balance dialog box:
In this dialog box, you can change the mixture of colours of an image and emphasise or diminish certain colours.
A description of Colour Balance components follows.
Channel
This is where you can select the channel to be adjusted.
Adjustment Area
You can drag the triangles or enter the value (from 0 to 100) in the box directly to adjust.
To adjust the colour balance, first, you can select the channel you want to adjust, then drag the triangles under the three colour bars. In addition, you can also enter the desired values directly into the three entry boxes to the right of the Colour bars to adjust the Colour balance.
For example, if the colour of the brighter area in the original you wish to scan appears to be bluish, you can first choose Highlight as the channel, and then drag the triangle below the
When you get the desired effect, click the OK button to confirm your settings and close the dialog box. If you are not satisfied with the adjustment, you can click on the Reset button and the settings will return to the default values. Alternatively, you can click the Cancel button to cancel your settings and close the dialog box.