|
| Chapter 10 |
|
|
|
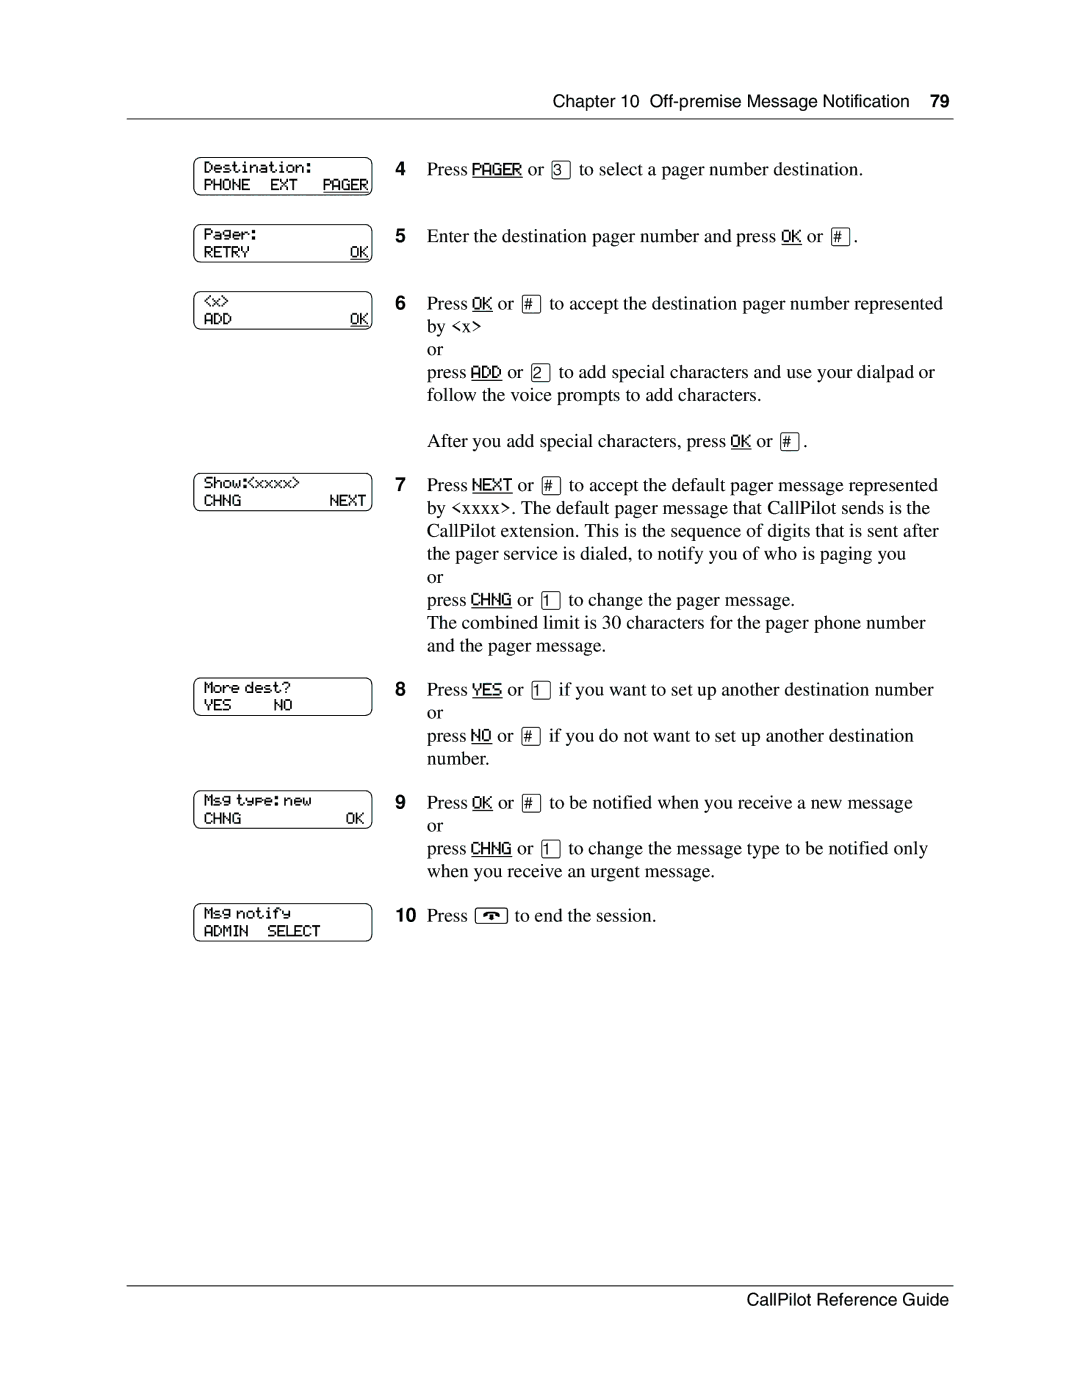
Destination: |
| 4 Press PAGER or ‹to select a pager number destination. |
PHONE EXT | PAGER |
|
Pager: |
| 5 Enter the destination pager number and press OK or £. |
RETRY | OK |
|
<x> |
| 6 Press OK or £to accept the destination pager number represented |
ADD | OK | by <x> |
|
| |
|
| or |
|
| press ADD or ¤to add special characters and use your dialpad or |
|
| follow the voice prompts to add characters. |
|
| After you add special characters, press OK or £. |
Show:<xxxx> |
| 7 Press NEXT or £to accept the default pager message represented |
CHNG | NEXT | by <xxxx>. The default pager message that CallPilot sends is the |
|
| |
|
| CallPilot extension. This is the sequence of digits that is sent after |
|
| the pager service is dialed, to notify you of who is paging you |
|
| or |
|
| press CHNG or ⁄to change the pager message. |
|
| The combined limit is 30 characters for the pager phone number |
|
| and the pager message. |
More dest?
YES NO
8Press YES or ⁄if you want to set up another destination number or
press NO or £if you do not want to set up another destination number.
Msg type: new | 9 | Press OK or £to be notified when you receive a new message |
CHNG | OK | or |
|
| |
|
| press CHNG or ⁄to change the message type to be notified only |
|
| when you receive an urgent message. |
Msg notify | 10 | Press ®to end the session. |
ADMIN SELECT |
|
|
CallPilot Reference Guide
