Basic operation of the setup menu
Screenshot 1
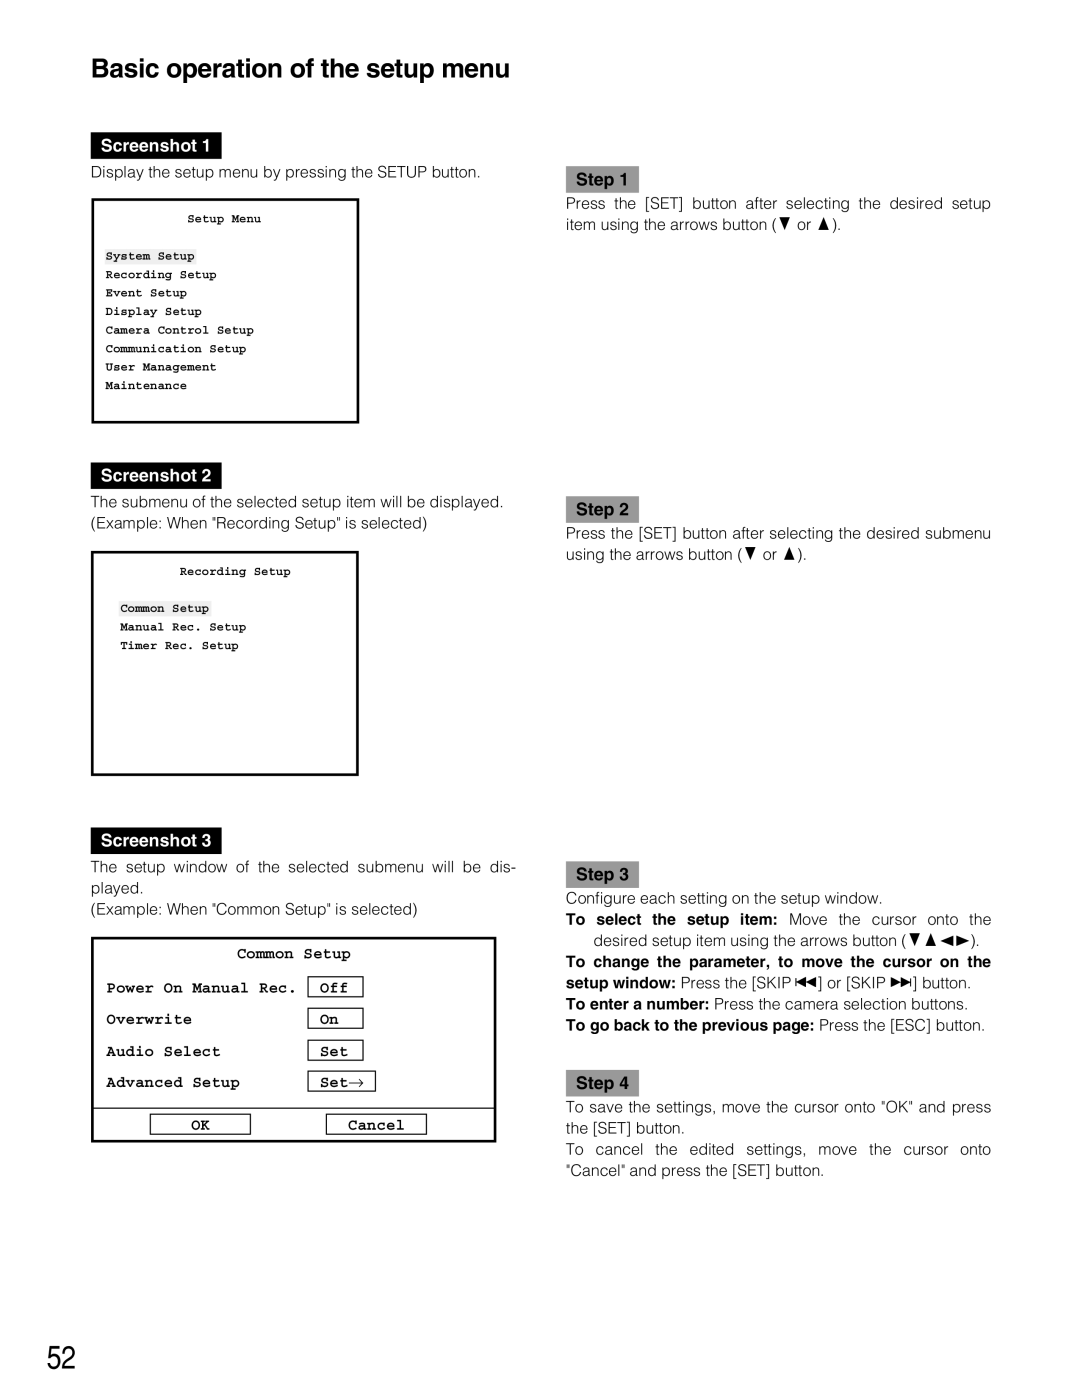
Display the setup menu by pressing the SETUP button.
Setup Menu
System Setup
Recording Setup
Event Setup
Display Setup
Camera Control Setup
Communication Setup
User Management
Maintenance
Step 1
Press the [SET] button after selecting the desired setup item using the arrows button (C or D).
Screenshot 2
The submenu of the selected setup item will be displayed. (Example: When "Recording Setup" is selected)
Recording Setup
Common Setup
Manual Rec. Setup
Timer Rec. Setup
Screenshot 3
The setup window of the selected submenu will be dis- played.
(Example: When "Common Setup" is selected)
Common Setup
Power | On | Manual Rec. | Off |
|
|
| |||
Overwrite |
|
|
|
| |||||
| On |
|
|
| |||||
Audio | Select |
|
|
|
| ||||
| Set |
|
|
| |||||
|
|
|
|
|
| ||||
Advanced | Setup |
| Set→ |
|
| ||||
|
|
|
|
|
|
|
|
|
|
|
|
|
|
|
|
|
|
|
|
|
|
| OK |
|
| Cancel |
| ||
Step 2
Press the [SET] button after selecting the desired submenu using the arrows button (C or D).
Step 3
Configure each setting on the setup window.
To select the setup item: Move the cursor onto the desired setup item using the arrows button (CDAB).
To change the parameter, to move the cursor on the setup window: Press the [SKIP s] or [SKIP d] button. To enter a number: Press the camera selection buttons. To go back to the previous page: Press the [ESC] button.
Step 4
To save the settings, move the cursor onto "OK" and press the [SET] button.
To cancel the edited settings, move the cursor onto "Cancel" and press the [SET] button.
52
