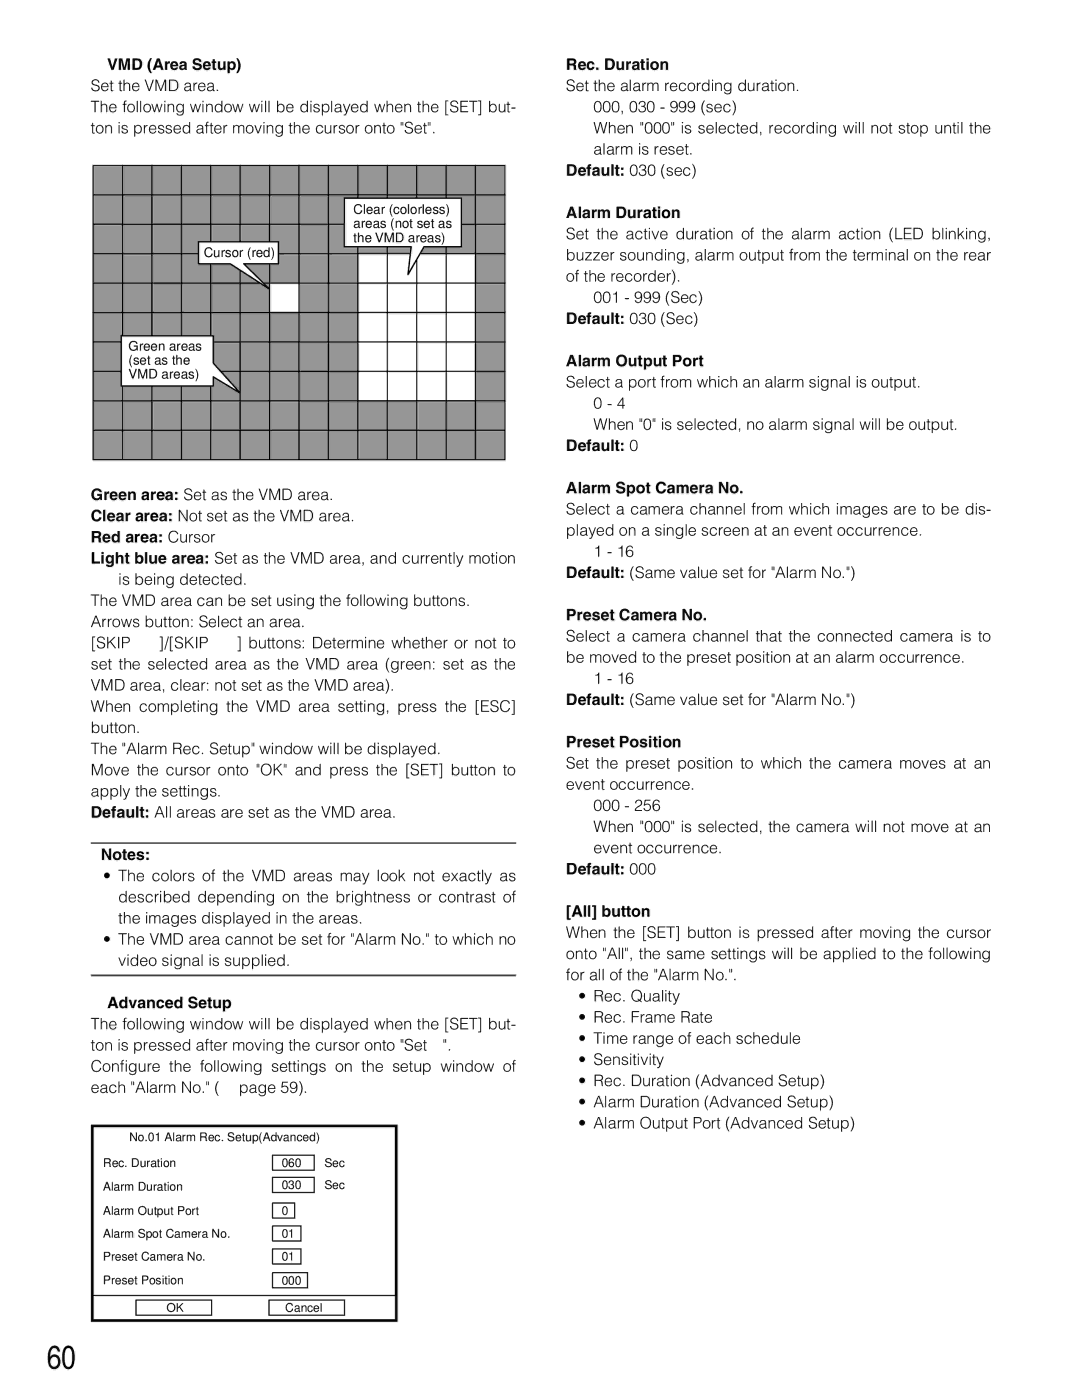
■VMD (Area Setup) Set the VMD area.
The following window will be displayed when the [SET] but- ton is pressed after moving the cursor onto "Set".
Clear (colorless) areas (not set as the VMD areas)
Cursor (red) |
Green areas |
(set as the |
VMD areas) |
Green area: Set as the VMD area.
Clear area: Not set as the VMD area.
Red area: Cursor
Light blue area: Set as the VMD area, and currently motion is being detected.
The VMD area can be set using the following buttons. Arrows button: Select an area.
[SKIP d]/[SKIP s] buttons: Determine whether or not to
set the selected area as the VMD area (green: set as the
VMD area, clear: not set as the VMD area).
When completing the VMD area setting, press the [ESC] button.
The "Alarm Rec. Setup" window will be displayed.
Move the cursor onto "OK" and press the [SET] button to apply the settings.
Default: All areas are set as the VMD area.
Notes:
•The colors of the VMD areas may look not exactly as described depending on the brightness or contrast of the images displayed in the areas.
•The VMD area cannot be set for "Alarm No." to which no video signal is supplied.
■Advanced Setup
The following window will be displayed when the [SET] but- ton is pressed after moving the cursor onto "Set→". Configure the following settings on the setup window of each "Alarm No." (☞ page 59).
No.01 Alarm Rec. Setup(Advanced)
Rec. Duration |
| 060 |
| Sec | |||||
|
|
|
|
|
| ||||
Alarm Duration |
| 030 |
| Sec | |||||
Alarm Output Port |
|
|
|
|
|
| |||
| 0 |
|
|
|
|
| |||
Alarm Spot Camera No. |
|
|
|
|
| ||||
| 01 |
|
|
|
| ||||
Preset Camera No. |
|
|
|
|
| ||||
| 01 |
|
|
|
| ||||
Preset Position |
|
|
|
| |||||
| 000 |
|
|
| |||||
|
|
|
|
|
|
|
|
|
|
|
|
|
|
|
|
|
|
|
|
| OK |
|
| Cancel |
| ||||
Rec. Duration
Set the alarm recording duration. 000, 030 - 999 (sec)
When "000" is selected, recording will not stop until the alarm is reset.
Default: 030 (sec)
Alarm Duration
Set the active duration of the alarm action (LED blinking, buzzer sounding, alarm output from the terminal on the rear of the recorder).
001 - 999 (Sec) Default: 030 (Sec)
Alarm Output Port
Select a port from which an alarm signal is output. 0 - 4
When "0" is selected, no alarm signal will be output. Default: 0
Alarm Spot Camera No.
Select a camera channel from which images are to be dis- played on a single screen at an event occurrence.
1 - 16
Default: (Same value set for "Alarm No.")
Preset Camera No.
Select a camera channel that the connected camera is to be moved to the preset position at an alarm occurrence.
1 - 16
Default: (Same value set for "Alarm No.")
Preset Position
Set the preset position to which the camera moves at an event occurrence.
000 - 256
When "000" is selected, the camera will not move at an event occurrence.
Default: 000
[All] button
When the [SET] button is pressed after moving the cursor onto "All", the same settings will be applied to the following for all of the "Alarm No.".
•Rec. Quality
•Rec. Frame Rate
•Time range of each schedule
•Sensitivity
•Rec. Duration (Advanced Setup)
•Alarm Duration (Advanced Setup)
•Alarm Output Port (Advanced Setup)
60
