| Getting started |
Canceling the | When a |
enlarging (scanning | 800 x 600 dots (for example, 640x480 dots) is input, the LCD projector |
line conversion) | automatically enlarges the image to 800 x 600 dots. This may cause picture quality |
function | degradation. For a better image, select EXPANSION (VGA) or (NTSC):OFF by |
| the following procedure. |
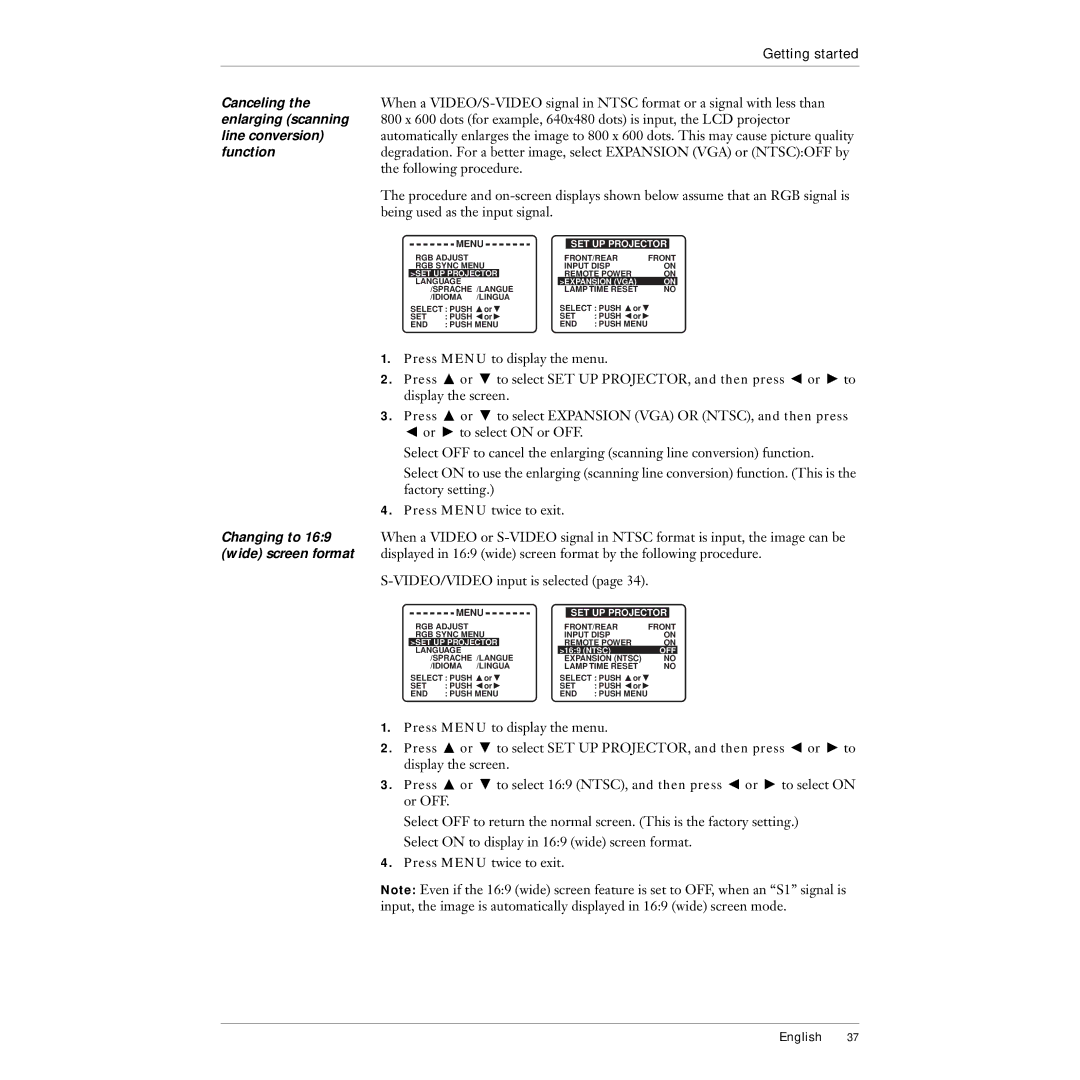
| The procedure and |
| being used as the input signal. |
| MENU |
| SET UP PROJECTOR |
| |||
RGB ADJUST | FRONT/REAR | FRONT | |||||
RGB SYNC MENU | INPUT DISP | ON | |||||
>SET UP PROJECTOR |
| REMOTE POWER | ON | ||||
LANGUAGE |
| >EXPANSION (VGA) | ON | ||||
| /SPRACHE /LANGUE | LAMP TIME RESET | NO | ||||
| /IDIOMA /LINGUA |
|
|
|
|
| |
SELECT : PUSH ZorX | SELECT : PUSH ZorX | ||||||
SET | : PUSH CorV | SET | : PUSH CorV | ||||
END | : PUSH MENU | END | : PUSH MENU |
|
| ||
1.Press MENU to display the menu.
2.Press Z or X to select SET UP PROJECTOR, and then press C or V to display the screen.
3.Press Z or X to select EXPANSION (VGA) OR (NTSC), and then press C or V to select ON or OFF.
Select OFF to cancel the enlarging (scanning line conversion) function.
Select ON to use the enlarging (scanning line conversion) function. (This is the factory setting.)
4.Press MENU twice to exit.
Changing to 16:9 | When a VIDEO or |
(wide) screen format | displayed in 16:9 (wide) screen format by the following procedure. |
|
|
| MENU |
| SET UP PROJECTOR |
| |||
RGB ADJUST | FRONT/REAR | FRONT | |||||
RGB SYNC MENU | INPUT DISP | ON | |||||
>SET UP PROJECTOR |
| REMOTE POWER | ON | ||||
LANGUAGE |
| >16:9 (NTSC) | OFF | ||||
| /SPRACHE /LANGUE | EXPANSION (NTSC) | NO | ||||
| /IDIOMA /LINGUA | LAMP TIME RESET | NO | ||||
SELECT : PUSH ZorX | SELECT : PUSH ZorX | ||||||
SET | : PUSH CorV | SET | : PUSH CorV | ||||
END | : PUSH MENU | END | : PUSH MENU |
|
| ||
1.Press MENU to display the menu.
2.Press Z or X to select SET UP PROJECTOR, and then press C or V to display the screen.
3.Press Z or X to select 16:9 (NTSC), and then press C or V to select ON or OFF.
Select OFF to return the normal screen. (This is the factory setting.) Select ON to display in 16:9 (wide) screen format.
4.Press MENU twice to exit.
Note: Even if the 16:9 (wide) screen feature is set to OFF, when an “S1” signal is input, the image is automatically displayed in 16:9 (wide) screen mode.
English 37
