Getting started
Basic LCD projector operation
Before you begin, make sure…
•You have read Important safeguards. (See page 7)
•All connections are made. (See page 20)
•The LCD projector is positioned properly. (See page 31)
•The LCD projector is plugged in.
•The lens cap is removed.
c
a d
| VOLUME |
| MODE |
T | S |
A |
|
N |
|
D | |
A |
|
R | |
D | |
| MENU |
| INPUT |
| b |
| STATUS CODE |
POWER FREEZE SHUTTER
MUTE | VOLUME |
MODE | MENU INPUT |
STANDARD |
LIGHT POINTER |
g
f e
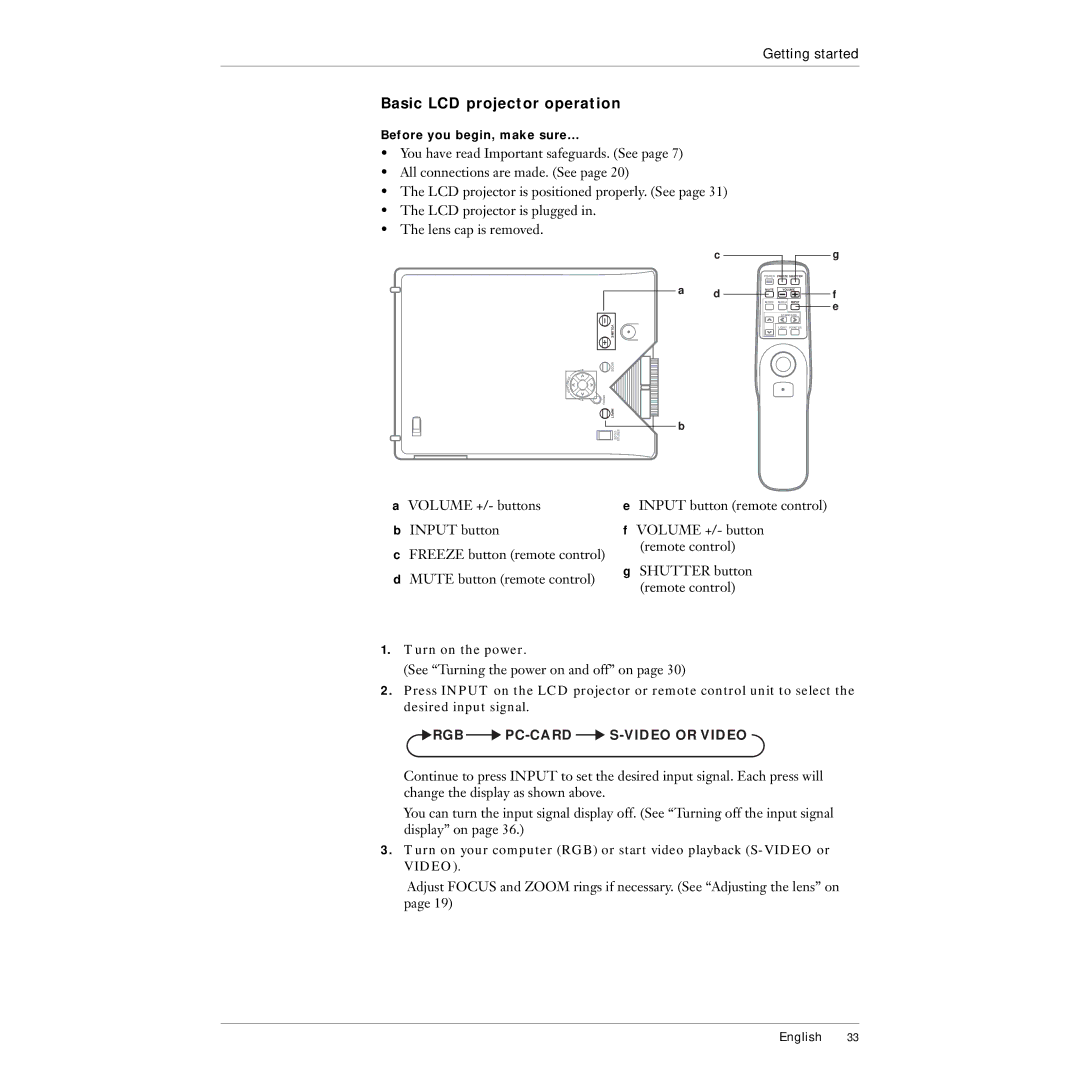
aVOLUME +/- buttons
bINPUT button
cFREEZE button (remote control)
dMUTE button (remote control)
1.Turn on the power.
eINPUT button (remote control)
fVOLUME +/- button
(remote control)
gSHUTTER button (remote control)
(See “Turning the power on and off” on page 30)
2.Press INPUT on the LCD projector or remote control unit to select the desired input signal.
 RGB
RGB 
PC-CARD 
S-VIDEO OR VIDEO
Continue to press INPUT to set the desired input signal. Each press will change the display as shown above.
You can turn the input signal display off. (See “Turning off the input signal display” on page 36.)
3.Turn on your computer (RGB) or start video playback
Adjust FOCUS and ZOOM rings if necessary. (See “Adjusting the lens” on page 19)
English 33