Assembly Steps
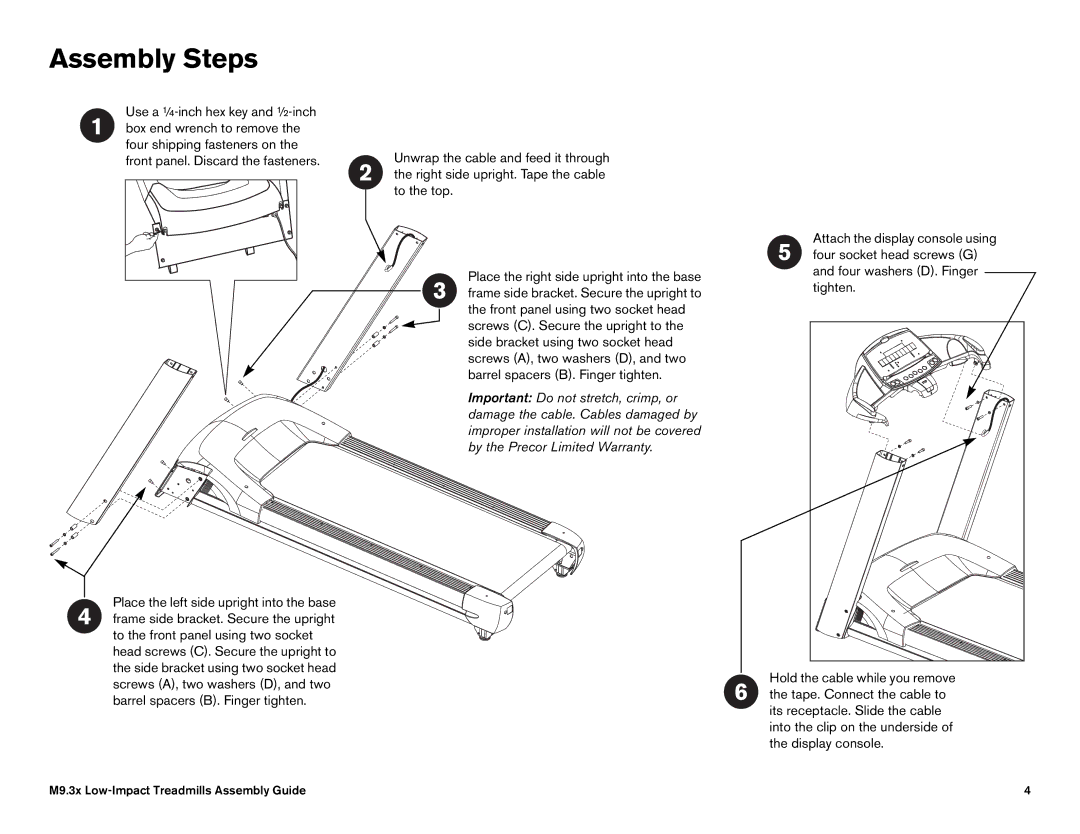
Use a
Unwrap the cable and feed it through the right side upright. Tape the cable to the top.
Place the right side upright into the base frame side bracket. Secure the upright to the front panel using two socket head screws (C). Secure the upright to the side bracket using two socket head screws (A), two washers (D), and two barrel spacers (B). Finger tighten.
Important: Do not stretch, crimp, or damage the cable. Cables damaged by improper installation will not be covered by the Precor Limited Warranty.
Attach the display console using four socket head screws (G) and four washers (D). Finger tighten.
Place the left side upright into the base frame side bracket. Secure the upright to the front panel using two socket head screws (C). Secure the upright to the side bracket using two socket head screws (A), two washers (D), and two barrel spacers (B). Finger tighten.
Hold the cable while you remove the tape. Connect the cable to its receptacle. Slide the cable into the clip on the underside of the display console.
M9.3x | 4 |