OPERATING INSTRUCTIONS
OPERATION
MATCHING REMOTE
HANDSET & CONTROL
BOX ID CODE
The Remote Control Handset has a set of unique ID codes that is
To ensure the remote control is matched to the receiver correctly, please follow the steps below:
1. | Ensure that the Remote Control and the |
| |
| both in the OFF position. |
2. | Ensure that the pilot is lit and the pilot |
| control knob is in the ON position on the |
| appliance. |
3. | Install the 2 x AAA alkaline batteries into the |
| Remote Control. |
4. | Unplug and |
OPERATING
INSTRUCTIONS
1)Read and understand these instructions before operating this appliance.
2)Check to see that all wiring is correct and enclosed to prevent possible shock.
3)Check to ensure there are no gas leaks.
4)Make sure the glass in the door frame is properly positioned. Never operate the appliance with the glass removed.
5)Verify that the venting and cap are unobstructed.
6)Ensure that the brick panels are installed.
7)Verify log placement. If the pilot cannot be seen when lighting the unit, the logs have been incorrectly positioned.
8)The unit should never be turned off, and on again without a minimum of a 60 second wait.
1)Push in gas control knob slightly and turn clockwise to “OFF”. Knob cannot be turned from “PILOT” to “OFF” unless knob is pushed in slightly. Do not force.
2)Wait five (5) minutes to clear out any gas.
3)Turn knob on gas control counterclockwise to “PILOT”.
4)Push in control knob all the way and hold in until the pilot lights up. Continue to hold the control knob in for about 20 seconds after the pilot is lit. Release knob and it will pop back up. Pilot should remain lit. If it goes out, repeat steps 1) to 4). If knob does not pop up when released, stop and immediately call your service technician or gas supplier. If the pilot will not stay lit after several tries, turn the gas control knob to “OFF” and call your service technician or gas supplier.
5)Turn gas control knob
6)Turn the unit on.
NOTE: If using the remote control refer to the FireWizard manual for instructions.
| power cord is located on the left hand side |
| of the appliance and will be plugged into the |
| receptacle. |
5. | Switch the |
| pliance to the REMOTE position. |
6. | Press and hold the PROG and FAN buttons |
| simultaneously for up to 20 seconds. During |
| this time, the remote will display LC while it |
| is transmitting codes to the receiver. Once |
| it is successfully transmitted, one will hear |
| the solenoid click and the burners will come |
| on. If is does not work the first time, repeat |
| steps 1 - 6. |
7. | Release both the PROG and FAN buttons. |
| The remote will revert back to normal, but |
| the burner will still be on. |
8. | Press the ON/OFF button on the remote |
| control 2 times to turn the burner off. |
9. | The remote control is now programmed to |
| the receiver and the appliance can now be |
| operated with it. |
The control box will only learn the Remote ID codes during the first 30 seconds after power is applied and will ignore this special command from the Remote after the first 30 seconds.
NOTE: This must only be performed by a quali- fied installer.
LIGHTING
PROCEDURE
IMPORTANT
To ignite or reignite the pilot,
you must first release the
tension springs below the door.
Only when the pilot holds, without pressure being applied to the control knob, reapply the tension springs to the door. The unit must not be operated with the tension springs unattached.
IMPORTANT Gas on/off knob cannot be turned from "PILOT" to "OFF" unless it is partially depressed.
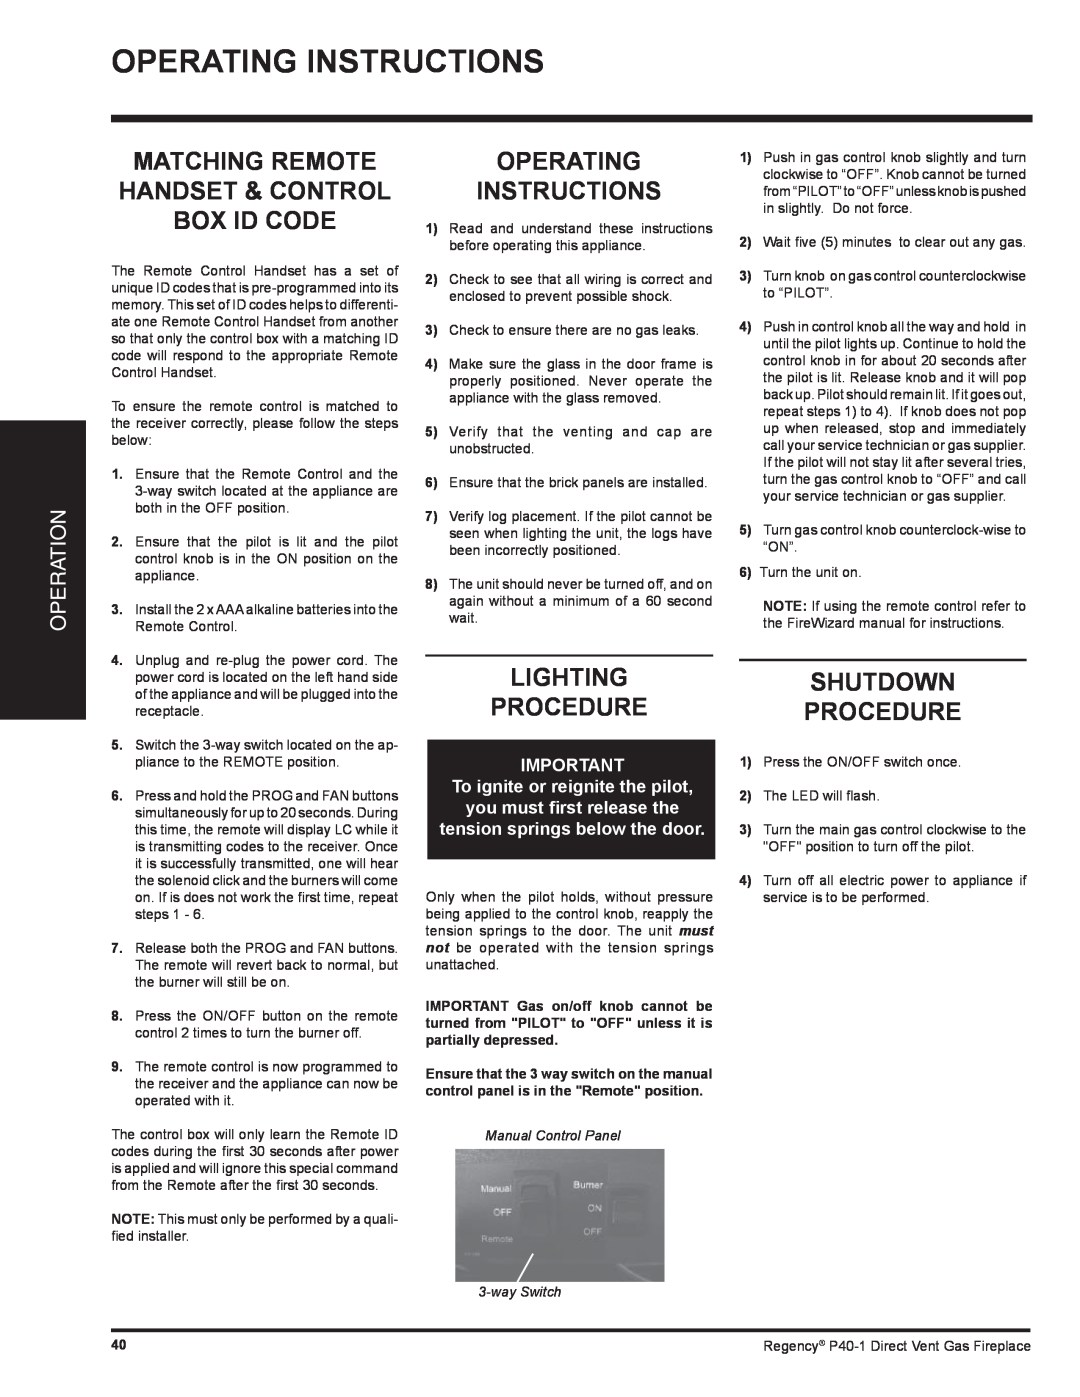
Ensure that the 3 way switch on the manual control panel is in the "Remote" position.
Manual Control Panel
SHUTDOWN
PROCEDURE
1)Press the ON/OFF switch once.
2)The LED will flash.
3)Turn the main gas control clockwise to the "OFF" position to turn off the pilot.
4)Turn off all electric power to appliance if service is to be performed.
3-way Switch
40 | Regency® |