NaviTrack® II
![]() Tracing line (Lower Antenna Signal) – shows the apparent direction of the field as detected at the lower antenna.
Tracing line (Lower Antenna Signal) – shows the apparent direction of the field as detected at the lower antenna.
Display Elements: Passive Trace Mode
The screen elements in Passive Trace Mode are the same as those seen in Active Line Trace mode.
NOTE! Mode is determined by the type of target source (Sonde or Line). For example, selecting the 512 Hz frequency from the Sonde mode section of the frequency menu puts the
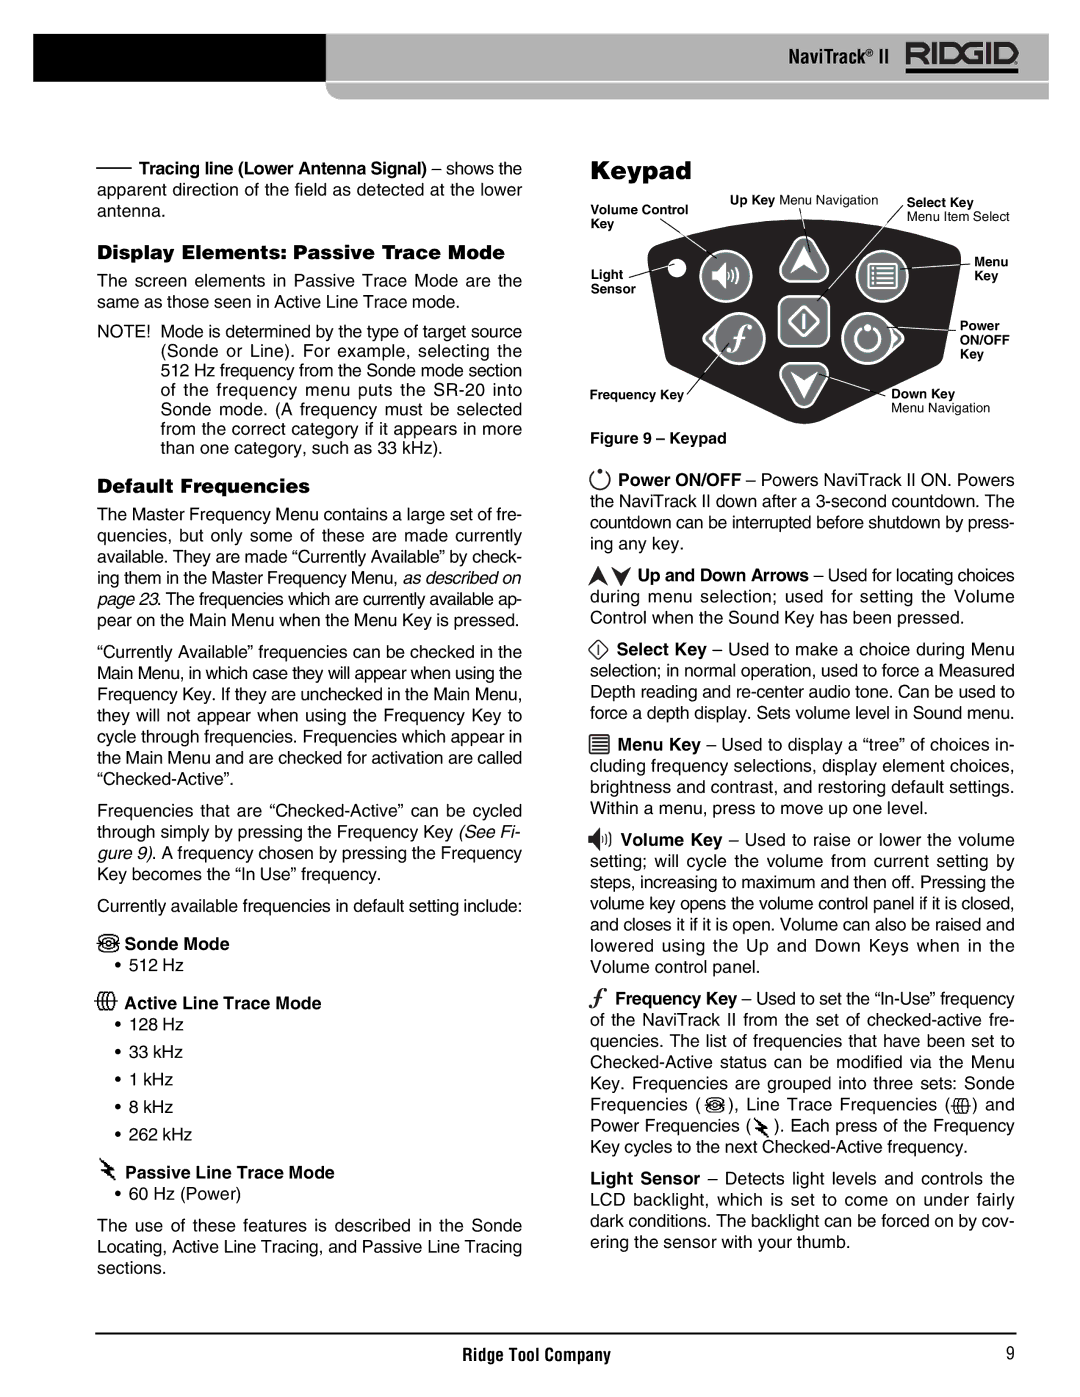
Keypad
Volume Control Key
Light ![]() Sensor
Sensor
Frequency Key
Up Key Menu Navigation | Select Key |
| Menu Item Select |
Menu
Key
![]() Power
Power
ON/OFF
Key
![]()
![]() Down Key
Down Key
Menu Navigation
than one category, such as 33 kHz).
Default Frequencies
The Master Frequency Menu contains a large set of fre- quencies, but only some of these are made currently available. They are made “Currently Available” by check- ing them in the Master Frequency Menu, as described on page 23. The frequencies which are currently available ap- pear on the Main Menu when the Menu Key is pressed.
“Currently Available” frequencies can be checked in the Main Menu, in which case they will appear when using the Frequency Key. If they are unchecked in the Main Menu, they will not appear when using the Frequency Key to cycle through frequencies. Frequencies which appear in the Main Menu and are checked for activation are called
Frequencies that are
Currently available frequencies in default setting include:
![]() Sonde Mode
Sonde Mode
• 512 Hz
![]() Active Line Trace Mode
Active Line Trace Mode
•128 Hz
•33 kHz
•1 kHz
•8 kHz
•262 kHz
 Passive Line Trace Mode
• 60 Hz (Power)
The use of these features is described in the Sonde Locating, Active Line Tracing, and Passive Line Tracing sections.
Figure 9 – Keypad
![]() Power ON/OFF – Powers NaviTrack II ON. Powers the NaviTrack II down after a
Power ON/OFF – Powers NaviTrack II ON. Powers the NaviTrack II down after a
![]()
![]() Up and Down Arrows – Used for locating choices during menu selection; used for setting the Volume Control when the Sound Key has been pressed.
Up and Down Arrows – Used for locating choices during menu selection; used for setting the Volume Control when the Sound Key has been pressed.
![]() Select Key – Used to make a choice during Menu selection; in normal operation, used to force a Measured Depth reading and
Select Key – Used to make a choice during Menu selection; in normal operation, used to force a Measured Depth reading and
![]() Menu Key – Used to display a “tree” of choices in- cluding frequency selections, display element choices, brightness and contrast, and restoring default settings. Within a menu, press to move up one level.
Menu Key – Used to display a “tree” of choices in- cluding frequency selections, display element choices, brightness and contrast, and restoring default settings. Within a menu, press to move up one level.
![]()
![]()
![]()
![]() Volume Key – Used to raise or lower the volume setting; will cycle the volume from current setting by steps, increasing to maximum and then off. Pressing the volume key opens the volume control panel if it is closed, and closes it if it is open. Volume can also be raised and lowered using the Up and Down Keys when in the Volume control panel.
Volume Key – Used to raise or lower the volume setting; will cycle the volume from current setting by steps, increasing to maximum and then off. Pressing the volume key opens the volume control panel if it is closed, and closes it if it is open. Volume can also be raised and lowered using the Up and Down Keys when in the Volume control panel.
![]() Frequency Key – Used to set the
Frequency Key – Used to set the ![]() ), Line Trace Frequencies (
), Line Trace Frequencies (![]() ) and Power Frequencies (
) and Power Frequencies (![]() ). Each press of the Frequency Key cycles to the next
). Each press of the Frequency Key cycles to the next
Light Sensor – Detects light levels and controls the LCD backlight, which is set to come on under fairly dark conditions. The backlight can be forced on by cov- ering the sensor with your thumb.
Ridge Tool Company | 9 |