Operation
|
|
|
|
|
|
|
|
|
|
|
|
| Contrast: Refer to Contrast on page 55. |
|
|
|
|
|
|
|
|
|
|
|
|
| Brightness: Refer to Brightness on page 54. |
|
|
|
|
|
|
|
|
|
|
|
|
| Color: Refer to Color Saturation on page 55. |
|
|
|
|
|
|
|
|
|
|
|
|
| Tint: Refer to Tint on page 56. |
|
|
|
|
|
|
|
|
|
|
|
|
| Sharpness: Refer to Sharpness on page 57. |
|
|
|
|
|
|
|
|
|
|
|
|
| Color Temp.: To adjust the color temperature, select Color Temp. from the Picture |
|
|
|
|
|
|
|
|
|
|
|
|
| Adjust menu. (Color temperature defines the “color of gray.”) Press or to select |
|
|
|
|
|
|
|
|
|
|
|
|
| 5500, 6500, 7500, 8500, 9300 or 10500. In most cases, 6500 or 7500 will produce the |
|
|
|
|
|
|
|
|
|
|
|
|
| most realistic colors. Higher settings produce a “bluer” picture; lower ones cause the |
|
|
|
|
|
|
|
|
|
|
|
|
| image to appear more red. |
|
|
|
|
|
|
|
|
|
|
|
|
| White Balance: Select White Balance from the Picture Adjust menu to choose a white |
|
|
|
|
|
|
|
|
|
|
|
|
| balance preset (or “gamma curve”) to store in the |
|
|
|
|
|
|
|
|
|
|
|
|
| more information on white balance presets, refer to White Balance on page 70. |
|
|
|
|
|
|
|
|
|
|
|
|
| RVR: Iris: Select RVR: Iris from the Picture Adjust menu to increase or decrease the |
|
|
|
|
|
|
|
|
|
|
|
|
| Reflectance Volume Regulation setting. RVR lets you control the aperture or iris size (the |
|
|
|
|
|
|
|
|
|
|
|
|
| physical opening through the lens; similar to an |
|
|
|
|
|
|
|
|
|
|
|
|
| to optimize brightness and contrast according to the amount of ambient light in the |
|
|
|
|
|
|
|
|
|
|
|
|
| viewing area. |
|
|
|
|
|
|
|
|
|
|
|
|
| Select High Brightness or Theater for rooms with lots of ambient light. Select CRT |
|
|
|
|
|
|
|
|
|
|
|
|
| Emulation for more |
|
|
|
|
|
|
|
|
|
|
|
|
| Lamp Power: Select Lamp Power from the Picture Adjust menu to adjust the lamp |
|
|
|
|
|
|
|
|
|
|
|
|
| output level. You can choose to run the lamp as bright as possible (220W; this is the |
|
|
|
|
|
|
|
|
|
|
|
|
| default setting) or you can choose the lower setting (180W). Generally, lower lamp output |
|
|
|
|
|
|
|
|
|
|
|
|
| can prolong the life of the lamp, but decreases brightness. |
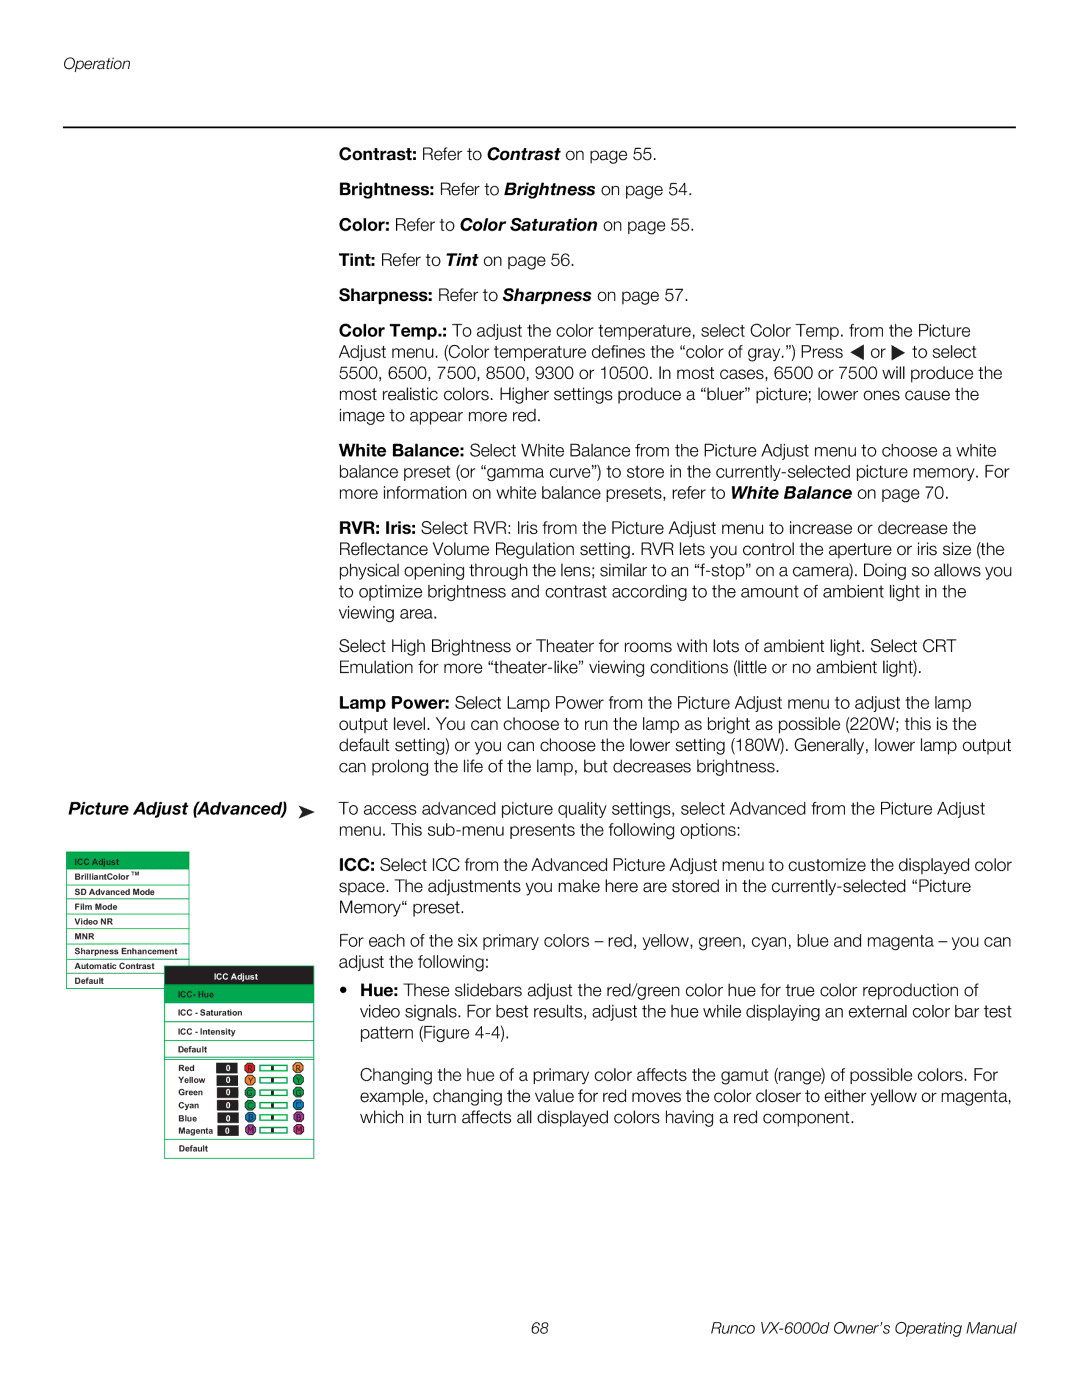
Picture Adjust (Advanced) | ➤ | To access advanced picture quality settings, select Advanced from the Picture Adjust | |||||||||||
|
|
|
|
|
|
|
|
|
|
|
|
| menu. This |
|
|
|
|
|
|
|
|
|
|
|
|
| ICC: Select ICC from the Advanced Picture Adjust menu to customize the displayed color |
ICC Adjust |
|
|
|
|
|
|
|
|
|
|
| ||
|
|
|
|
|
|
|
|
|
|
|
| ||
BrilliantColor TM |
|
|
|
|
|
|
|
|
|
|
| space. The adjustments you make here are stored in the | |
SD Advanced Mode |
|
|
|
|
|
|
|
|
|
|
| ||
Film Mode |
|
|
|
|
|
|
|
|
|
|
| Memory“ preset. | |
Video NR |
|
|
|
|
|
|
|
|
|
|
|
| |
MNR |
|
|
|
|
|
|
|
|
|
|
| For each of the six primary colors – red, yellow, green, cyan, blue and magenta – you can | |
Sharpness Enhancement |
|
|
|
|
|
|
|
|
|
|
| ||
|
|
|
|
|
|
|
|
|
|
| adjust the following: | ||
Automatic Contrast |
|
|
|
|
|
|
|
|
|
|
|
| |
|
| ICC Adjust |
|
| |||||||||
Default |
|
|
|
| • Hue: These slidebars adjust the red/green color hue for true color reproduction of | ||||||||
| ICC- Hue |
|
|
|
| ||||||||
| ICC - Saturation |
|
|
|
| video signals. For best results, adjust the hue while displaying an external color bar test | |||||||
| ICC - Intensity |
|
|
|
| pattern (Figure | |||||||
| Default |
|
|
|
|
|
|
|
|
|
|
| |
|
|
|
|
|
|
|
|
|
|
|
|
| |
| Red |
|
|
|
|
|
| R |
| R |
|
| |
| 0 |
|
| Changing the hue of a primary color affects the gamut (range) of possible colors. For | |||||||||
| Yellow |
|
|
|
|
| Y |
| Y |
| |||
| 0 |
|
| ||||||||||
|
|
|
|
|
| ||||||||
| Green |
|
|
|
| G |
| G |
| example, changing the value for red moves the color closer to either yellow or magenta, | |||
| 0 |
|
| ||||||||||
|
|
|
|
|
|
|
|
| C |
| C |
| |
| Cyan |
|
|
| 0 |
|
|
| |||||
|
|
|
| B |
| B |
| which in turn affects all displayed colors having a red component. | |||||
| Blue |
| 0 |
|
| ||||||||
|
|
|
|
| |||||||||
|
|
| M |
| M |
| |||||||
| Magenta |
|
|
|
| 0 |
|
|
|
| |||
|
|
|
|
|
|
|
|
| |||||
| Default |
|
|
|
|
|
|
|
|
|
|
| |
|
|
|
|
|
|
|
|
|
|
|
|
|
|
68 | Runco |