Operation
Table
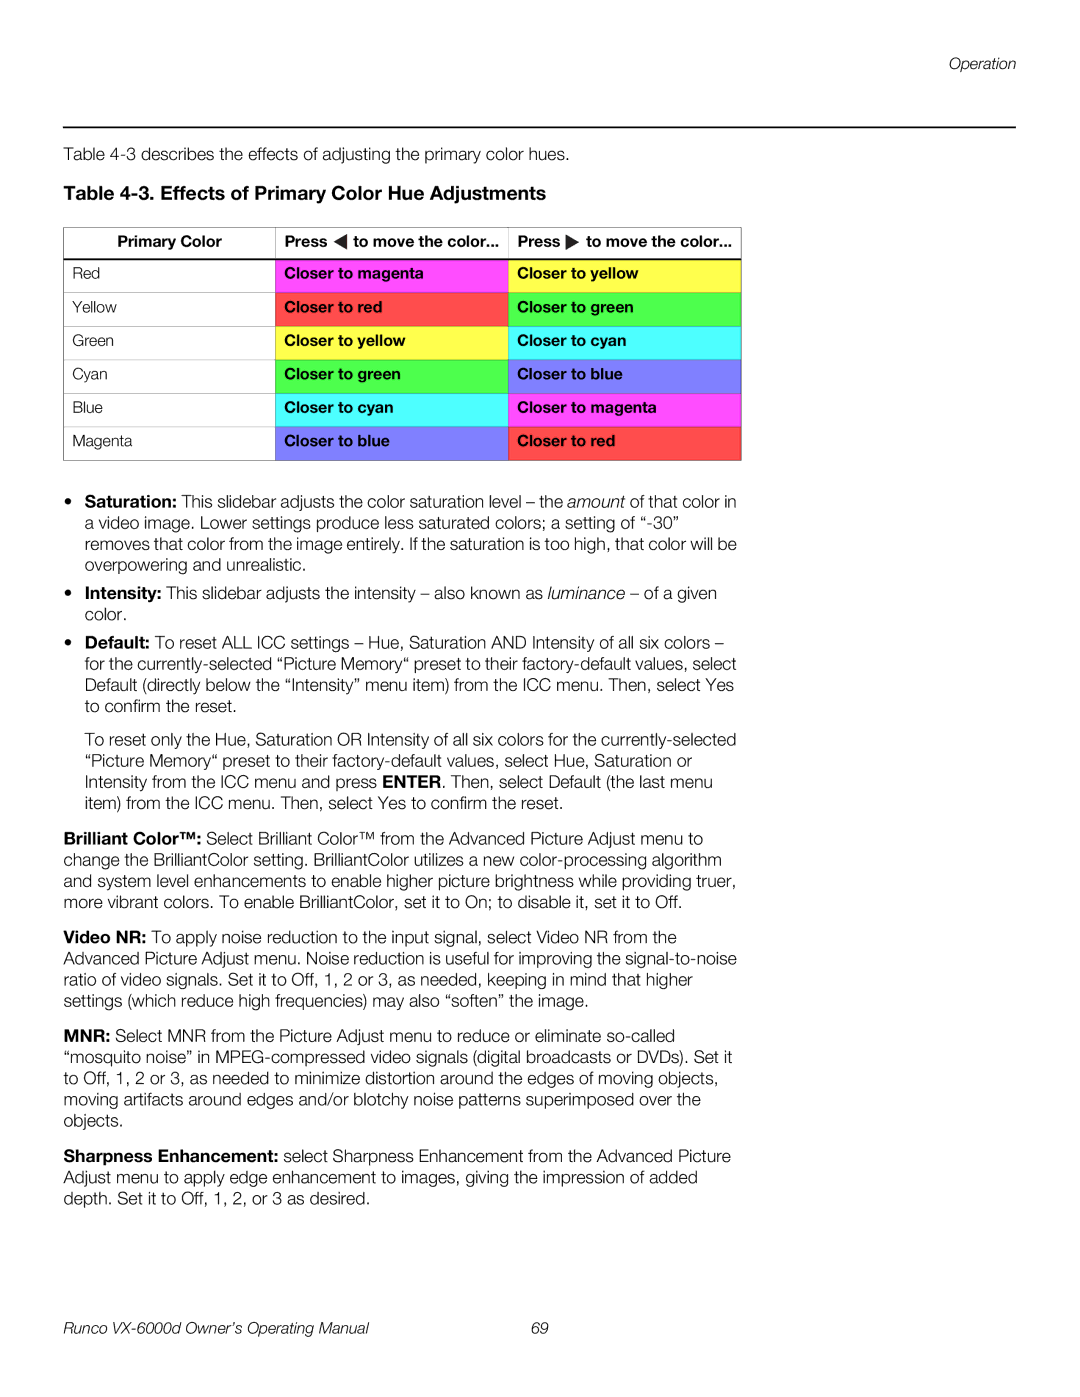
Table 4-3. Effects of Primary Color Hue Adjustments
Primary Color | Press to move the color... | Press to move the color... |
|
|
|
Red | Closer to magenta | Closer to yellow |
|
|
|
Yellow | Closer to red | Closer to green |
|
|
|
Green | Closer to yellow | Closer to cyan |
|
|
|
Cyan | Closer to green | Closer to blue |
|
|
|
Blue | Closer to cyan | Closer to magenta |
|
|
|
Magenta | Closer to blue | Closer to red |
|
|
|
•Saturation: This slidebar adjusts the color saturation level – the amount of that color in a video image. Lower settings produce less saturated colors; a setting of
•Intensity: This slidebar adjusts the intensity – also known as luminance – of a given color.
•Default: To reset ALL ICC settings – Hue, Saturation AND Intensity of all six colors – for the
To reset only the Hue, Saturation OR Intensity of all six colors for the
Brilliant Color™: Select Brilliant Color™ from the Advanced Picture Adjust menu to change the BrilliantColor setting. BrilliantColor utilizes a new
Video NR: To apply noise reduction to the input signal, select Video NR from the Advanced Picture Adjust menu. Noise reduction is useful for improving the
MNR: Select MNR from the Picture Adjust menu to reduce or eliminate
Sharpness Enhancement: select Sharpness Enhancement from the Advanced Picture Adjust menu to apply edge enhancement to images, giving the impression of added depth. Set it to Off, 1, 2, or 3 as desired.
Runco | 69 |