maintenance
This chapter provides information about maintaining your machine and the toner cartridge.
This chapter includes:
•Printing a machine report
•Cleaning a machine
Printing a machine report
You can print a configuration page to view current printer settings, or to help troubleshoot printer problems.
In ready mode, press and hold the Cancel ( ![]() ) button for about 5 seconds, then release.
) button for about 5 seconds, then release.
A configuration page prints out.
Cleaning a machine
If printing quality problems occur or if you use your machine in a dusty environment, you need to clean your machine regularly to keep the most optimum printing quality.
•Cleaning the cabinet of the machine with cleaning materials
containing large amounts of alcohol, solvent, or other strong substances can discolor or distort the cabinet.
•If your machine or the surrounding area is contaminated with toner, we recommend that you use a cloth or tissue dampened with water to clean it. If you use a vacuum cleaner, toner blows in the air and might be harmful if inhaled.
Cleaning the outside
Clean the machine cabinet with a soft,
Cleaning the inside
During the printing process, paper, toner and dust particles can accumulate inside the machine. This buildup can cause print quality problems such as toner specks or smearing. Cleaning the inside of the machine clears or reduces these problems.
1.Turn the machine off and unplug the power cord. Wait for the machine to cool down.
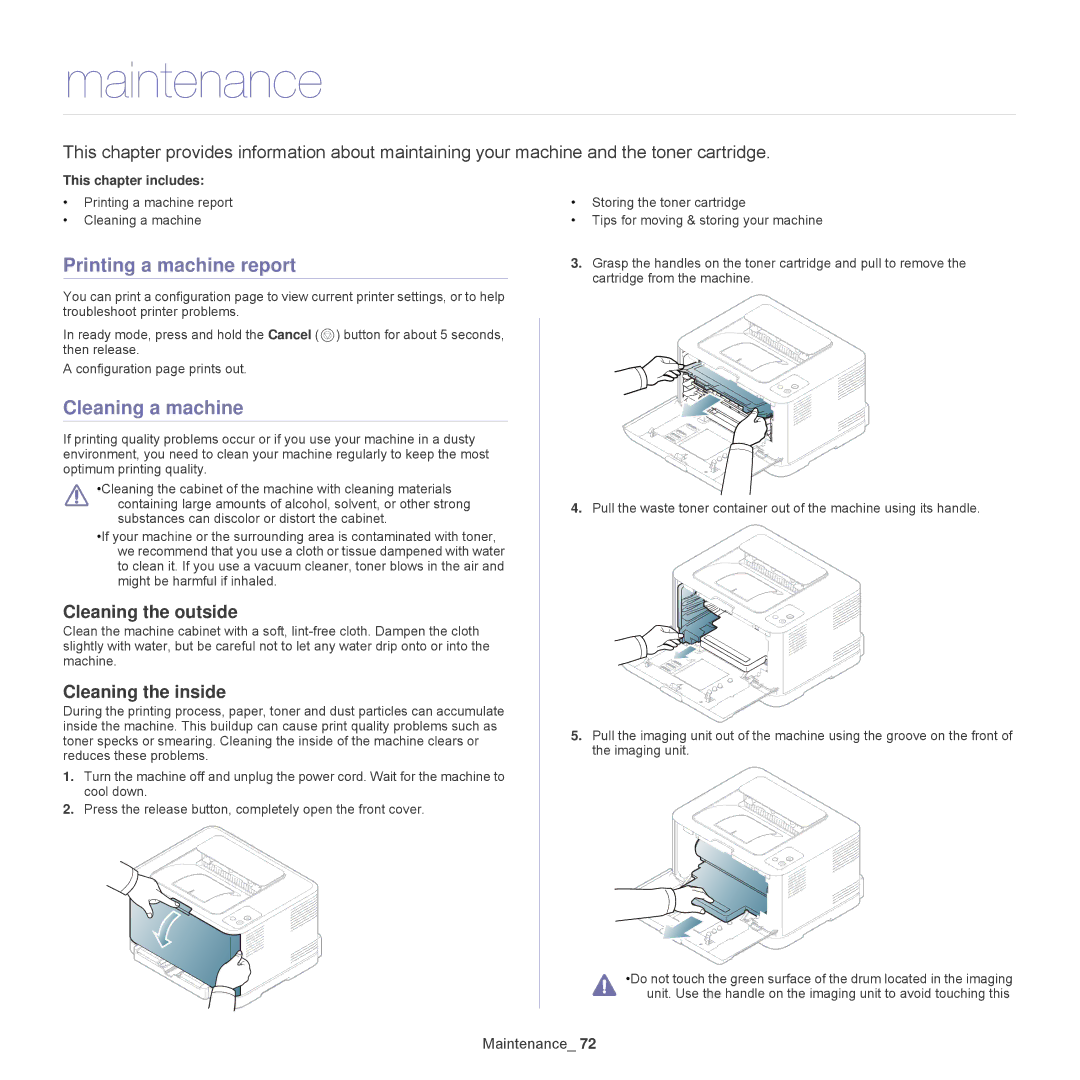
2.Press the release button, completely open the front cover.
•Storing the toner cartridge
•Tips for moving & storing your machine
3.Grasp the handles on the toner cartridge and pull to remove the cartridge from the machine.
4.Pull the waste toner container out of the machine using its handle.
5.Pull the imaging unit out of the machine using the groove on the front of the imaging unit.
•Do not touch the green surface of the drum located in the imaging unit. Use the handle on the imaging unit to avoid touching this