Connections
Turn off the power for all equipment before making any connections.
 Basic Connections
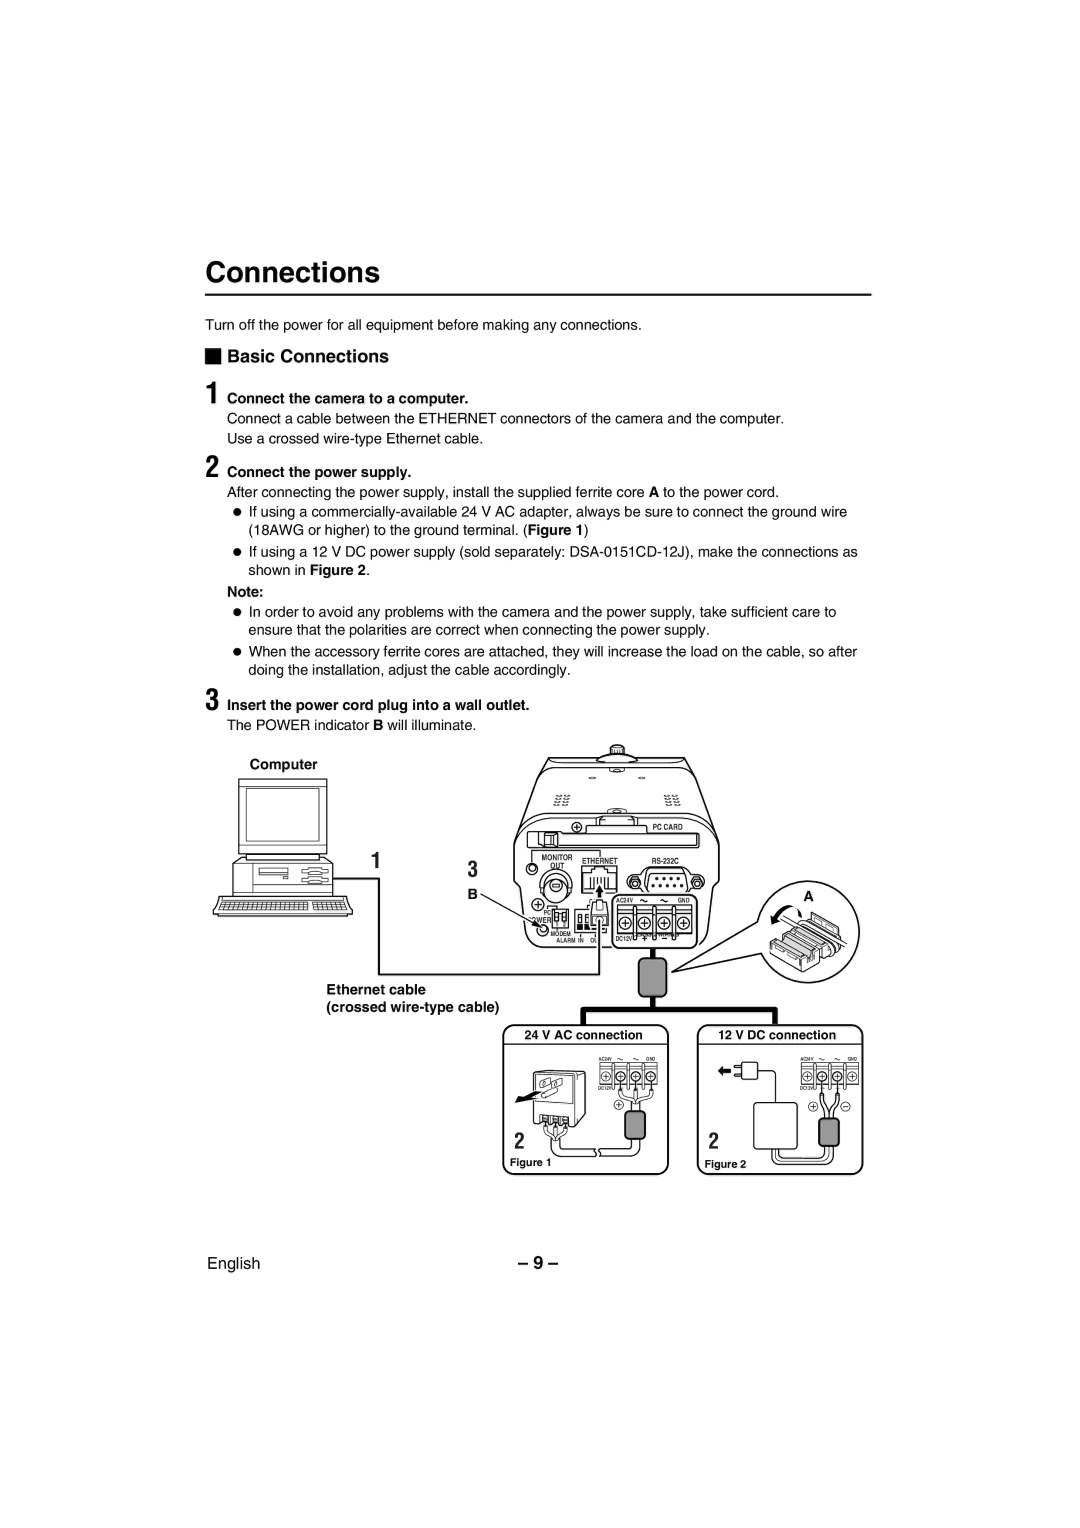
1 Connect the camera to a computer.
Connect a cable between the ETHERNET connectors of the camera and the computer. Use a crossed
2 Connect the power supply.
After connecting the power supply, install the supplied ferrite core A to the power cord.
•If using a
•If using a 12 V DC power supply (sold separately:
Note:
•In order to avoid any problems with the camera and the power supply, take sufficient care to ensure that the polarities are correct when connecting the power supply.
•When the accessory ferrite cores are attached, they will increase the load on the cable, so after doing the installation, adjust the cable accordingly.
3 Insert the power cord plug into a wall outlet.
The POWER indicator B will illuminate.
Computer
|
|
|
|
|
| PC CARD | |
1 | 3 | MONITOR | ETHERNET | ||||
OUT | |||||||
|
|
|
| ||||
|
|
|
|
| |||
| B |
|
|
| AC24V | GND | |
|
| PC |
|
|
|
| |
|
| POWER 1 2 |
|
|
|
| |
|
| MODEM |
| OUT | DC12VCLASS 2 WIRING | ||
|
| ALARM IN |
|
| |||
Ethernet cable
(crossed
A
24 V AC connection |
| 12 V DC connection |
AC24V
DC12V
2
Figure 1
GND | AC24V | GND |
DC12V
2
Figure 2
English | – 9 – |
