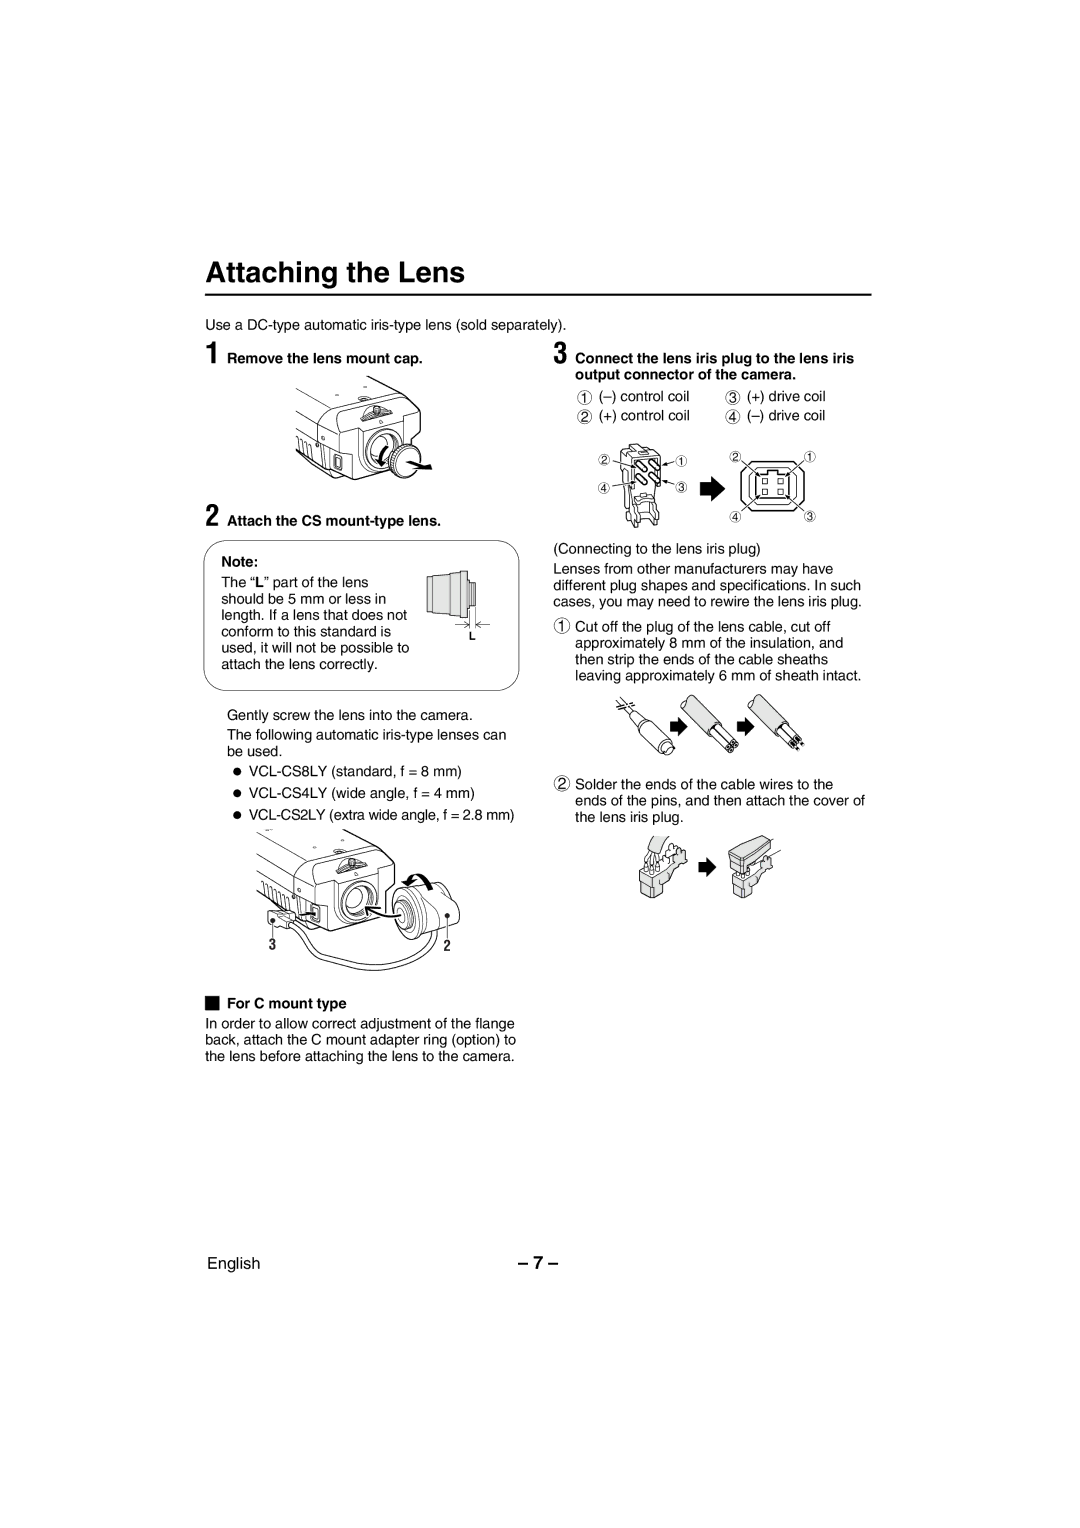
Attaching the Lens
Use a
1
2
Remove the lens mount cap.
Attach the CS mount-type lens.
Note:
The “L” part of the lens should be 5 mm or less in length. If a lens that does not
conform to this standard isL used, it will not be possible to
attach the lens correctly.
3 Connect the lens iris plug to the lens iris output connector of the camera.
1 | 3 (+) drive coil | ||
2 (+) control coil | 4 | ||
2 | 1 | 2 | 1 |
|
| ||
4 | 3 |
|
|
|
| 4 | 3 |
(Connecting to the lens iris plug)
Lenses from other manufacturers may have different plug shapes and specifications. In such cases, you may need to rewire the lens iris plug.
1Cut off the plug of the lens cable, cut off approximately 8 mm of the insulation, and then strip the ends of the cable sheaths leaving approximately 6 mm of sheath intact.
Gently screw the lens into the camera.
The following automatic
•
•
•
2Solder the ends of the cable wires to the ends of the pins, and then attach the cover of the lens iris plug.
3 | 2 |
For C mount type
In order to allow correct adjustment of the flange back, attach the C mount adapter ring (option) to the lens before attaching the lens to the camera.
English | – 7 – |
