CLOCK SET Settings
This lets you set the camera’s internal clock. You can also make settings for summer time.
Click the [CLOCK] menu select button.
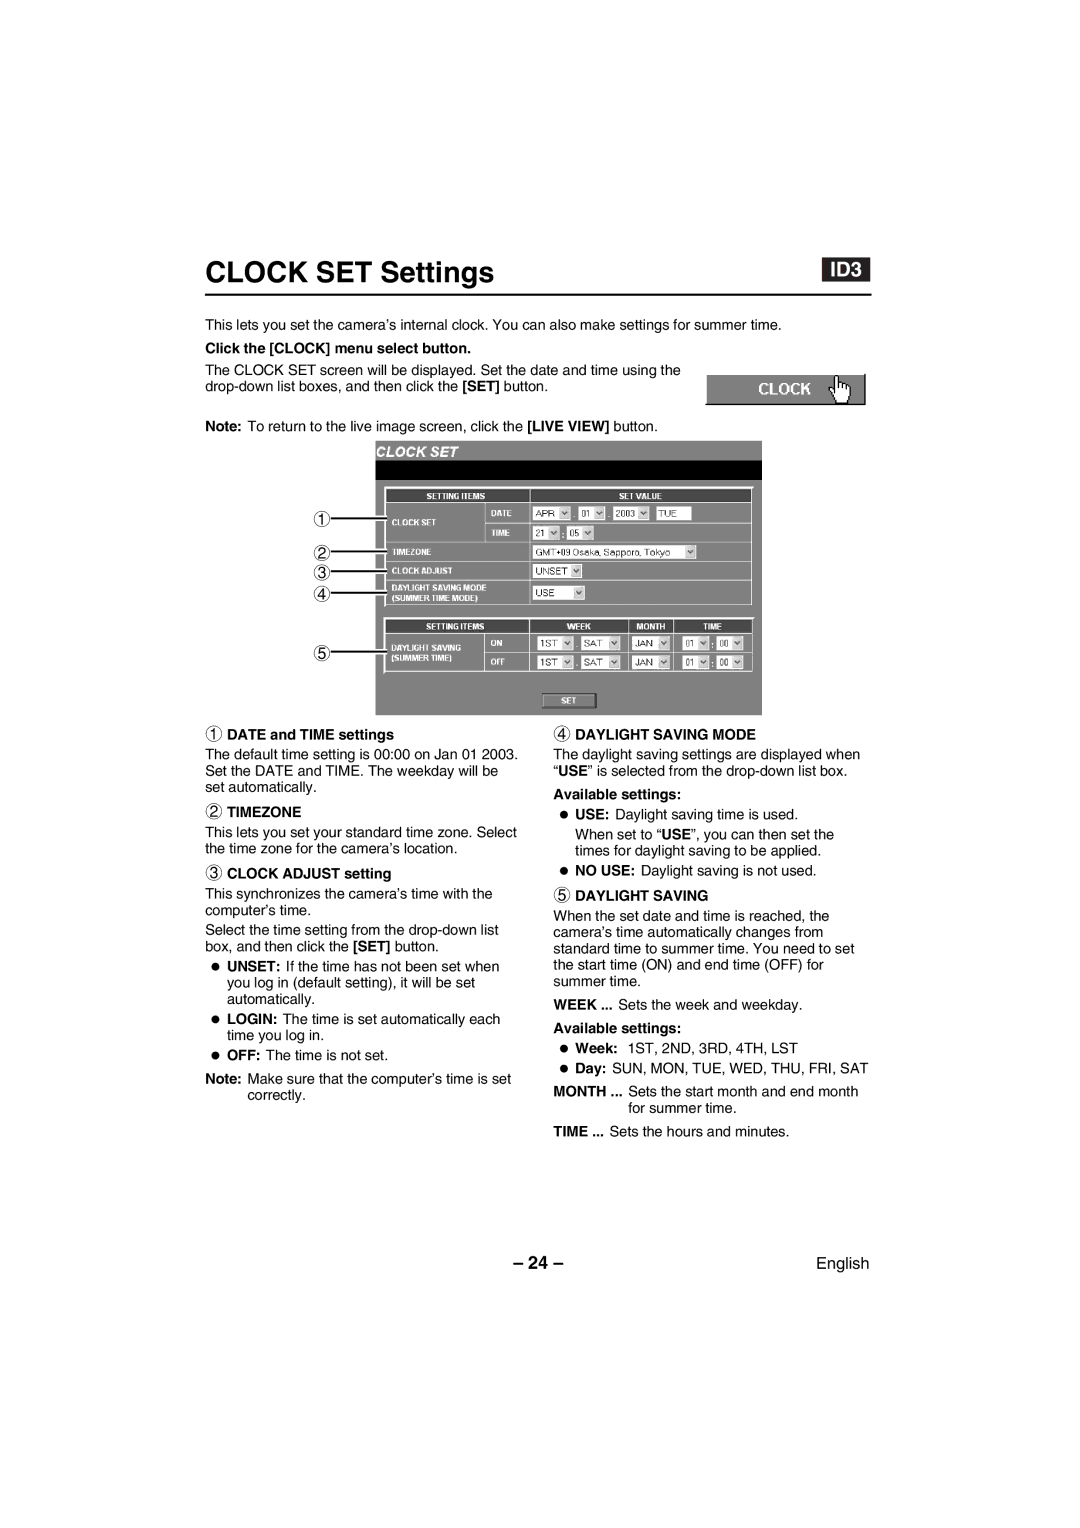
The CLOCK SET screen will be displayed. Set the date and time using the
Note: To return to the live image screen, click the [LIVE VIEW] button.
1
2
3
4
5
1DATE and TIME settings
The default time setting is 00:00 on Jan 01 2003. Set the DATE and TIME. The weekday will be set automatically.
2TIMEZONE
This lets you set your standard time zone. Select the time zone for the camera’s location.
3CLOCK ADJUST setting
This synchronizes the camera’s time with the computer’s time.
Select the time setting from the
•UNSET: If the time has not been set when you log in (default setting), it will be set automatically.
•LOGIN: The time is set automatically each time you log in.
•OFF: The time is not set.
Note: Make sure that the computer’s time is set correctly.
4DAYLIGHT SAVING MODE
The daylight saving settings are displayed when “USE” is selected from the
Available settings:
•USE: Daylight saving time is used. When set to “USE”, you can then set the times for daylight saving to be applied.
•NO USE: Daylight saving is not used.
5DAYLIGHT SAVING
When the set date and time is reached, the camera’s time automatically changes from standard time to summer time. You need to set the start time (ON) and end time (OFF) for summer time.
WEEK ... Sets the week and weekday.
Available settings:
•Week: 1ST, 2ND, 3RD, 4TH, LST
•Day: SUN, MON, TUE, WED, THU, FRI, SAT
MONTH ... Sets the start month and end month for summer time.
TIME ... Sets the hours and minutes.
– 24 – | English |