PPP (Dial-up) Settings
2 4
3![]()
56
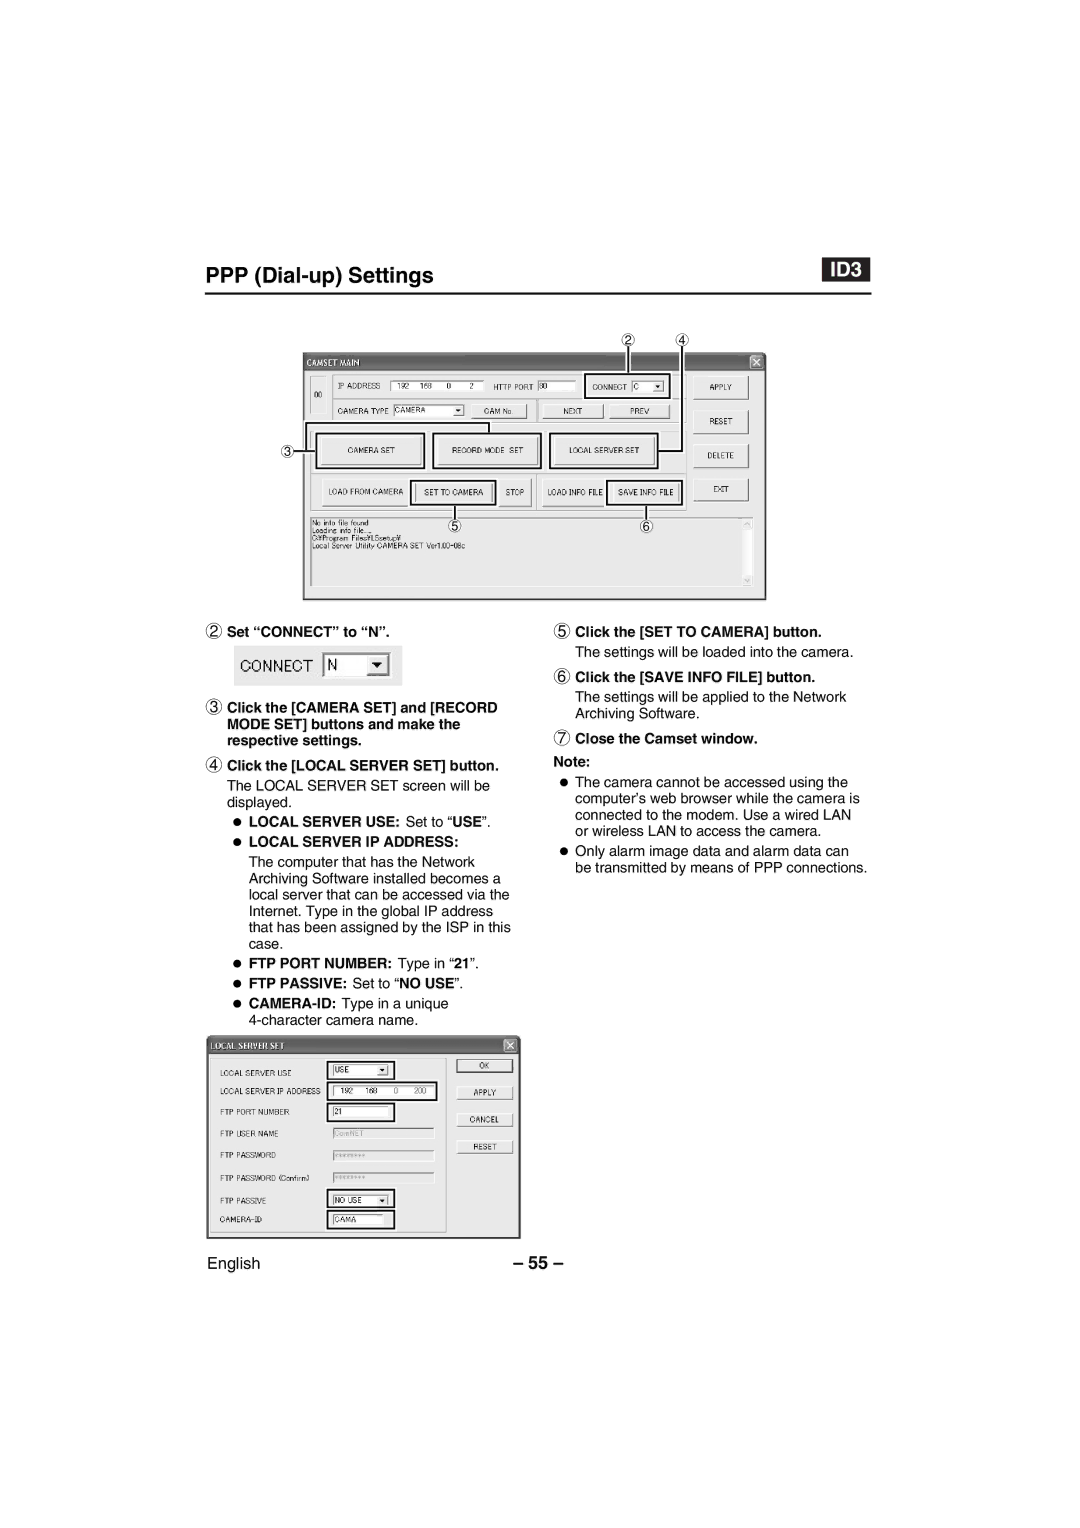
2Set “CONNECT” to “N”.
3Click the [CAMERA SET] and [RECORD MODE SET] buttons and make the respective settings.
4Click the [LOCAL SERVER SET] button.
The LOCAL SERVER SET screen will be displayed.
•LOCAL SERVER USE: Set to “USE”.
•LOCAL SERVER IP ADDRESS: The computer that has the Network Archiving Software installed becomes a local server that can be accessed via the Internet. Type in the global IP address that has been assigned by the ISP in this case.
•FTP PORT NUMBER: Type in “21”.
•FTP PASSIVE: Set to “NO USE”.
•
5Click the [SET TO CAMERA] button.
The settings will be loaded into the camera.
6Click the [SAVE INFO FILE] button.
The settings will be applied to the Network Archiving Software.
7Close the Camset window.
Note:
•The camera cannot be accessed using the computer’s web browser while the camera is connected to the modem. Use a wired LAN or wireless LAN to access the camera.
•Only alarm image data and alarm data can be transmitted by means of PPP connections.
English | – 55 – |