Assigning a Name to
4 Press ENTER/YES.
A cursor flashes in the display.
To check the name
Press DISPLAY in stop mode.
a CD (disc memo function)
DISC CD
1 2 3 4 5
6 7 8 9 10
11
If you press DISPLAY again, the original display returns.
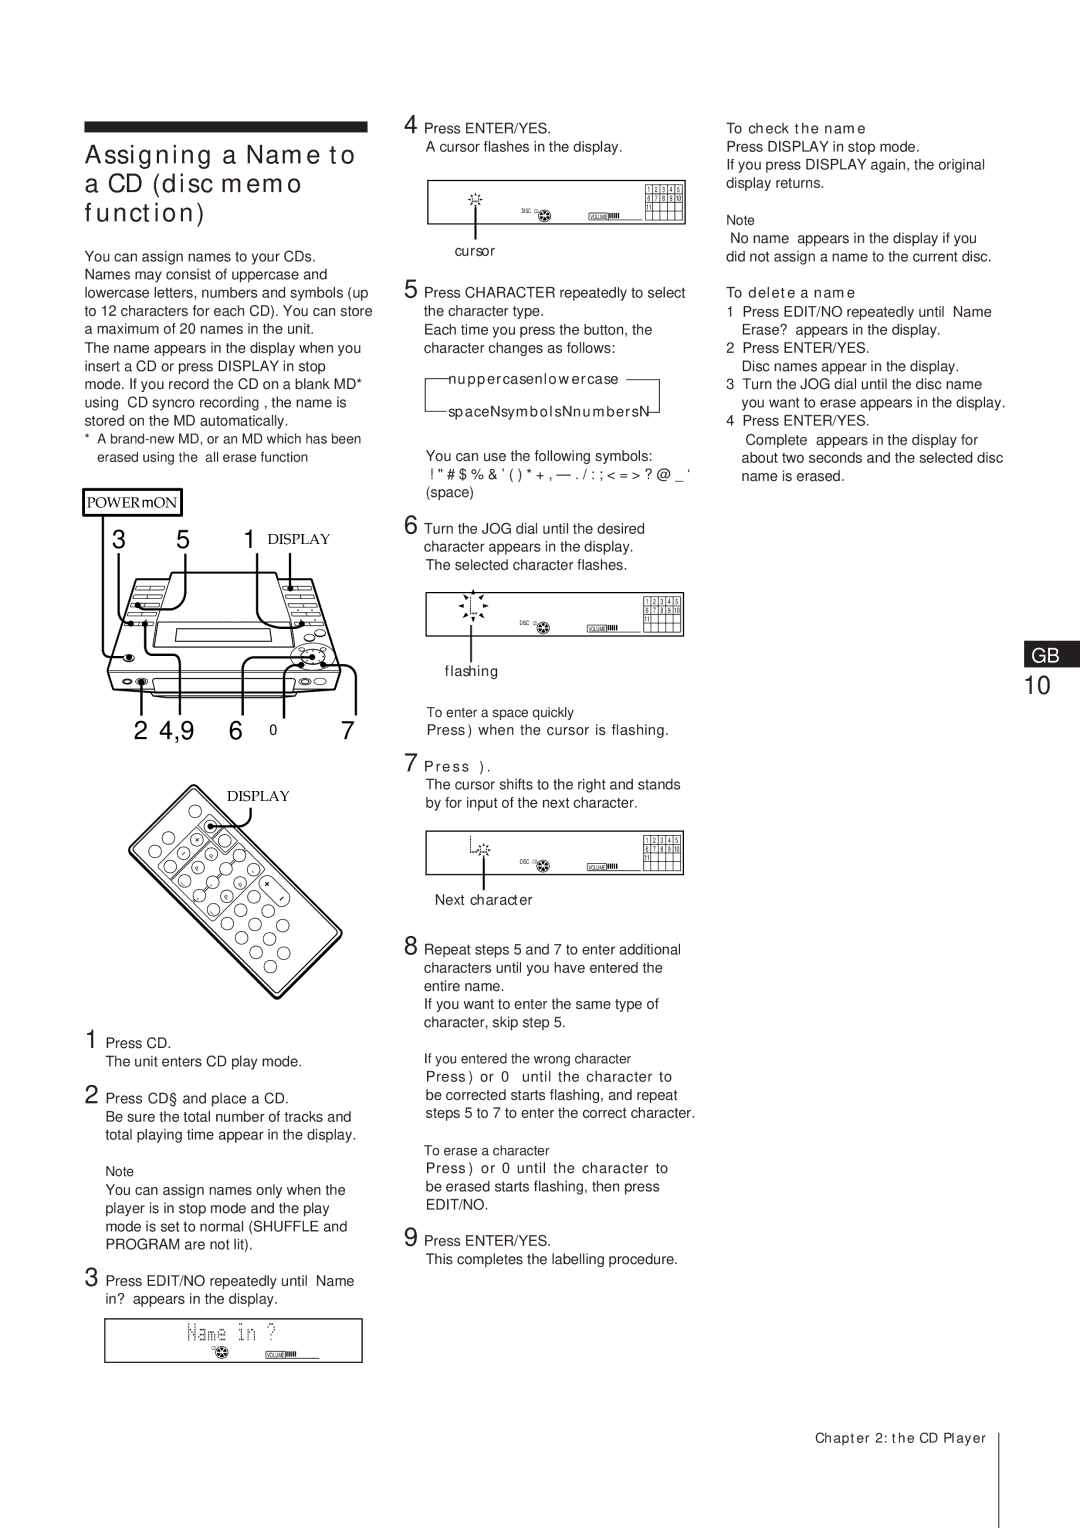
You can assign names to your CDs. Names may consist of uppercase and lowercase letters, numbers and symbols (up to 12 characters for each CD). You can store a maximum of 20 names in the unit.
The name appears in the display when you insert a CD or press DISPLAY in stop mode. If you record the CD on a blank MD* using “CD syncro recording”, the name is stored on the MD automatically.
*A
POWER m ON |
|
|
3 | 5 | 1 DISPLAY |
2 4,9 | 6 | 0 | 7 |
DISPLAY
| p |
|
| P | r |
( | + | p |
| = | P |
| ( |
|
1 Press CD.
The unit enters CD play mode.
2 Press CD § and place a CD.
Be sure the total number of tracks and total playing time appear in the display.
Note
You can assign names only when the player is in stop mode and the play mode is set to normal (SHUFFLE and PROGRAM are not lit).
3 Press EDIT/NO repeatedly until “Name in?” appears in the display.
CD
VOLUME ![]()
![]()
![]()
VOLUME ![]()
![]()
![]()
cursor
5 Press CHARACTER repeatedly to select the character type.
Each time you press the button, the character changes as follows:
nuppercasenlowercase
spaceNsymbols NnumbersN
You can use the following symbols:
!" # $ % & ' ( ) * + ,
6 Turn the JOG dial until the desired character appears in the display. The selected character flashes.
|
| 1 |
| 2 |
| 3 |
| 4 |
| 5 |
| |||||
|
|
|
|
|
|
| ||||||||||
|
|
|
| 6 |
| 7 |
| 8 |
| 9 |
| 10 |
| |||
| DISC | 11 |
|
|
|
|
|
|
|
|
| |||||
| CD |
|
|
|
|
|
|
|
|
|
| |||||
|
| VOLUME |
|
|
|
|
|
|
|
|
| |||||
|
|
|
|
|
|
|
|
|
|
|
|
|
|
|
|
|
|
|
|
|
|
|
|
|
|
|
|
|
|
|
|
|
|
flashing
To enter a space quickly
Press ) when the cursor is flashing.
7 P r e s s ) .
The cursor shifts to the right and stands by for input of the next character.
|
| 1 |
| 2 |
| 3 |
| 4 |
| 5 |
| |||||
|
|
|
|
|
|
| ||||||||||
|
|
|
| 6 |
| 7 |
| 8 |
| 9 |
| 10 |
| |||
| DISC | 11 |
|
|
|
|
|
|
|
|
| |||||
| CD |
|
|
|
|
|
|
|
|
|
| |||||
|
| VOLUME |
|
|
|
|
|
|
|
|
| |||||
|
|
|
|
|
|
|
|
|
|
|
|
|
|
|
|
|
|
|
|
|
|
|
|
|
|
|
|
|
|
|
|
|
|
Next character
8 Repeat steps 5 and 7 to enter additional characters until you have entered the entire name.
If you want to enter the same type of character, skip step 5.
If you entered the wrong character
Press ) or 0 until the character to be corrected starts flashing, and repeat steps 5 to 7 to enter the correct character.
To erase a character
Press ) or 0 until the character to be erased starts flashing, then press EDIT/NO.
9 Press ENTER/YES.
This completes the labelling procedure.
Note
“No name” appears in the display if you did not assign a name to the current disc.
To delete a name
1Press EDIT/NO repeatedly until “Name Erase?” appears in the display.
2Press ENTER/YES.
Disc names appear in the display.
3Turn the JOG dial until the disc name you want to erase appears in the display.
4Press ENTER/YES.
“Complete” appears in the display for about two seconds and the selected disc name is erased.
GB
10
Chapter 2: the CD Player
