Chapter 1:
Setting Up
Connecting the Stereo
Inserting the Battery
Setting the Clock
GB
4
Connecting the
Stereo
Use the illustrations below to connect your stereo.
If you want to connect any optional components to the stereo, see “Connecting Optional Equipment” in Chapter 8.
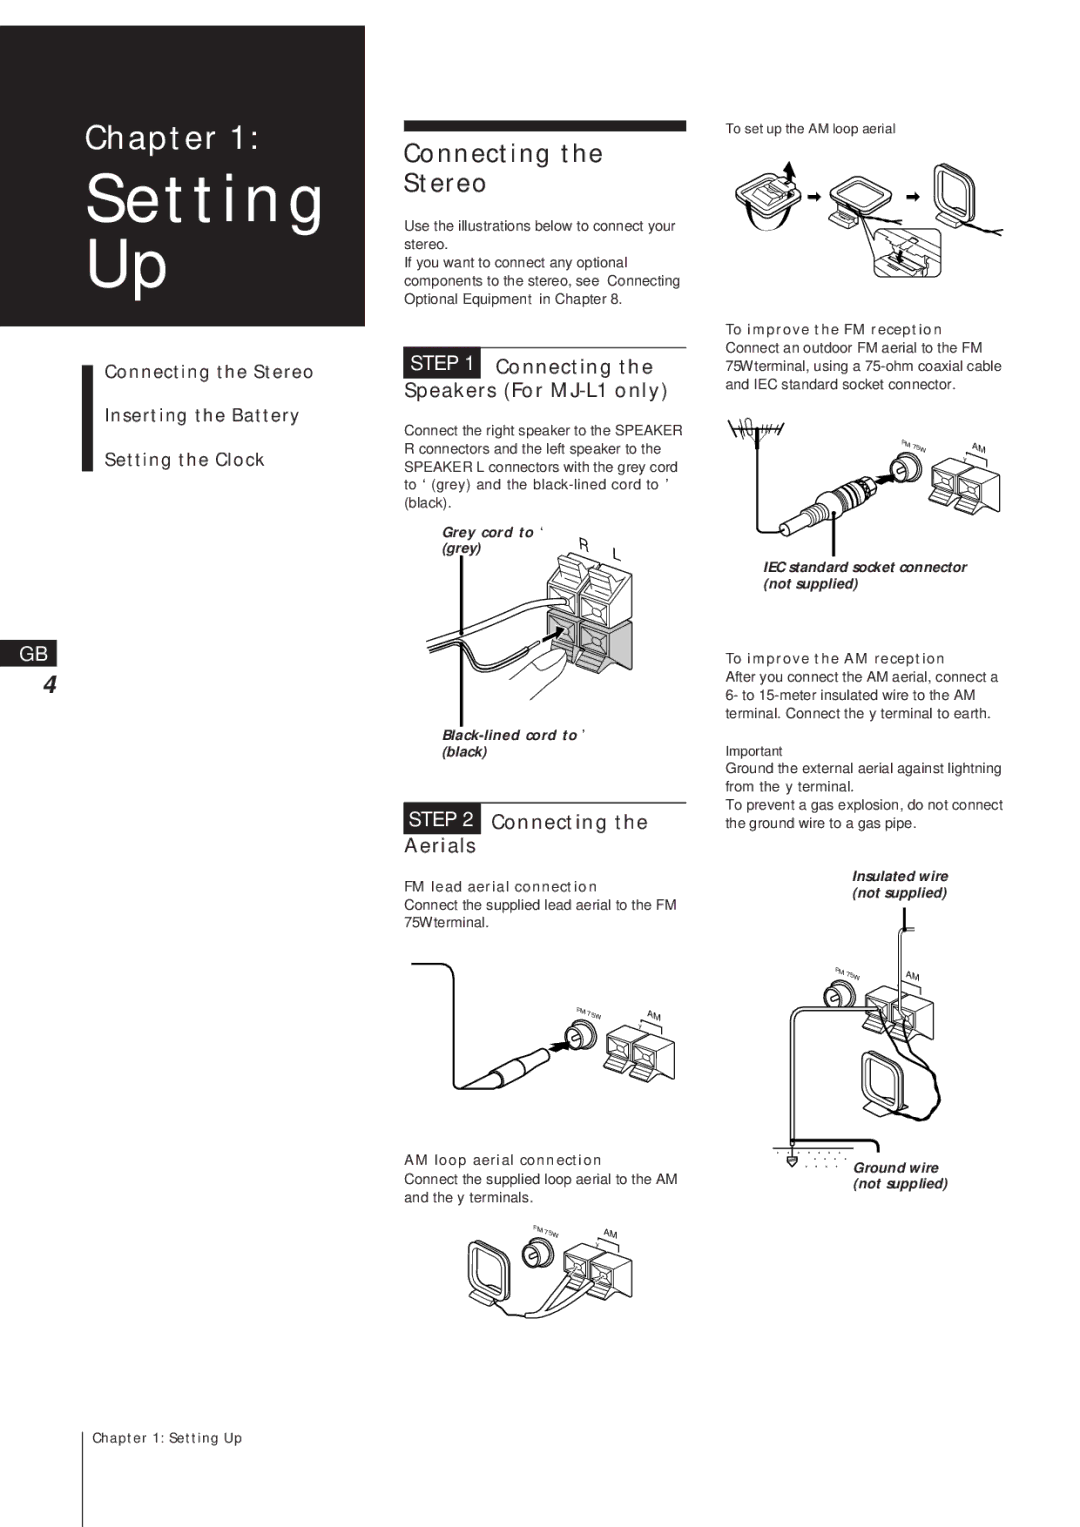
STEP 1 Connecting the Speakers (For MJ-L1 only)
Connect the right speaker to the SPEAKER R connectors and the left speaker to the SPEAKER L connectors with the grey cord to ‘ (grey) and the
Grey cord to ‘ | R |
| |
(grey) | L | ||
| |||
|
|
STEP 2 Connecting the
Aerials
FM lead aerial connection
Connect the supplied lead aerial to the FM 75Ω terminal.
FM | 75 | Ω | AM |
|
|
| y |
AM loop aerial connection
Connect the supplied loop aerial to the AM and the y terminals.
FM | 75 | Ω | AM |
|
|
| y |
To set up the AM loop aerial
To improve the FM reception
Connect an outdoor FM aerial to the FM
75Ω terminal, using a
FM | 75 | Ω | AM |
|
|
| y |
IEC standard socket connector (not supplied)
To improve the AM reception
After you connect the AM aerial, connect a 6- to
Important
Ground the external aerial against lightning from the y terminal.
To prevent a gas explosion, do not connect the ground wire to a gas pipe.
Insulated wire (not supplied)
FM | 75 | Ω | AM |
|
|
| y |
Ground wire (not supplied)
Chapter 1: Setting Up
