Chapter 5:
Editing
Recorded MDs
|
|
| Erasing Recordings | |
|
|
| (erase function) | |
|
|
| Moving Recorded Tracks | |
|
|
| (move function) | |
|
|
| Dividing Recorded Tracks | |
|
|
| (divide function) | |
|
|
| Combining Recorded Tracks | |
|
|
| (combine function) | |
|
|
| Labelling Recordings | |
GB | ||||
|
| (title function) | ||
|
|
|
|
18
Erasing Recordings (erase function)
You can erase the recorded sound easily. Since erasing updates the TOC, you do not have to record over previous material. You can choose from the following three erase methods:
•Erasing a single track
•Erasing all tracks
•Erasing parts of a track
When erasing two or more tracks
When you erase a track, all tracks following the erased one are renumbered. For example, if you erase track 1, the original track 2 will be renumbered as track 1.
To avoid confusion, you should erase starting from high track numbers and proceeding to low track numbers. This prevents renumbering of tracks that have not yet been erased.
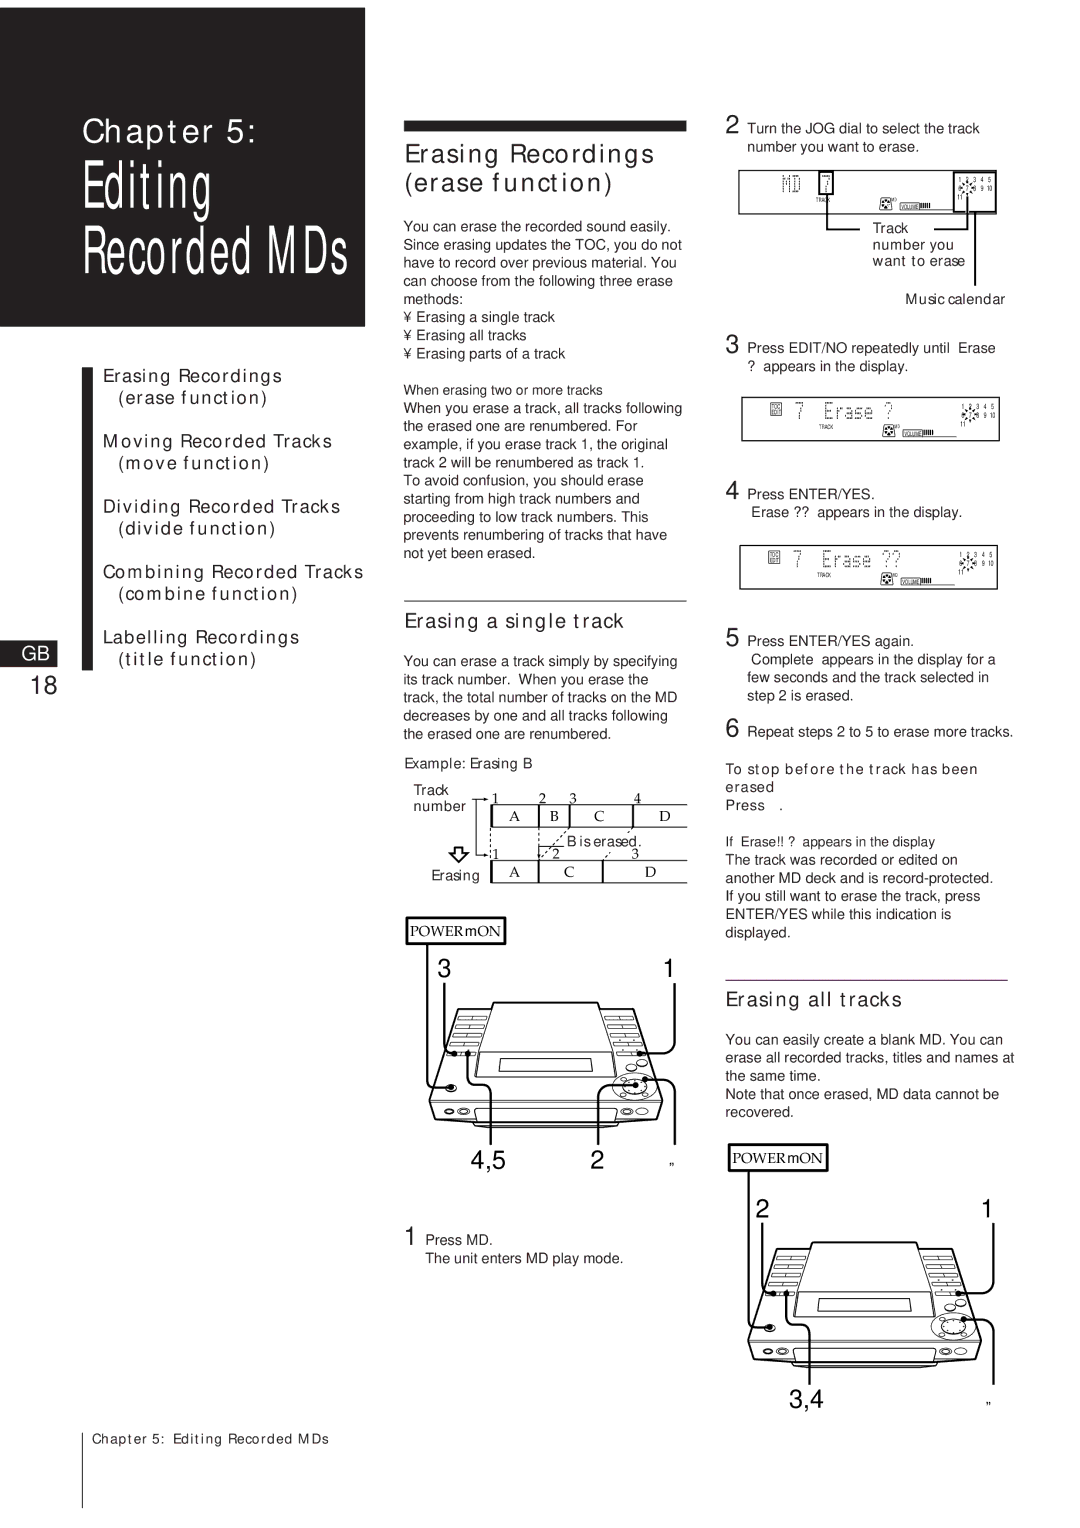
Erasing a single track
You can erase a track simply by specifying its track number. When you erase the track, the total number of tracks on the MD decreases by one and all tracks following the erased one are renumbered.
Example: Erasing B |
|
|
|
|
|
| |||
Track |
|
| 1 | 2 | 3 |
| 4 |
| |
number |
|
| |||||||
A | B |
| C | D |
| ||||
|
|
|
|
| |||||
|
|
|
|
|
|
|
|
|
|
|
|
| 1 | 2 | B is erased. |
| |||
|
|
|
|
|
| 3 |
| ||
Erasing | A |
| C |
| D |
| |||
|
|
|
|
|
|
|
|
|
|
POWER m ON
31
4,5 2 „
1 Press MD.
The unit enters MD play mode.
2 Turn the JOG dial to select the track number you want to erase.
|
| 1 | 2 | 3 | 4 | 5 |
|
| 6 | 7 | 8 | 9 | 10 |
TRACK | MD | 11 |
|
|
|
|
VOLUME |
|
|
|
| ||
|
|
|
|
|
|
Track number you want to erase
Music calendar
3 Press EDIT/NO repeatedly until “Erase ?” appears in the display.
TOC |
| 1 | 2 | 3 | 4 | 5 |
EDIT |
| 6 | 7 | 8 | 9 | 10 |
|
| |||||
TRACK | MD | 11 |
|
|
|
|
VOLUME ![]()
![]()
![]()
4 Press ENTER/YES.
“Erase ??” appears in the display.
TOC |
| 1 | 2 | 3 | 4 | 5 |
EDIT |
| 6 | 7 | 8 | 9 | 10 |
|
| |||||
TRACK | MD | 11 |
|
|
|
|
VOLUME ![]()
![]()
![]()
5 Press ENTER/YES again.
“Complete” appears in the display for a few seconds and the track selected in step 2 is erased.
6 Repeat steps 2 to 5 to erase more tracks.
To stop before the track has been erased
Press .
If “Erase!! ?” appears in the display
The track was recorded or edited on another MD deck and is
Erasing all tracks
You can easily create a blank MD. You can erase all recorded tracks, titles and names at the same time.
Note that once erased, MD data cannot be recovered.
POWER m ON
21
3,4„
Chapter 5: Editing Recorded MDs