To set up the wireless mouse
Insert two AA batteries (supplied with the mouse) into the wireless mouse as shown.
Inserting batteries into the wireless mouse
![]() If your wireless mouse does not operate properly, the batteries may need to be replaced. When your wireless mouse is not being used for extended periods of time, remove the batteries to avoid possible damage from battery leakage.
If your wireless mouse does not operate properly, the batteries may need to be replaced. When your wireless mouse is not being used for extended periods of time, remove the batteries to avoid possible damage from battery leakage.
To connect the wireless optical mouse
Before attempting to use the wireless mouse, you must enable communication between the computer and the mouse.
![]() When attempting to connect the wireless mouse, confirm that the AA batteries (supplied) are properly inserted into the mouse before your computer is turned on.
When attempting to connect the wireless mouse, confirm that the AA batteries (supplied) are properly inserted into the mouse before your computer is turned on.
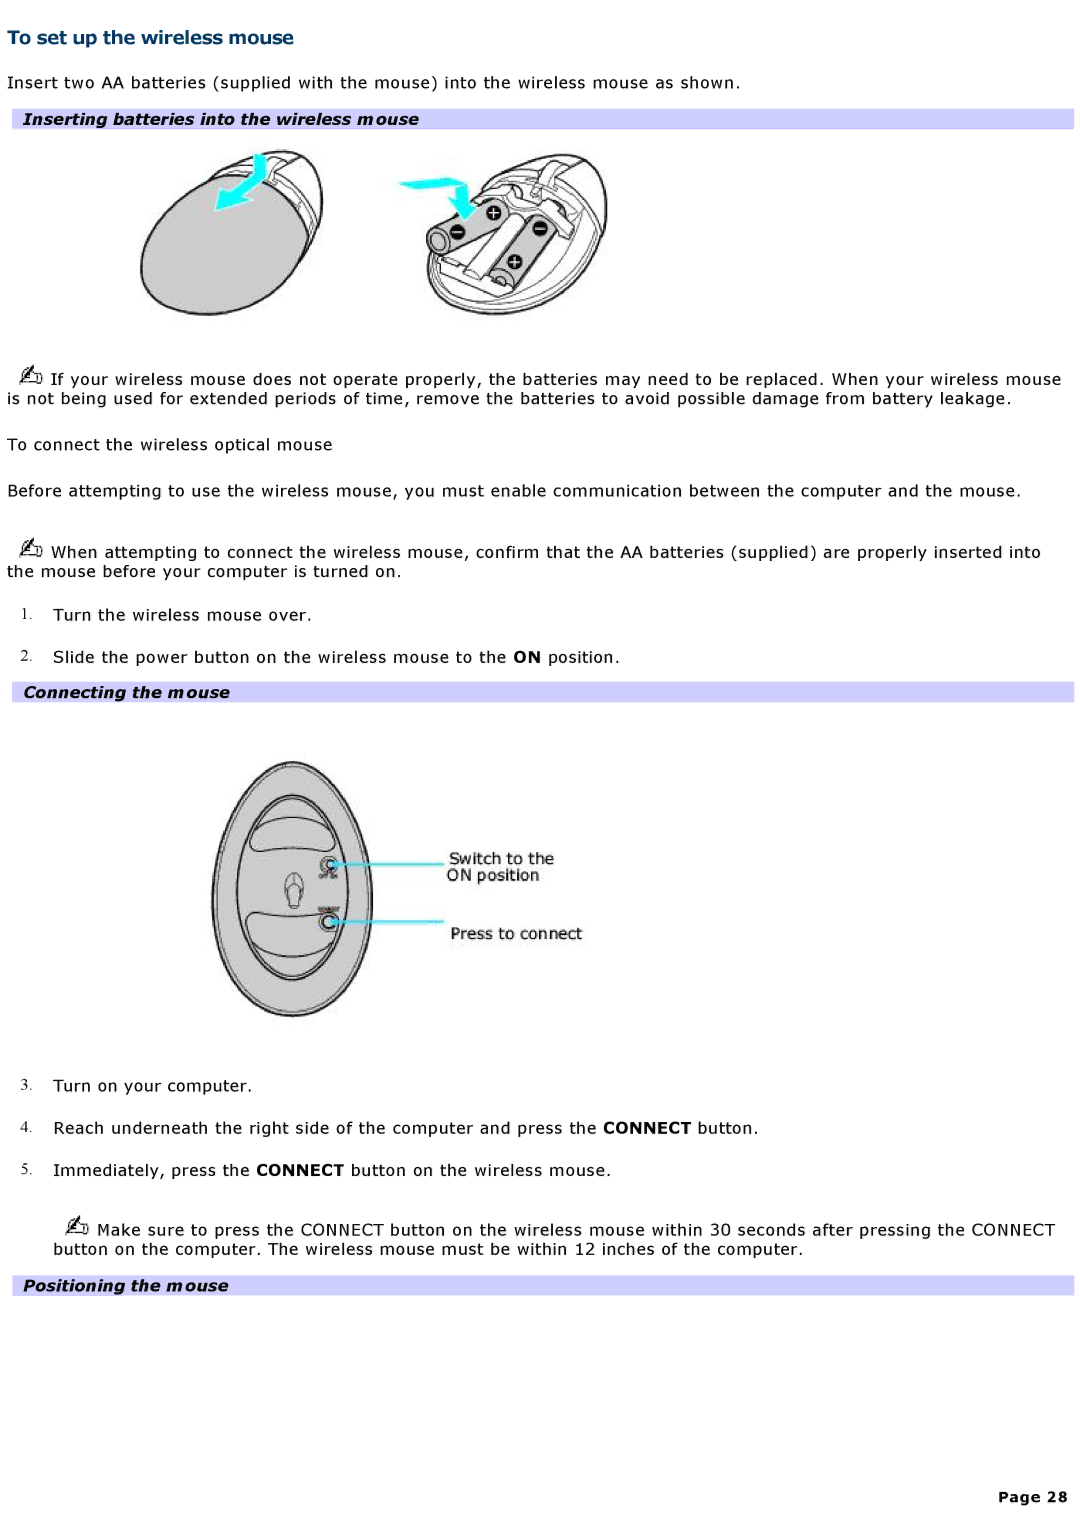
1.Turn the wireless mouse over.
2.Slide the power button on the wireless mouse to the ON position.
Connecting the mouse
3.Turn on your computer.
4.Reach underneath the right side of the computer and press the CONNECT button.
5.Immediately, press the CONNECT button on the wireless mouse.
![]() Make sure to press the CONNECT button on the wireless mouse within 30 seconds after pressing the CONNECT button on the computer. The wireless mouse must be within 12 inches of the computer.
Make sure to press the CONNECT button on the wireless mouse within 30 seconds after pressing the CONNECT button on the computer. The wireless mouse must be within 12 inches of the computer.
Positioning the mouse
Page 28
