Chapter 3: Using the Printer with Windows 3.1
This chapter contains specific information you need to know when using the printer with Microsoft Windows 3.1. It also tells you how to install the printer driver on your computer so that it can control the printer correctly. In this chapter, you will learn about:
❏How to set up for printing with Microsoft Windows 3.1
❏How to prepare for printing
❏How to print a document
❏How to install TrueType fonts
❏How to select fonts from within an application
Setting up for printing with Microsoft Windows 3.1
This printer is designed to work best with computers running Microsoft Windows
3.1.If you are running an earlier version of Windows, we recommend that you upgrade to 3.1.
Before you can use the printer with Windows, you must first use the procedure outlined below to install the printer driver that is supplied on the 3.5” floppy disk that comes with the printer. This procedure assumes that you are using a mouse and that you are familiar with common mouse operations like click and
❏Insert the disk that contains the printer driver into one of your computer’s disk drives. This explanation assumes you are using a drive named “A:”, but you could use any drive. Just remember to change the “A:” in the following steps to the name of the drive you are using.
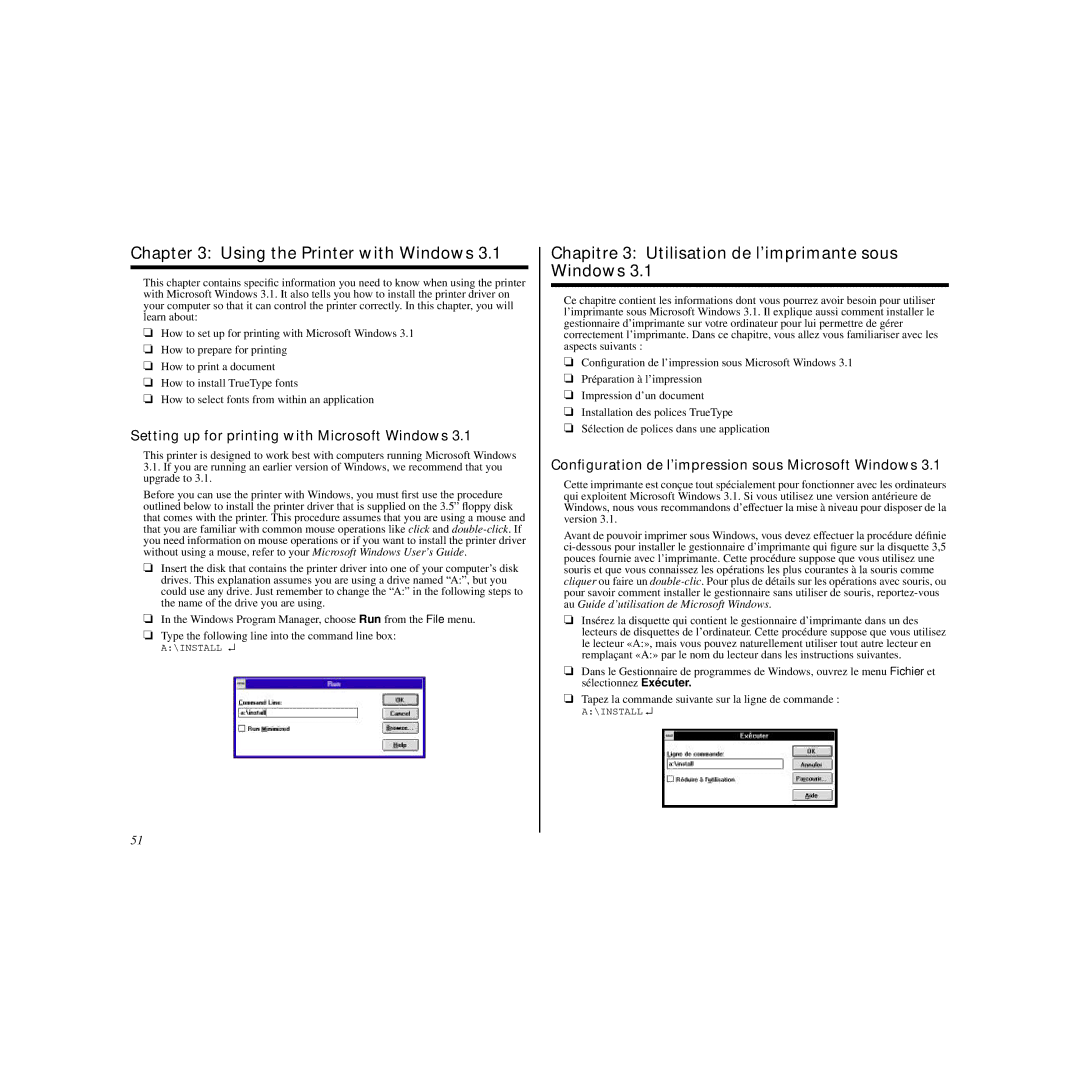
❏In the Windows Program Manager, choose Run from the File menu.
❏Type the following line into the command line box:
A:\INSTALL ↵
Chapitre 3: Utilisation de l’imprimante sous Windows 3.1
Ce chapitre contient les informations dont vous pourrez avoir besoin pour utiliser l’imprimante sous Microsoft Windows 3.1. Il explique aussi comment installer le gestionnaire d’imprimante sur votre ordinateur pour lui permettre de gérer correctement l’imprimante. Dans ce chapitre, vous allez vous familiariser avec les aspects suivants :
❏Configuration de l’impression sous Microsoft Windows 3.1
❏Préparation à l’impression
❏Impression d’un document
❏Installation des polices TrueType
❏Sélection de polices dans une application
Configuration de l’impression sous Microsoft Windows 3.1
Cette imprimante est conçue tout spécialement pour fonctionner a vec les ordinateurs qui exploitent Microsoft Windows 3.1. Si vous utilisez une version antérieure de Windows, nous vous recommandons d’effectuer la mise à ni veau pour disposer de la version 3.1.
Avant de pouvoir imprimer sous Windows, vous devez effectuer la procédure définie
❏Insérez la disquette qui contient le gestionnaire d’imprimante dans un des lecteurs de disquettes de l’ordinateur. Cette procédure suppose que v ous utilisez le lecteur «A:», mais vous pouvez naturellement utiliser tout autre lecteur en remplaçant «A:» par le nom du lecteur dans les instructions suivantes.
❏Dans le Gestionnaire de programmes de Windows, ouvrez le menu Fichier et sélectionnez Exécuter.
❏Tapez la commande suivante sur la ligne de commande :
A:\INSTALL ↵
51