Knob
Bouton
Drehknopf
Manopola
Print head shield |
| Print head shield |
|
Protection de tête d’impression |
| Protection de tête d’impression |
|
Druckkopfführung |
| Druckkopfführung |
|
Protezione della testina di stampa | Ribbon | Protezione della testina di stampa | Ribbon |
| Ruban |
| Ruban |
| Farbband |
| Farbband |
| Nastro |
| Nastro |
|
|
| Print head |
|
|
| Tête d’impression |
| Print head |
| Druckkopf |
|
| Testina di stampa | |
| Tête d’impression |
|
|
| Druckkopf |
|
|
| Testina di stampa |
|
|
Color ribbon cartridge | Monochrome ribbon cartridge |
Cartouche de ruban couleur | Cartouche de ruban monochrome |
Monochrom | |
Cartuccia nastro a colori | Cartuccia nastro nero |
Installing the ribbon cartridge
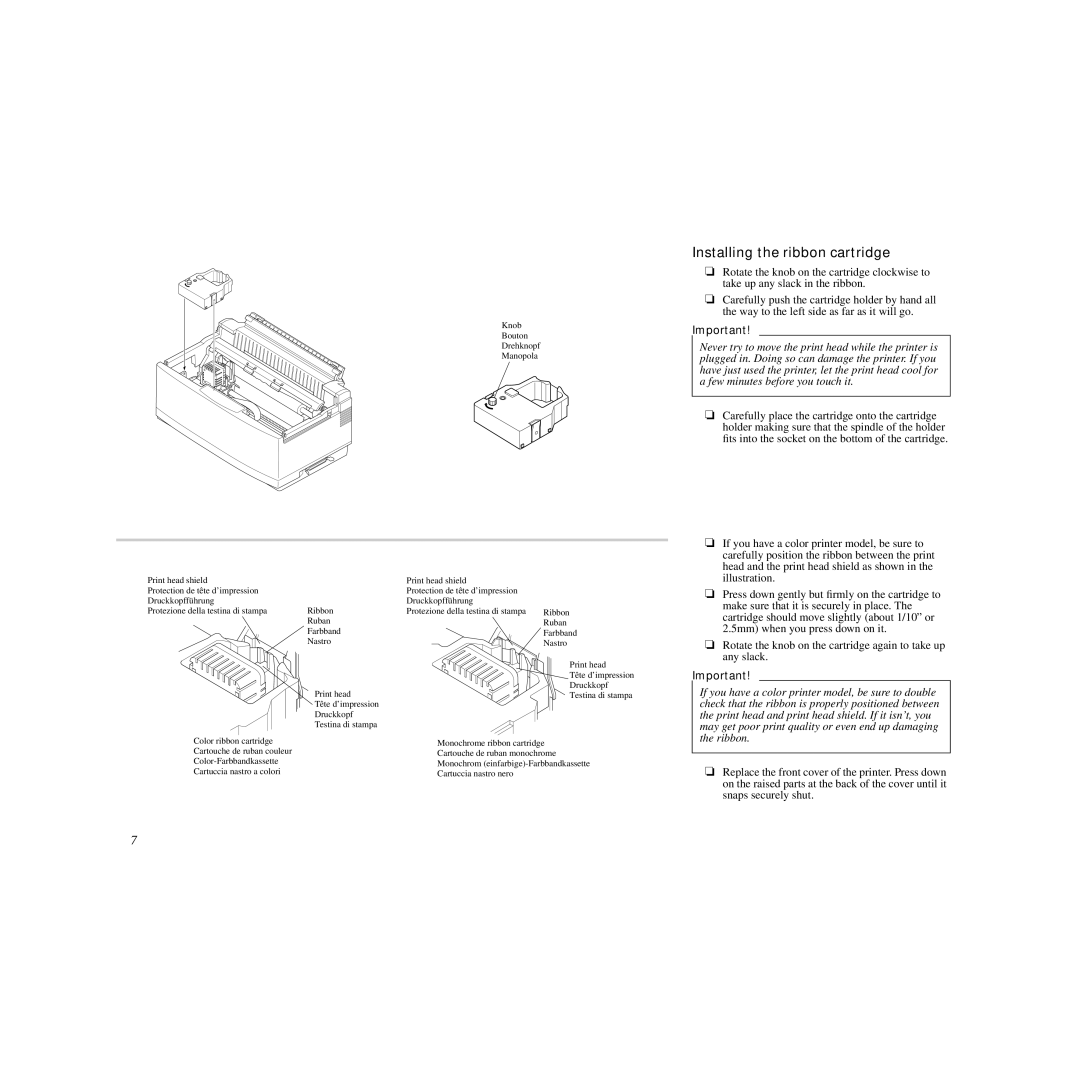
❏Rotate the knob on the cartridge clockwise to take up any slack in the ribbon.
❏Carefully push the cartridge holder by hand all the way to the left side as far as it will go.
Important!
Never try to move the print head while the printer is plugged in. Doing so can damage the printer. If you have just used the printer, let the print head cool for a few minutes before you touch it.
❏Carefully place the cartridge onto the cartridge holder making sure that the spindle of the holder fits into the socket on the bottom of the cartridge.
❏If you have a color printer model, be sure to carefully position the ribbon between the print head and the print head shield as shown in the illustration.
❏Press down gently but firmly on the cartridge to make sure that it is securely in place. The cartridge should move slightly (about 1/10” or 2.5mm) when you press down on it.
❏Rotate the knob on the cartridge again to take up any slack.
Important!
If you have a color printer model, be sure to double check that the ribbon is properly positioned between the print head and print head shield. If it isn’t, you may get poor print quality or even end up damaging the ribbon.
❏Replace the front cover of the printer. Press down on the raised parts at the back of the cover until it snaps securely shut.
7
