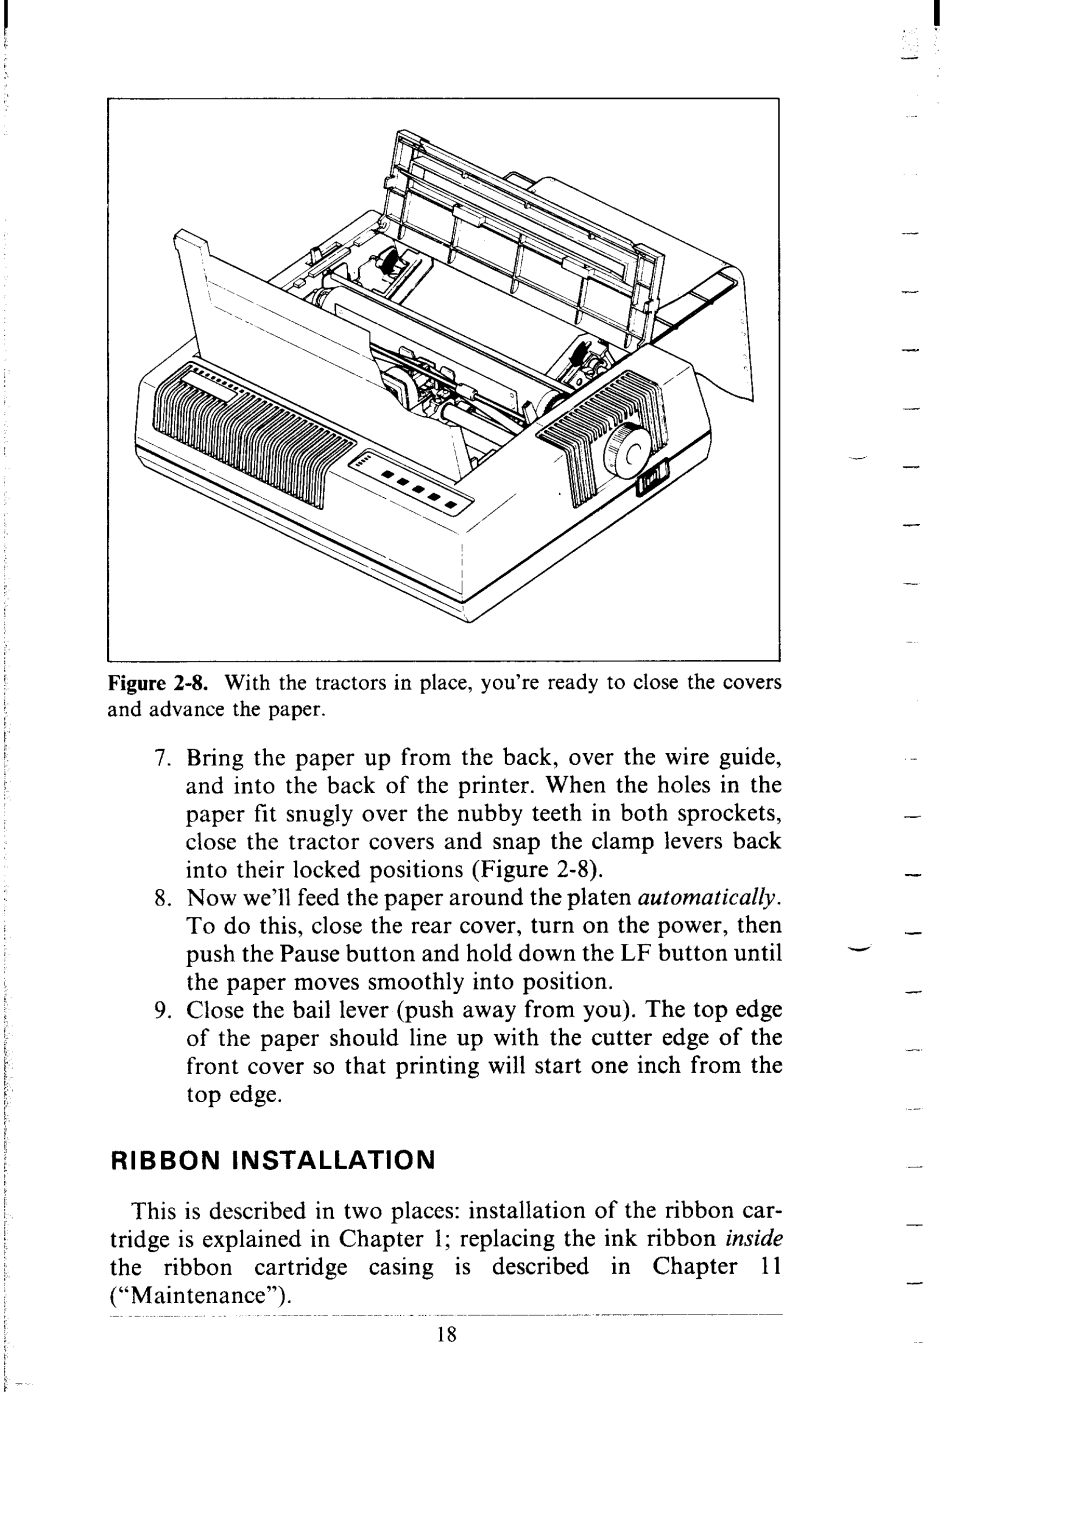
Figure 2-8. With the tractors in place, you’re ready to close the covers and advance the paper.
7.Bring the paper up from the back, over the wire guide, and into the back of the printer. When the holes in the
paper | fit | snugly | over | the | nubby | teeth | in both sprockets, |
| - | ||||
close the tractor covers and snap the clamp levers back |
|
| |||||||||||
into |
| their | locked | positions | (Figure |
|
|
| - | ||||
8. Now we’ll feed the paper around the platen automatically. |
|
| |||||||||||
To do this, close the rear cover, turn on the power, then |
|
| |||||||||||
push | the Pause button | and | hold | down | the LF | button | until | - | - | ||||
the | paper | moves | smoothly | into | position. |
|
|
| - | ||||
9. Close the bail lever (push away from you). The top edge |
|
| |||||||||||
of the paper should | line | up | with the | cutter | edge of the |
| - | ||||||
front cover so that printing will start one inch from the |
|
| |||||||||||
top | edge. |
|
|
|
|
|
|
|
|
|
| .- | |
|
|
|
|
|
|
|
|
|
|
|
|
| |
RIBBON | INSTALLATION |
|
|
|
|
|
|
|
| - | |||
This is described in two places: installation of the ribbon car- |
| - | |||||||||||
tridge is explained in Chapter 1; replacing the ink ribbon inside |
| ||||||||||||
|
| ||||||||||||
the ribbon |
| cartridge | casing | is | described | in | Chapter | 11 |
| - | |||
|
|
|
|
|
|
|
|
|
|
|
|
| |
(“Maintenance”).
18