Addressing and Installing ArmorBlocks™
Addressing Armorblocks
An ArmorBlock permits you to give it a number “address” so that the controller network system can recognize its location and function. ArmorBlocks are used at vacuum hopper/receiver, pump, and alarm node locations.
ArmorBlock Address Ranges
The number range of ArmorBlock addresses are as follows:
•01 to 50 — Vacuum hopper/receiver stations; use a leading zero for numbers 01 to 09.
•51 to 57 — Pump stations
•58 to 60 — Alarm stations
Setting Armorblock Addresses
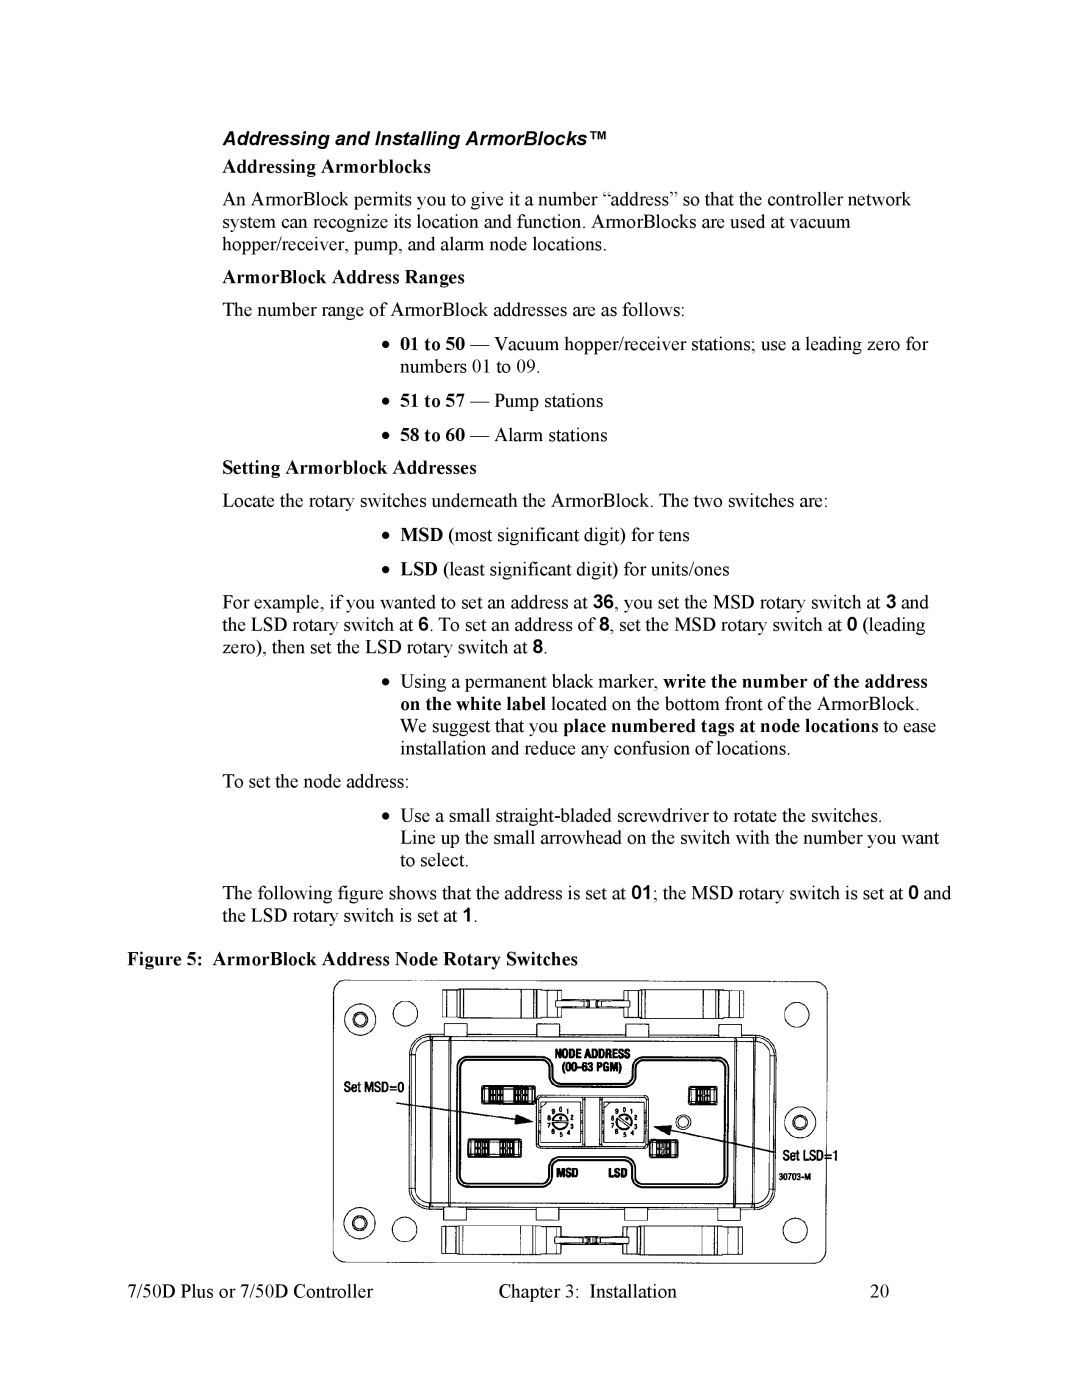
Locate the rotary switches underneath the ArmorBlock. The two switches are:
•MSD (most significant digit) for tens
•LSD (least significant digit) for units/ones
For example, if you wanted to set an address at 36, you set the MSD rotary switch at 3 and the LSD rotary switch at 6. To set an address of 8, set the MSD rotary switch at 0 (leading zero), then set the LSD rotary switch at 8.
•Using a permanent black marker, write the number of the address on the white label located on the bottom front of the ArmorBlock. We suggest that you place numbered tags at node locations to ease installation and reduce any confusion of locations.
To set the node address:
•Use a small
Line up the small arrowhead on the switch with the number you want to select.
The following figure shows that the address is set at 01; the MSD rotary switch is set at 0 and the LSD rotary switch is set at 1.
Figure 5: ArmorBlock Address Node Rotary Switches
7/50D Plus or 7/50D Controller | Chapter 3: Installation | 20 |
