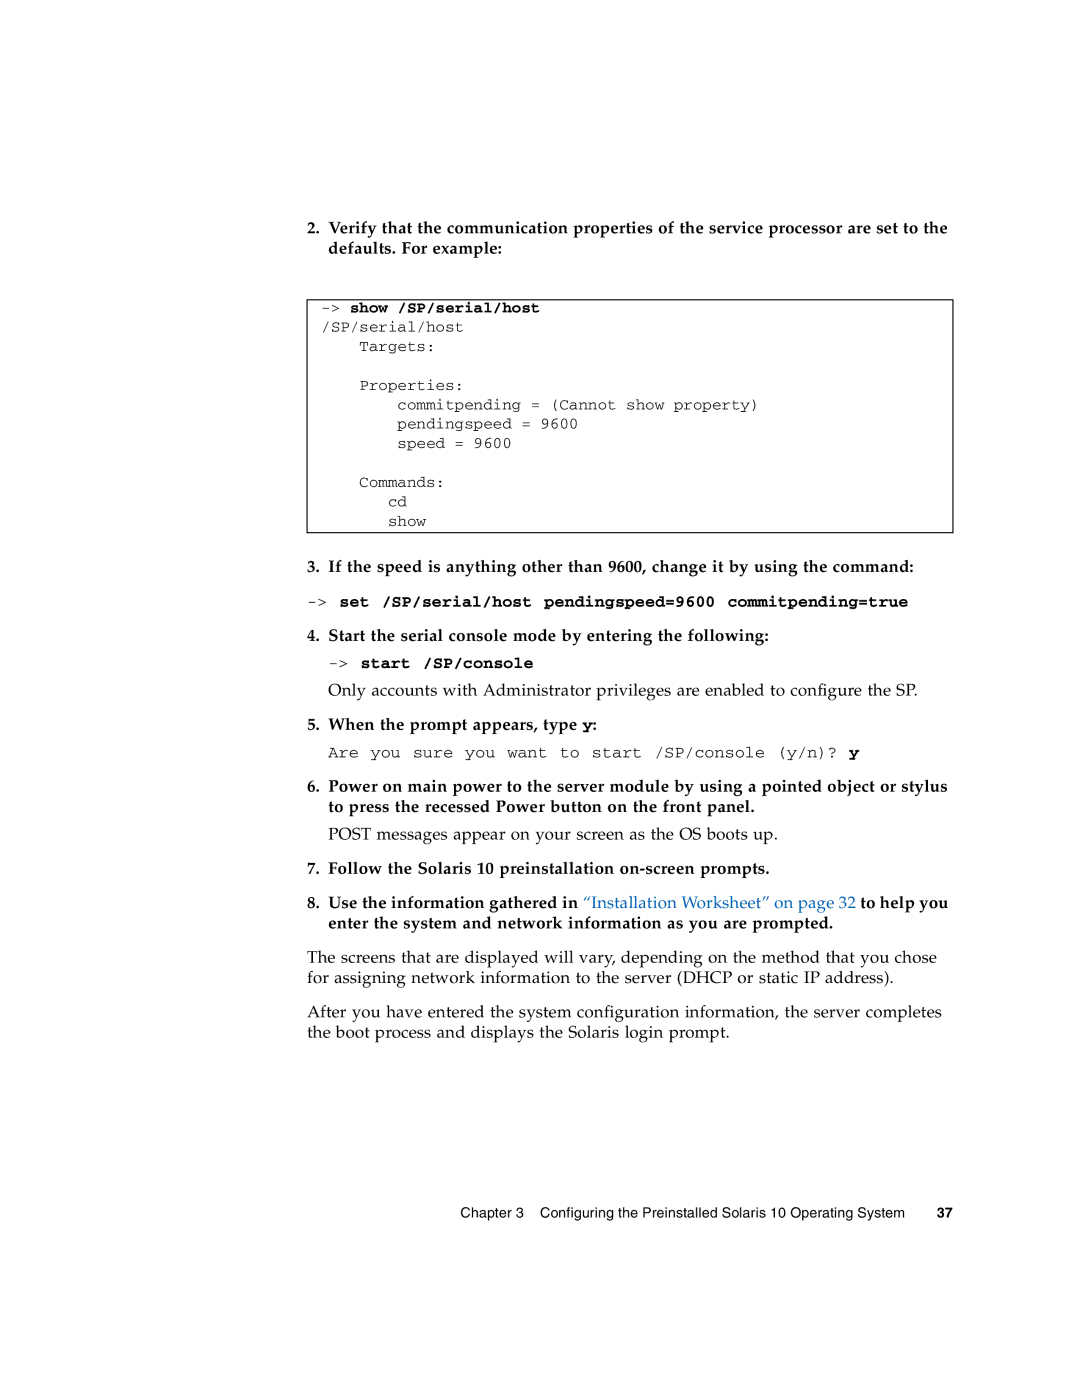
2.Verify that the communication properties of the service processor are set to the defaults. For example:
Targets:
Properties:
commitpending = (Cannot show property) pendingspeed = 9600
speed = 9600
Commands: cd show
3. If the speed is anything other than 9600, change it by using the command:
4.Start the serial console mode by entering the following:
Only accounts with Administrator privileges are enabled to configure the SP.
5.When the prompt appears, type y:
Are you sure you want to start /SP/console (y/n)? y
6.Power on main power to the server module by using a pointed object or stylus to press the recessed Power button on the front panel.
POST messages appear on your screen as the OS boots up.
7.Follow the Solaris 10 preinstallation
8.Use the information gathered in “Installation Worksheet” on page 32 to help you enter the system and network information as you are prompted.
The screens that are displayed will vary, depending on the method that you chose for assigning network information to the server (DHCP or static IP address).
After you have entered the system configuration information, the server completes the boot process and displays the Solaris login prompt.
Chapter 3 Configuring the Preinstalled Solaris 10 Operating System | 37 |