Page: 36 | Model MRC44 |
ohm resistor.) The Low output should normally be used. The Medium Setting is close to the High Power Mode emitter out on a
Expanded Options
For systems using a single controller (four zones or less) and that will use Advanced Programming features, the NOT EXPANDED mode should be selected. For any system using two controllers, (five to eight zones) the Expanded mode must be selected. When changing to the Expanded mode a “Please Wait” message will appear on screen. Dragon
ZONE LINKING
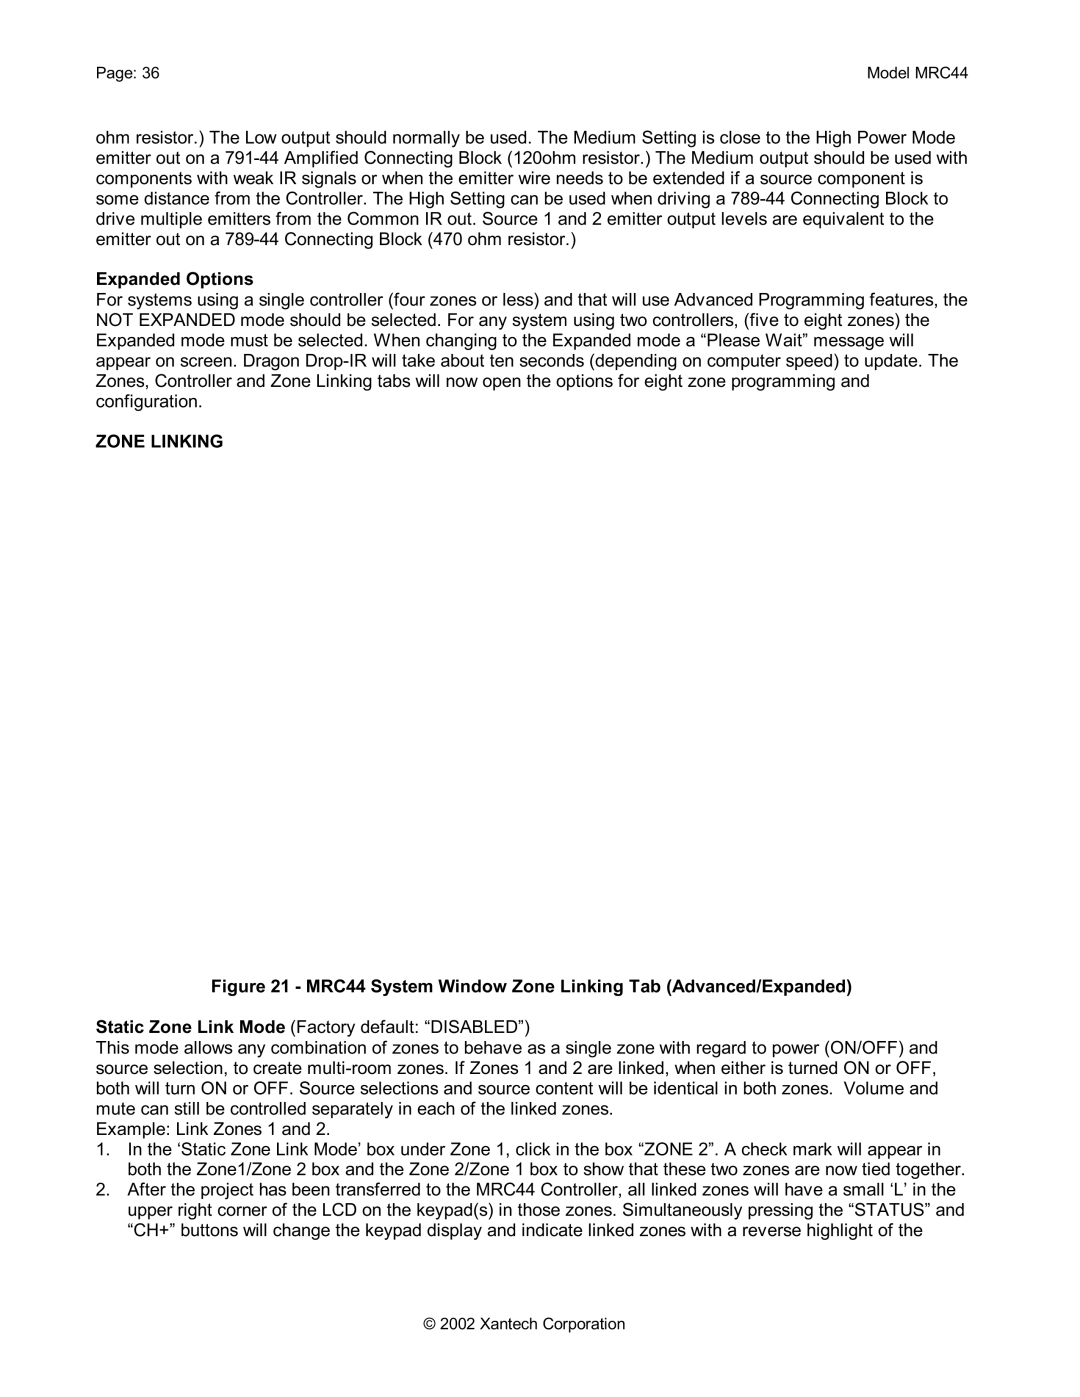
Figure 21 - MRC44 System Window Zone Linking Tab (Advanced/Expanded)
Static Zone Link Mode (Factory default: “DISABLED”)
This mode allows any combination of zones to behave as a single zone with regard to power (ON/OFF) and source selection, to create
Example: Link Zones 1 and 2.
1.In the ‘Static Zone Link Mode’ box under Zone 1, click in the box “ZONE 2”. A check mark will appear in both the Zone1/Zone 2 box and the Zone 2/Zone 1 box to show that these two zones are now tied together.
2.After the project has been transferred to the MRC44 Controller, all linked zones will have a small ‘L’ in the upper right corner of the LCD on the keypad(s) in those zones. Simultaneously pressing the “STATUS” and “CH+” buttons will change the keypad display and indicate linked zones with a reverse highlight of the
© 2002 Xantech Corporation